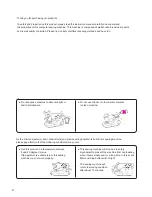
● Do not use thinner or other similar solvents
to clean machine.
● Do not expose machine to direct sunlight or
humid atmosphere.
As the microcomputer(s), semi-conductor(s) and precise wiring board(s) is built in this sewing machine,
please pay attention that the following condition(s) may occur.
● Use this product in a temperature between
5 and 40 degree Celsius.
If temperature is extremely low, this sewing
machine may not work properly.
● This sewing machine will stop due to safety
mechanism to prevent the machine from overheating,
when it sews slowly and for a long time. In this event,
Start and Stop button will not light.
The sewing machine will
return to working condition
after about 10 minutes.
2
Thank you for purchasing our products.
To safely and properly use this product, please read the instruction manual carefully and understand
the properties of this computer sewing machine. This machine is composed of well-chosen brand-name parts
and is well quality controlled. Please try a variety of different sewing methods and have fun.
FOR USA AND CANADA ONLY
This appliance has a polarized plug (one blade wider than the other). To reduce the risk of
electric shock, this plug is intended to fit in a polarized outlet only one way. If the plug does
not fit fully in the outlet, reverse the plug. If it still does not fit, contact a qualified electrician to
install the proper outlet. Do not modify the plug in any way.
Stop!
3
Practical sewing
Straight stitch
………………………………………………
34~38
How to use seam guide line on the throat plate
Automatic lock stitch and programmed thread
trimming
How to change needle positions
How to change the stitch length
Other straight stitch patterns
Zigzag stitch
………………………………………………………
39
Overcasting stitch
………………………………………
40, 41
Blind stitch
……………………………………………………
42~44
Buttonhole stitches
………………………………………
45~50
Standard buttonholing
Keyhole buttonholing
Buttonhole with gimp
When changing the width of the buttonhole
When changing the density of the seam
Manual 2-step buttonhole
……………………………
51, 52
Bartacking
……………………………………………………
53, 54
Inserting zippers
…………………………………………
55~57
Side zipper attachment
Butted zipper attachment
Shirring and gathering
………………………………………
58
Pintucking
……………………………………………………………
59
Welt seam
……………………………………………………………
60
How to use quilt guide
F600 / F400
…………………
61
Scallop stitches
…………………………………………………
62
Decorative stitches
……………………………………………
63
Important safety instructions
…………………………
1, 2
Principal parts
………………………………………………………
5
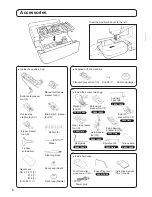
Accessories
……………………………………………………………
6
Basic operations
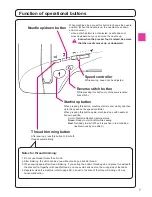
Function of operational buttons
……………………………
7
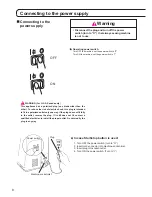
Connecting to the power supply
……………………
8, 9
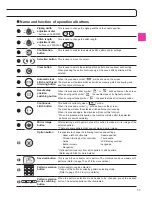
Name and function of other operational
buttons
……………………………………………………………
10, 11
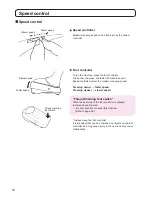
Speed control
………………………………………………………
12
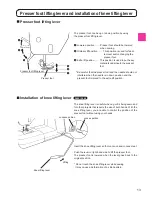
Presser foot lifting lever and installation of
knee lifting lever
…………………………………………………
13
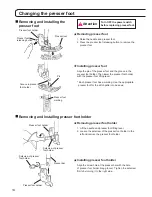
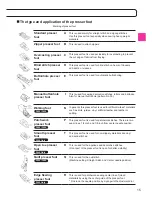
Changing the presser foot
…………………………
14, 15
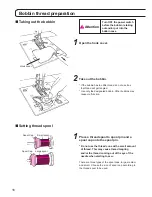
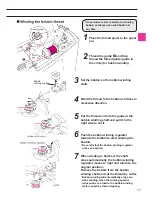
Bobbin thread preparation
…………………………
16~19
Needle thread preparation
…………………………
20~21
Threading the needle thread
Automatic needle threader
Pulling up the bobbin thread
Attaching the needle
…………………………………………
24
Fabric, thread and needle table
………………………
25
How to adjust thread tension
……………………………
26
How to adjust presser foot pressure
………………
27
How to lower feed dog
………………………………………
27
How to select a stitch pattern
F600
…………
28, 29
How to select a stitch pattern
F400
…………
30, 31
How to select a stitch pattern
F300
…………
32, 33
Contents
Basic operations
Practical sewing
Patchwork quilt
Decorative
stitches
Summary of Contents for HZL-600
Page 2: ......
Page 12: ...10 ...
Page 75: ...73 ...
Page 100: ...List of stitch patterns 97 F600 Patterns for crazy quilt 98 ...
Page 101: ...Pattern for elongation 98 Letters numbers signs One point 99 ...
Page 102: ...List of stitch patterns 99 F400 100 ...
Page 103: ...100 One point Pattern for elongation Letters numbers signs 101 ...
Page 104: ...List of stitch patterns 101 F300 102 ...
Page 105: ...102 One point Pattern for elongation Letters numbers signs 103 ...
Page 107: ......

