70
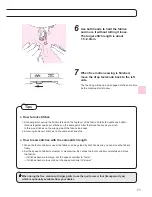
6
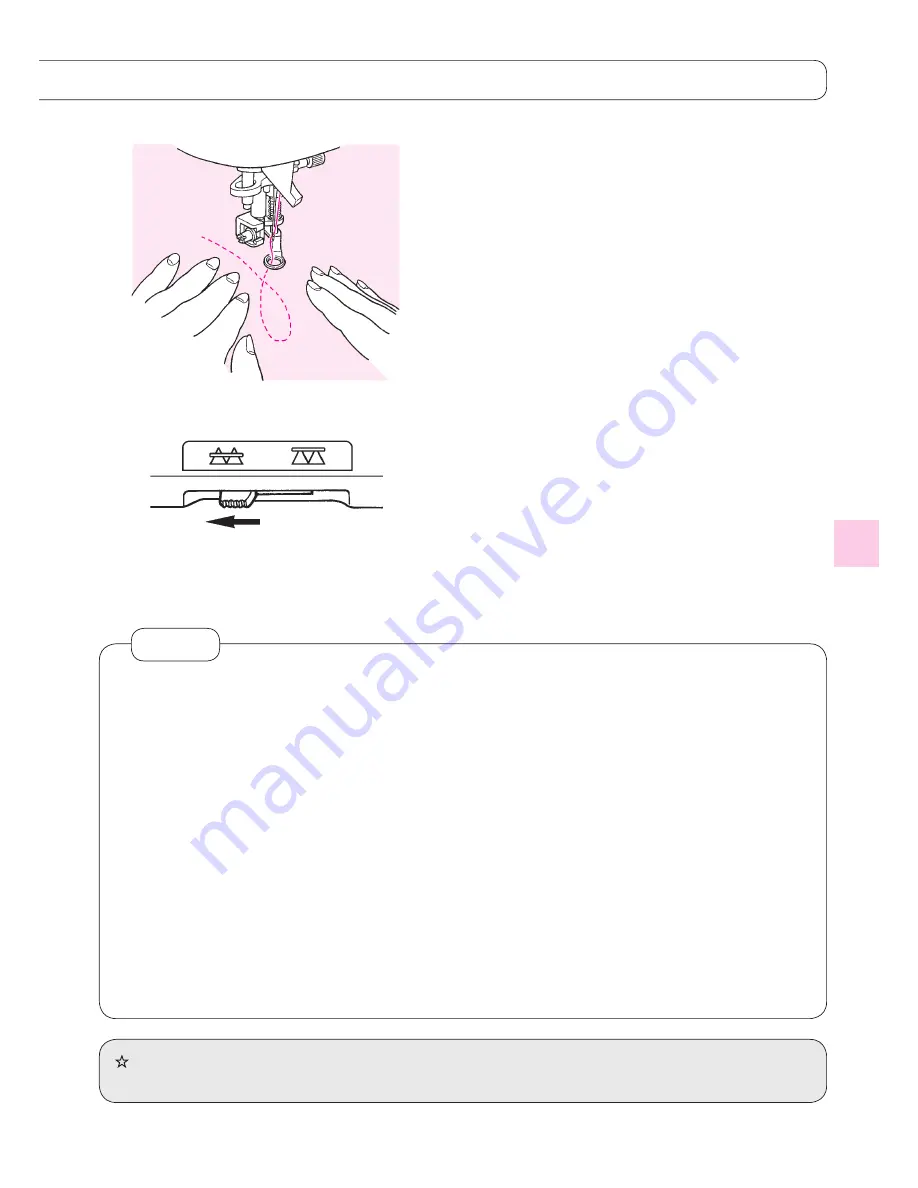
Use both hands to hold the fabrics
and move it without letting it loose.
The target stitch length is about
1.5~2.0mm.
7
When free motion sewing is finished,
move the drop feed knob back to the left
side.
The feed dog will be up and engaged at the same time
as the machine starts to sew.
● How to lock stitches
1. At sewing start, pull up the bobbin thread on the top layer of the fabric, hold both needle and bobbin
threads together and sew 3 stitches on the same point. After that move fabrics as you wish.
In this way, stitches on the wrong side of the fabrics look neat.
2. At sewing-end sew 3 stitches on the same point and stop.
● How to sew stitches with the same stitch length
1. When the foot controller is used, the fabrics can be guided by both hands and you can move the fabrics
freely.
2. Set the speed controller to medium or medium low first, press the foot controller completely and move
the fabrics.
-- if stitches become too large, set the speed controller to “faster”
-- if stitches become too small, set the speed controller to “slower”.
Tips
When doing the free motion with zigzag stitch, use the quilt presser foot (transparent type)
which is optionally available from your dealer.
71
69
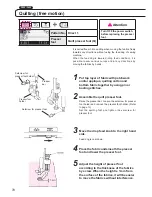
1
Put top layer of fabric with patchwork
and/or appliqué, quilting cotton and
bottom fabric together by using pin or
basting stitches.
2
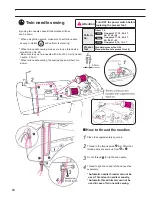
Assemble the quilt presser foot.
Raise the presser bar. Loosen the setscrew for presser
foot holder and remove the presser foot holder. (Refer
to page 13)
Set the quilting foot and tighten the setscrew for
presser foot.
Quilting (free motion)
It is called free motion quilting when moving the fabrics freely
towards any directions without using the feed dog of sewing
machine.
When the feed dog is lowered (drop feed condition), it is
possible to sew various curves and/or any directions by
moving the fabrics by hands.
Pattern No. Direct 1
Presser
foot
Quilt presser foot (Q)
3
Move the drop feed knob to the right hand
side.
Feed dog is now down.
Setscrew for presser foot
Setscrew for
presser foot holder
Presser
bar
Presser foot
holder
4
Place the fabric underneath the presser
foot and lower the presser foot.
5
Adjust the height of presser foot
according to the thickness of the fabrics
by screw. When the height is 1mm from
the surface of the fabrics, it will be easier
to move the fabrics without interference.
Screw
1 mm
F600 / F400
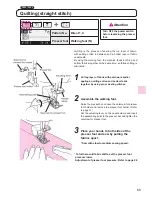
Attention
Turn OFF the power switch
before replacing the presser
foot.
Summary of Contents for HZL-600
Page 2: ......
Page 12: ...10 ...
Page 75: ...73 ...
Page 100: ...List of stitch patterns 97 F600 Patterns for crazy quilt 98 ...
Page 101: ...Pattern for elongation 98 Letters numbers signs One point 99 ...
Page 102: ...List of stitch patterns 99 F400 100 ...
Page 103: ...100 One point Pattern for elongation Letters numbers signs 101 ...
Page 104: ...List of stitch patterns 101 F300 102 ...
Page 105: ...102 One point Pattern for elongation Letters numbers signs 103 ...
Page 107: ......

