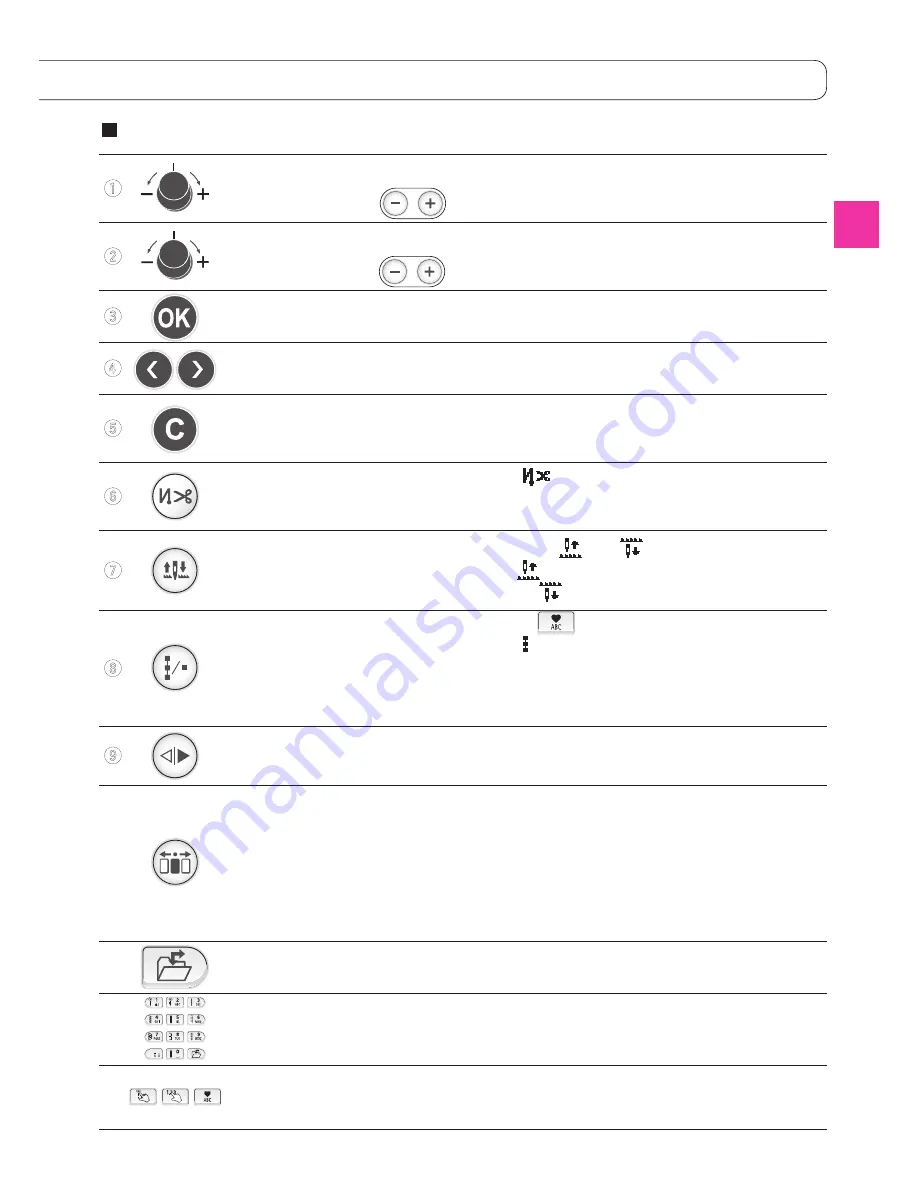
1
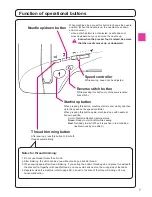
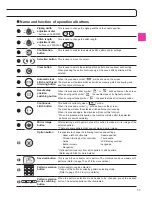
Zigzag width
adjustment dial
This is used to change the zigzag width and the needle position.
2
Stitch length
adjustment dial
This is used to change the stitch length.
3
Confirmation
button
This is used to confirm the selected stitch pattern and/or settings.
4
Selection button
This is used to move the cursor.
5
Clear button
This is used to delete the selected stitch pattern and to cancel each setting.
When pressing the button continuously, all the saved stitch patterns will be
deleted.
6
Automatic lock
stitch and thread
trimming button
When it is pressed, symbol “
“ will be shown on the screen.
The machine will automatically lock stitches at sewing-start and sewing-end
and then trim both threads.
7
Needle stop
position
switching button
When it is pressed, either symbol “
” or “
” will be shown on the screen.
When sewing with symbol “
”, the needle stops at its highest position.
When sewing with the symbol “
”, the needle stops at its lowest position.
8
Continuous
stitch button
This button is valid only when “
“ mode.
When it is pressed, symbol “ “ will be shown on the screen.
The machine will sew the selected stitch patterns continuously.
When it is pressed again, the machine will cancel this function.
* When it is pressed while sewing, the machine will stop after the selected
patterns are sewn completely.
9
Mirror Image
button
After selecting a stitch pattern, press this button to make a mirror image of the
selected pattern.
* There are some patterns that can not make a mirror image.
!0
Option button
It is possible to change the following function and settings.
・
Seam width of buttonhole
・
Needle position
・
Thread trimming by foot controller
・
Twin needle
・
Guide
・
LCD display contrast
・
Buzzer volume
・
Language
・
Elongation
* Optional functions vary from stitch pattern to stitch pattern.
(Refer page 80~89 for more details.)
!1
Save/call button
This is used to save and/or call a pattern. The machine can save maximum 10
patterns. (Refer to page 77 and 78 for more details.)
!2
Pattern selection
button
A stitch pattern can be selected.
* Usage of the buttons varies by pattern selecting mode.
(Refer to page 27~32 for more details.)
!3
Pattern selection
mode switching
button
When the pattern selection mode needs to be changed, press the desired
button. The selected button will be illuminated.
Name and function of operational buttons
10
* buttons on F400/F300.
* buttons on F400/F300.
11
Summary of Contents for HZL-600
Page 2: ......
Page 12: ...10 ...
Page 75: ...73 ...
Page 100: ...List of stitch patterns 97 F600 Patterns for crazy quilt 98 ...
Page 101: ...Pattern for elongation 98 Letters numbers signs One point 99 ...
Page 102: ...List of stitch patterns 99 F400 100 ...
Page 103: ...100 One point Pattern for elongation Letters numbers signs 101 ...
Page 104: ...List of stitch patterns 101 F300 102 ...
Page 105: ...102 One point Pattern for elongation Letters numbers signs 103 ...
Page 107: ......

