Chapter 2: Hardware Installation
Step 3.
Secure the left-side and right-side rails to the rack with two
(2) M5 flathead screws on the front and the rear rack
posts. (See
Figure 2-4
)
Step 4.
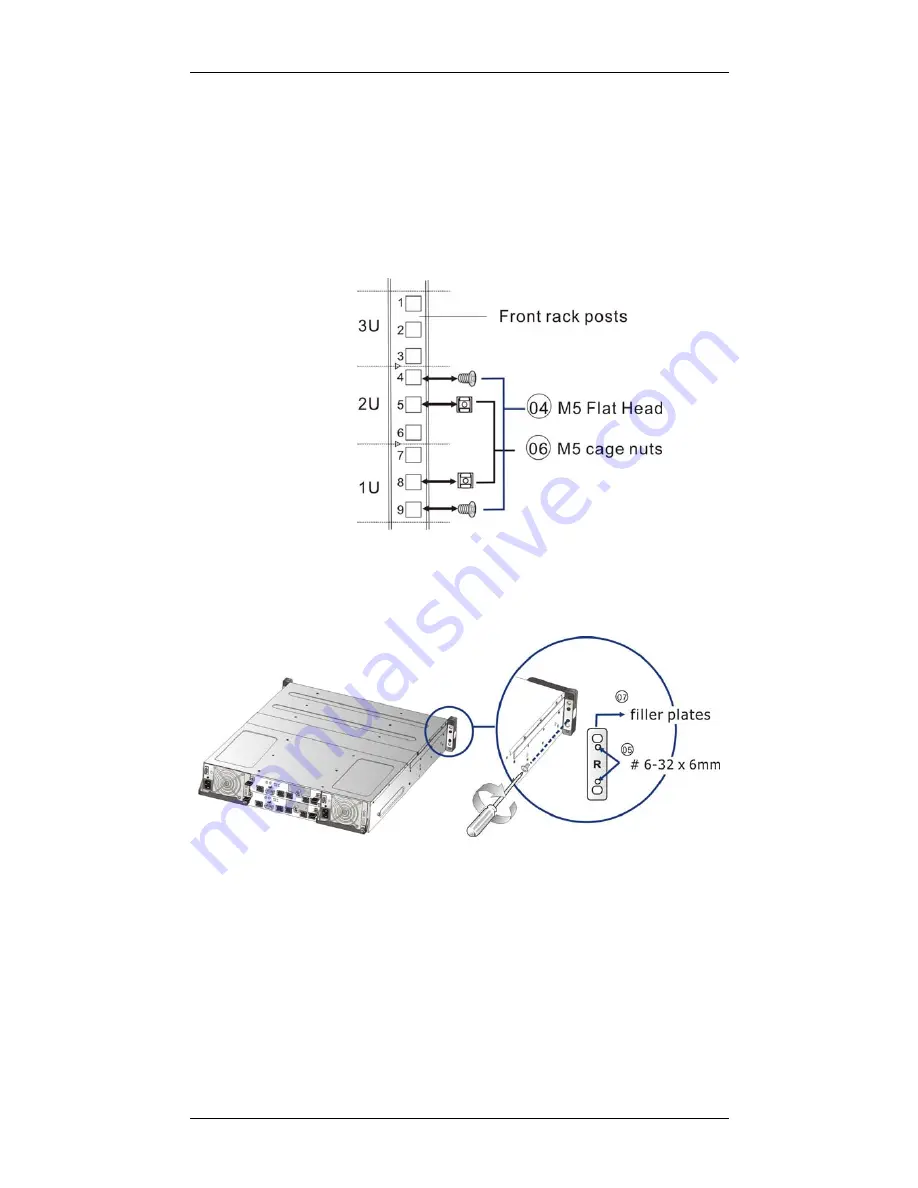
Attach two (2) M5 cage nuts to both sides of the front rack
posts. There are four rack post holes between the two
securing M5 flathead screws. The two (2) cage nuts
should be attached to the first and the last holes. (See
Figure 2-5
)
Figure 2-5: Attaching Cage Nuts
Step 5.
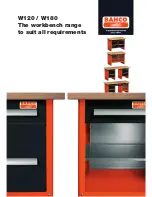
Attach filler plates to the back of the enclosure’s left-side
and right-side forearms with two (2) 6-32 L6 screws.
Figure 2-6: Attaching Filler Plates
Step 6.
Gently
slide the enclosure into the rack until you feel some
resistance. That means the plastic stoppers on the
rackmount rails have engaged the rivets on the sides of
the enclosure. This is to ensure the enclosure is firmly
installed. (See
Figure 2-7
)
2-11


