


5-60
CLUSTER CHECK PROCEDURE
CLUSTER CHECK PROCEDURE
Start key : ON
Start key : ON
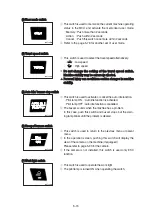
Check monitor
Check monitor
Buzzer sounding for 4 seconds with HYUNDAI logo on cluster.
If the ESL mode is set to the enable, enter the password to start engine.
After initialization of cluster, the operating screen is displayed on the LCD.
Also, self diagnostic function is carried out.
Engine rpm display : 0 rpm
Engine coolant temperature gauge : White range
Hydraulic oil temperature gauge : White range
Fuel level gauge : White range
DEF/AdBlue® Level gauge : White range
Indicating lamp state
Indicating lamp state
Power mode pilot lamp
: E mode or U mode
Work mode pilot lamp : General operation mode (bucket)
Travel speed pilot lamp
: Low (turtle)
Start of engine
Start of engine
Check machine condition
Check machine condition
RPM display indicates at present rpm
Gauge and warning lamp : Indicate at present condition.
When normal condition : All warning lamp OFF
Work mode selection : General work
Power mode selection : E mode or U mode
Travel speed pilot lamp : Low (turtle)
When warming up operation
When warming up operation
Warming up pilot lamp : ON
After engine started, engine speed increases to 1000 rpm.
Others same as above.
When abnormal condition
When abnormal condition
The warning lamp pops up and the buzzer sounds.
If BUZZER STOP switch is pressed, buzzer sound is canceled but the warning lamp lights up or
blinks until normal condition.
The pop-up warning lamp moves to the original position and warning lamp lights up or blinks
when the buzzer stop switch is pushed. Also the buzzer stops.
2)
2)
(1)
(1)
①
a.
※
②
a.
b.
c.
d.
e.
(2)
(2)
①
②
③
a.
b.
※
c.
d.
e.
a.
b.
※
a.
b.
※
③
a.
b.
c.
Summary of Contents for HX145 LCR
Page 11: ...SECTION 1 GENERAL SECTION 1 GENERAL Group 1 Safety Hints 1 1 Group 2 Specifications 1 10...
Page 204: ...4 5 MEMORANDUM HYUNDAI HEAVY INDUSTRIES CO LTD CONSTRUCTION EQUIPMENT DIV...
Page 627: ...8 155 125LCR8TM30 Turn casing 1 upside down and remove oil seal 3 using jig 29...
Page 657: ...8 185 8 185 Remove lock nut 22 and then boot 23 14 36078RL14 2507ARL10...


