


Figure 18 Apply the label within the recessed area
.
IMPORTANT:
The bar code label should only be applied as shown, with the alphanumeric portion facing the hub
side of the tape cartridge. Never apply multiple labels onto a cartridge because extra labels can
cause the cartridge to jam in a tape drive.
Write-protecting tape cartridges
All rewriteable data cartridges have a write-protect switch to prevent accidental erasure or overwriting
of data. Before loading a cartridge into the device, make sure the write-protect switch on the front of
the cartridge is in the desired position.
•
Slide the switch to the
left
to allow the device to write data to the cartridge (see
Figure 19
, 1).
•
Slide the switch to the
right
to write-protect the cartridge. An indicator, such as a red mark or small
padlock, is visible showing that the cartridge is write-protected (see
Figure 19
, 2).
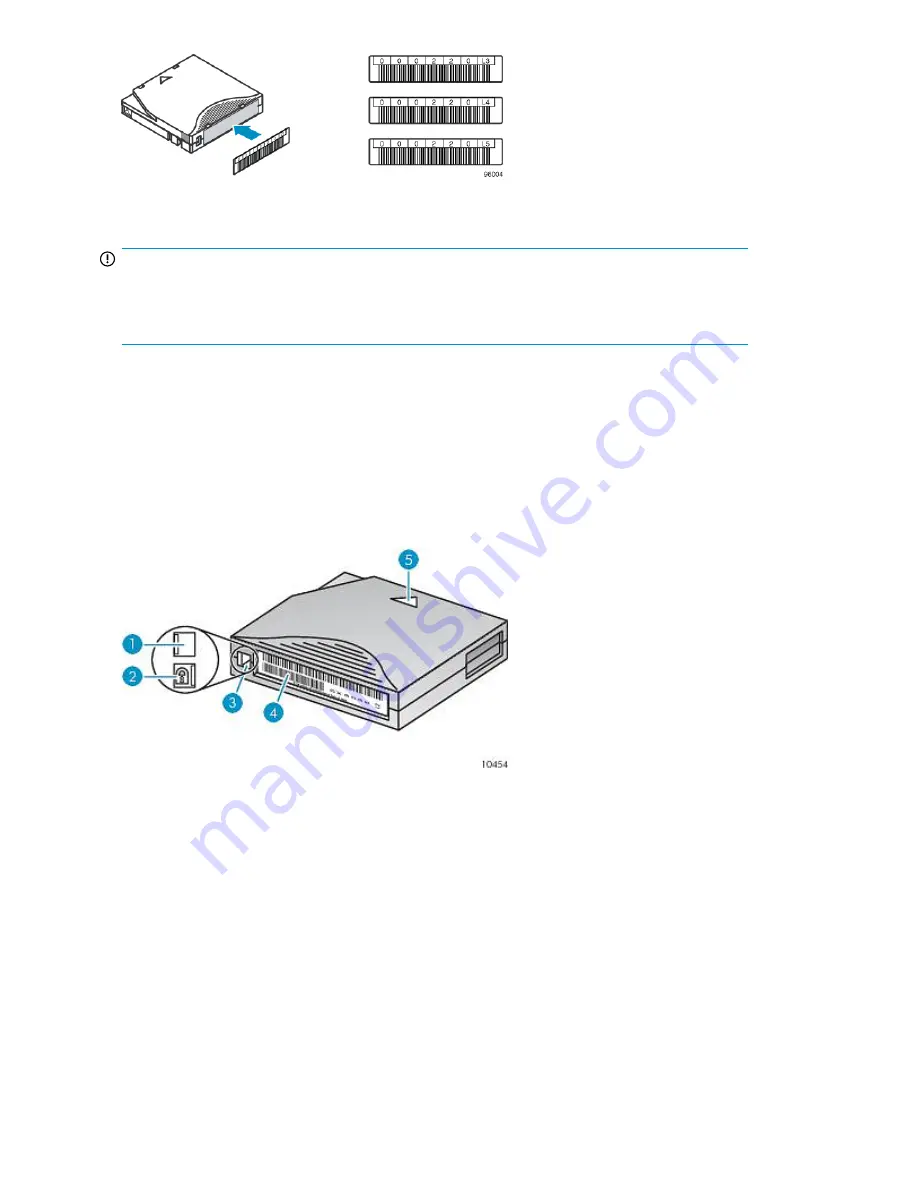
Figure 19 Write-protecting the data cartridge
.
2. Write-protected
1. Write-enabled
4. Bar code label
3. Write-protect switch
5. Insertion arrow
Tape cartridges and magazines
46
Summary of Contents for StorageWorks 1/8
Page 14: ...14 ...
Page 26: ...Features and overview 26 ...
Page 106: ...Operating the Tape Autoloader 106 ...
Page 156: ...Troubleshooting 156 ...
Page 168: ...Upgrading and servicing the Tape Autoloader 168 ...
Page 172: ...Support and other resources 172 ...
Page 174: ...Technical specifications 174 ...
Page 179: ...HP StorageWorks 1 8 G2 Tape Autoloader User and service guide 179 ...
Page 188: ...Battery replacement notices Dutch battery notice Regulatory compliance and safety 188 ...
Page 190: ...Italian battery notice Japanese battery notice Regulatory compliance and safety 190 ...
Page 192: ...Regulatory compliance and safety 192 ...
Page 194: ...Electrostatic discharge 194 ...
Page 204: ...204 ...