


Figure 12 Rack kit
.
•
Two rails
•
Two bags of eight M6 screws.
Select the bag of screws appropriate for your type of rack.
•
The HP Rack System/E rack has 7.1 mm round holes in the rack column. The packet for this rack
type is labeled
HP Rack System/E
.
•
The HP Rack 5000 and 10000 series have 9.5 mm square holes in the rack column. The packet
for these rack types is labeled
HP Rack 5000, 10000 Series.
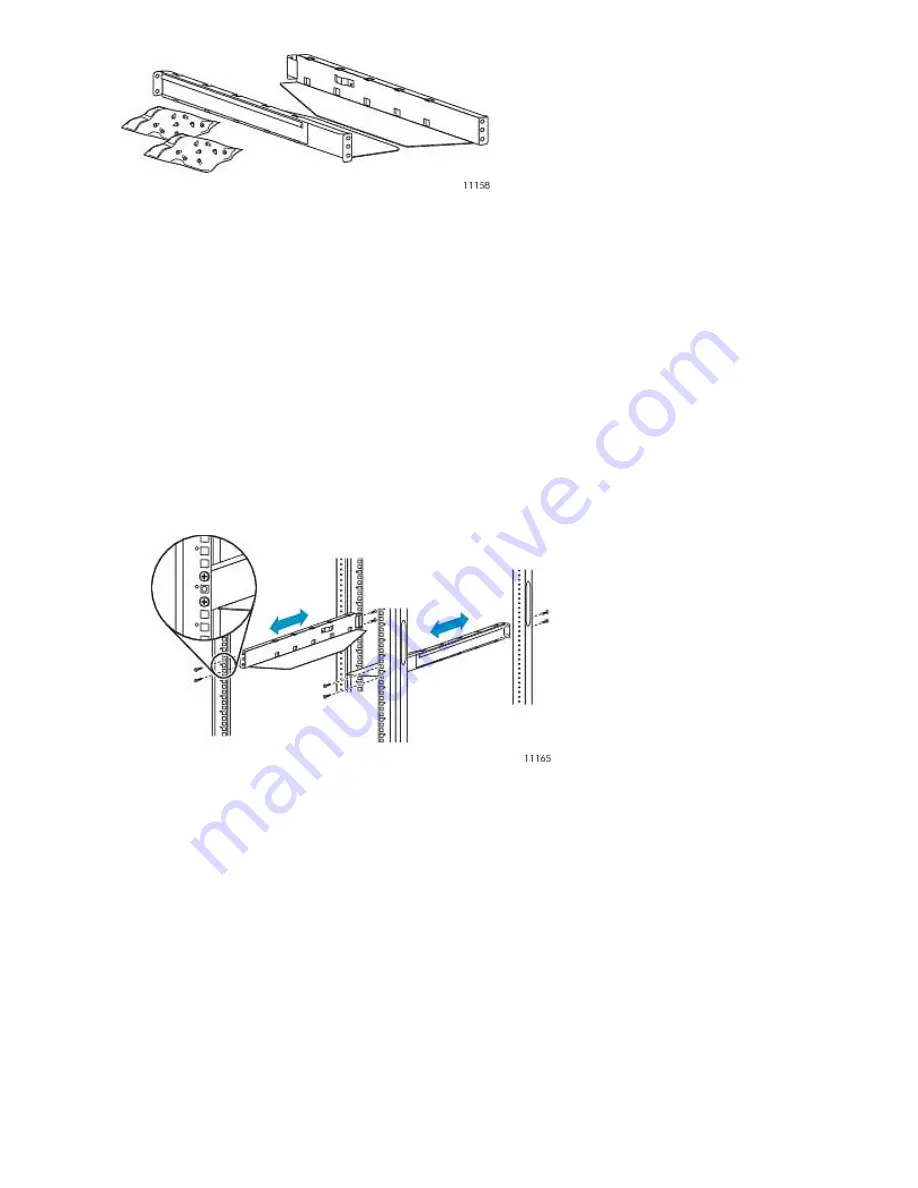
To install the rails into the rack:
1.
Using the screws for your rack type and a #3 Phillips screwdriver, secure one rail to each side
of the rack in your chosen rack location.
2.
Secure the front of one rail to the front of the rack. Extend the rail to the depth of the rack and
secure the rail to the back of the rack. The front of the rails are straight and the back are angled,
as shown in
Figure 13
on page 36.
Figure 13 Installing the rails into the rack
.
To install the device on the rails and into the rack:
1.
Locate the captive screws on the front bezel (see
Figure 14
).
2.
Slide the device onto the rails.
Installing the Tape Autoloader
36
Summary of Contents for StorageWorks 1/8
Page 14: ...14 ...
Page 26: ...Features and overview 26 ...
Page 106: ...Operating the Tape Autoloader 106 ...
Page 156: ...Troubleshooting 156 ...
Page 168: ...Upgrading and servicing the Tape Autoloader 168 ...
Page 172: ...Support and other resources 172 ...
Page 174: ...Technical specifications 174 ...
Page 179: ...HP StorageWorks 1 8 G2 Tape Autoloader User and service guide 179 ...
Page 188: ...Battery replacement notices Dutch battery notice Regulatory compliance and safety 188 ...
Page 190: ...Italian battery notice Japanese battery notice Regulatory compliance and safety 190 ...
Page 192: ...Regulatory compliance and safety 192 ...
Page 194: ...Electrostatic discharge 194 ...
Page 204: ...204 ...