16
Chapter 2 : Basics
3
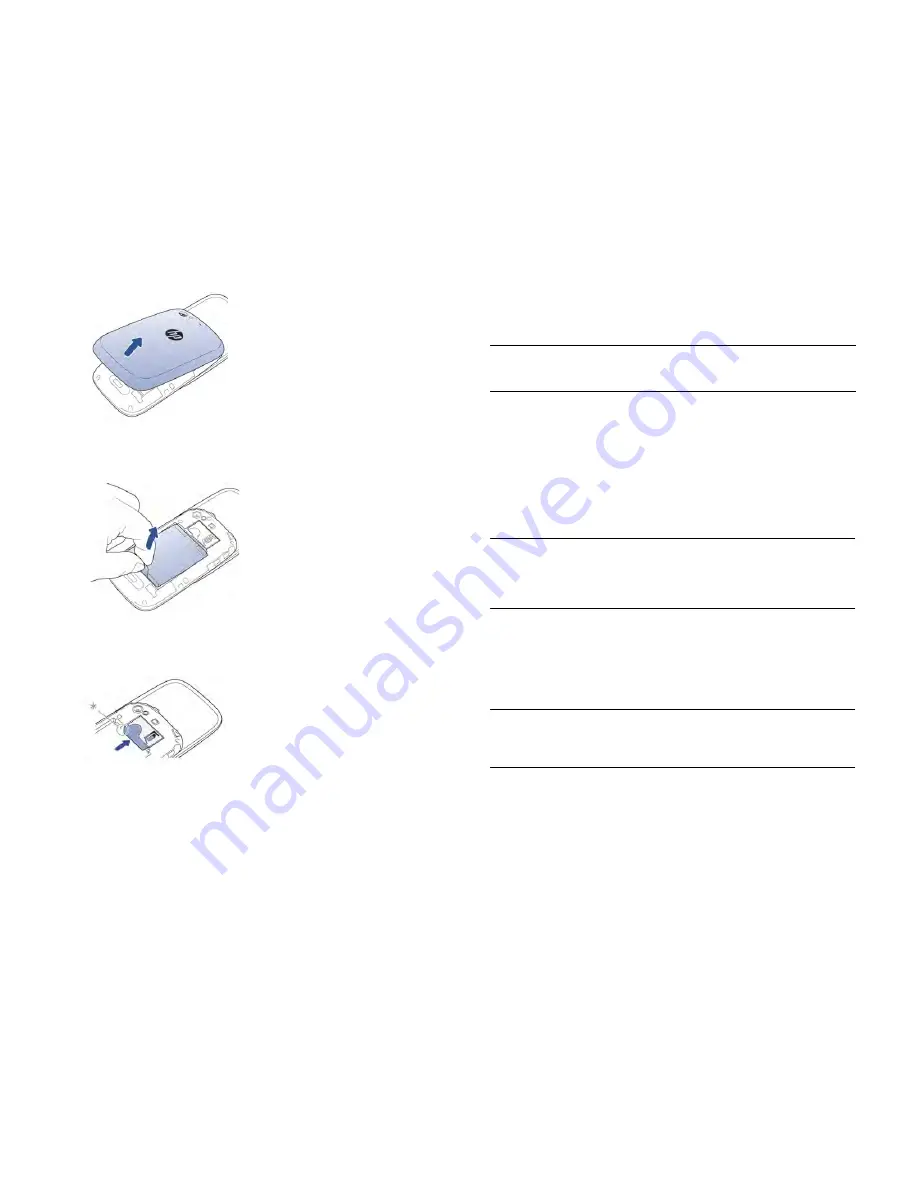
To remove the battery: Grasp the tab and pull it up to lift the battery
out of the compartment.
4
Slide the
SIM card
into the rectangular slot, with the gold contacts
facing down. Note the position of the notch.
*
Notch
5
Replace the battery.
6
To replace the cover, first fit the cover over the buttons at the top of
the smartphone, and then press all clasps to fasten the cover to the
body of the smartphone.
7
Press and hold the
power
button on the top right-hand corner of your
smartphone until you see a logo on the screen (approximately five
seconds). Your smartphone needs a few seconds to start up.
8
Follow the onscreen instructions to complete setup.
9
When the HP webOS Account screen appears, do one of the
following:
•
If you are a new user: Tap
Create New Account
. To create an HP
webOS Account, enter a working email address, create a
password for your profile and select and answer a security
question.
IMPORTANT
You must enter a valid email address to access all the features
available on your smartphone. Note that entering an email address here does
not set up your smartphone to send and receive messages from that email
account; you must do that separately (see
).
•
If you are upgrading from another webOS smartphone that you no
longer use: Tap
Sign In To My Profile
. Enter the username and
password for your existing profile. Any information backed up to
your profile is restored to your new smartphone (see
What
information is backed up?
).
NOTE
You can't use the same HP webOS Account on two webOS smartphones
at the same time. You can, however, use the same HP webOS Account on your
HP Pre
3
and on an HP tablet.
Your smartphone is ready to use. To learn how to make your first call, see
Make calls
.
TIP
If your smartphone does not turn on after you press and hold the
power
button, you need to connect your smartphone to the AC charger to charge it.
Summary of Contents for Pre 3
Page 1: ...U S E R G U I D E ...
Page 6: ...6 Contents ...
Page 10: ...10 Chapter 1 Welcome ...
Page 158: ...158 Chapter 10 Web and wireless connections ...
Page 184: ...184 Chapter 13 Preferences ...
Page 216: ...216 Chapter 14 Troubleshooting ...


