84
JUPITER L-S and LCD Series Control Panel Instruction Manual
Section 5 — Connecting the L-S, LCD Panel
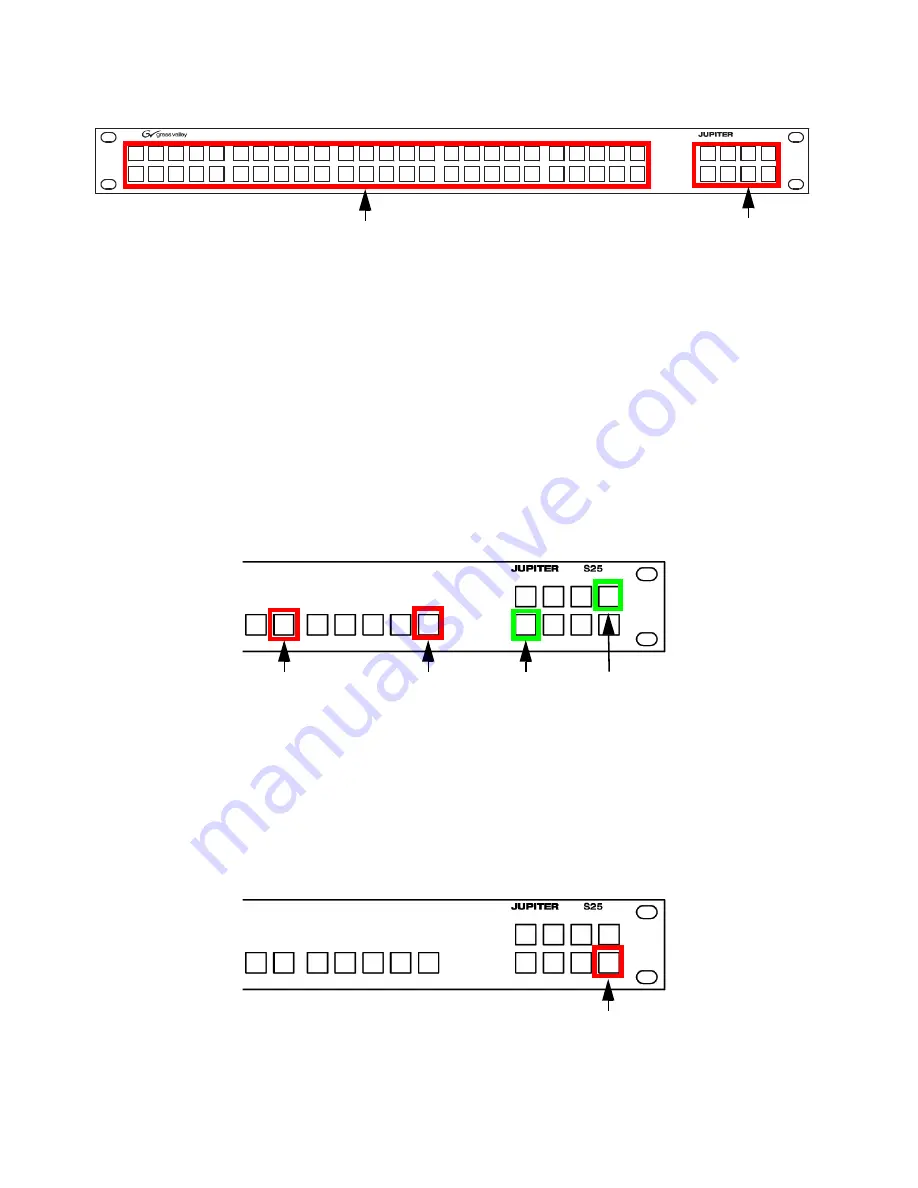
Figure 46. S50 Control Panel
Follow these steps to change the Connection Type setting using the S25 or
the S50 panel’s menu:
1.
Press the Destination button that is in the upper-right corner and the
Destination button in the lower-left corner at the same time, for
approximately three (3) seconds (
The
Serial Mode Cancel
button, button 25 (S25), or button 50 (S50), should
light up red.
The current Panel ID button will be high tally amber if the ID is between
1 and16. The button will not light up amber if the range is greater than
16.
Figure 47. S25 Front Panel
2.
Select one of the Panel ID buttons (1-16) to assign the Panel ID if you
want to change the panel’s ID. The selected button will then show high
tally amber.
The
Serial Mode Accept
button (the Destination button in the lower-right
corner) will then blink green (
).
Figure 48. Serial Mode Accept Button
S50
Destination Buttons
Buttons 1-50
Press and Hold these Buttons
Panel ID Button
Serial Mode Cancel Button
Serial Mode Accept Button
Summary of Contents for JUPITER CONTROL PANEL L32 -
Page 12: ...12 JUPITER L S and LCD Series Control Panel Instruction Manual Contents ...
Page 14: ...14 JUPITER L S and LCD Series Control Panel Instruction Manual Preface ...
Page 30: ...30 JUPITER L S and LCD Series Control Panel Instruction Manual Regulatory Notices ...
Page 156: ...156 JUPITER L S and LCD Series Control Panel Instruction Manual Section 7 LCD Introduction ...
Page 164: ...164 JUPITER L S and LCD Series Control Panel Instruction Manual Section 10 LCD Configuration ...
Page 206: ...206 JUPITER L S and LCD Series Control Panel Instruction Manual Glossary ...
Page 216: ...216 JUPITER L S and LCD Series Control Panel Instruction Manual Index ...