


40
Configuring Your GV Matrix
Data Restoration configuration using iControl
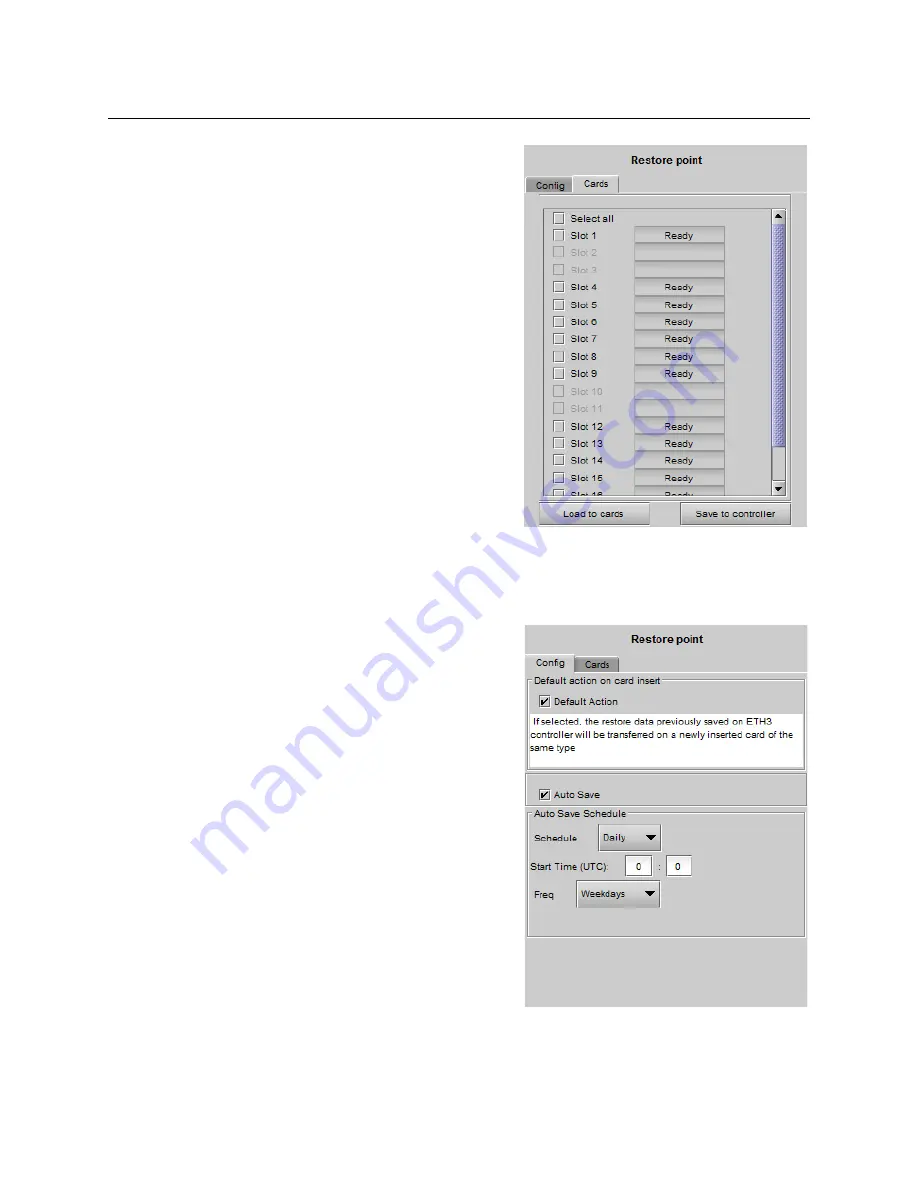
The tab show a list of the modular card
slots available in the GV Matrix frame,
with a check box, name, and status box
for each. Slots with a card installed are
enabled.
2 Click the check box to activate the Data
Restore feature for the card in that slot,
-or-
Click the
Select All
box at the top to
activate the feature for all slots in the
frame.
3 Click
Save to controller
at the bottom
to copy all restorable data from the cards
in the selected slots into the memory on
board the CPU-ETH3 controller.
4 Click
Load to cards
to load the cards in
the selected slots with data from the
controller’s memory.
Note that a data restore will only work if the
card in the slot is the same type as the card
that was there when the data was saved.
To configure automatic data restoration functions
1 Click the
Restore Point
button and view the
Config
tab.
2 Select the
Default Action
box to enable
the auto restore function for all the
modular cards in the GV Matrix frame.
Default Action
automatically updates a
card when it is inserted in a slot
previously occupied by a card of the
same type whose data was saved. Thus,
a new card can be configured
automatically to replace the card that
was removed, saving a lot of time when
cards are swapped.
3 Click the
Auto Save
box to enable the
automatic save function.
When
Auto Save
is enabled,
t
he CPU-
ETH3 card will automatically back up the
data on the cards in its slots according
to a set schedule.
4 Set up the schedule for data backup
using the controls provided.
• Schedule: Daily, Weekly, Monthly
• Start Time (UTC): Time in hours (24-hour clock) and minutes
Summary of Contents for GV MATRIX
Page 12: ...xii Notices ...
Page 16: ...xvi Notices ...
Page 34: ...18 Getting Started Ethernet Link Redundancy Channel Bonding ...
Page 104: ...88 Configuring Your GV Matrix Asynchronous Video ...


