Getting Started
1-78
LOGIQ V2/LOGIQ V1
–
User Guide
Direction 5610736-100
Rev. 9
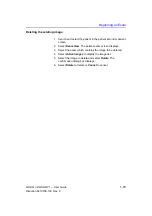
Deleting the existing patient/exam/image
Deleting the existing patient
1. Search and select the patient in the patient list.
2. Select
Delete
. The confirmation dialog box displays.
OR
Press the
Cursor
key. A pop-up menu displays. Select
Delete
. The confirmation dialog box displays.
3. Select
OK
to delete or
Cancel
.
Delete multiple patients from the patient list
1. Select the multiple patients to be deleted from the patient list
by holding down the Control key and selecting patients one
by one or holding down the Shift key to select a group of
patients.
2. Select
Delete
. The confirmation dialog box displays.
OR
Press the
Cursor
key. A pop-up menu displays. Select
Delete
. The confirmation dialog box displays.
3. Select
OK
to delete or
Cancel
.
Deleting the existing exam
1. Search and select the patient in the patient list under patient
screen.
2. Select
Exam View
to display patient exam screen.
3. Select the exam to be deleted.
4. Select
Delete
. The confirmation dialog box displays.
5. Select OK to delete or Cancel.
CAUTION
Before deleting a patient or image from the Patient Screen,
make sure you have already saved the data with EZBackup/
EZMove, Backup, or Export. Verify the media before deletion.
Summary of Contents for LOGIQ V2
Page 8: ...i 6 LOGIQ V2 LOGIQ V1 User Guide Direction 5610736 100 Rev 9...
Page 92: ...Getting Started 1 80 LOGIQ V2 LOGIQ V1 User Guide Direction 5610736 100 Rev 9...
Page 242: ...After the Exam is Over 3 80 LOGIQ V2 LOGIQ V1 User Guide Direction 5610736 100 Rev 9...
Page 288: ...Safety 4 46 LOGIQ V2 LOGIQ V1 User Guide Direction 5610736 100 Rev 9...
Page 380: ...Index 4 LOGIQ V2 LOGIQ V1 User Guide Direction 5610736 100 Rev 9...
Page 381: ......

