GE
V
OLUSON
i / V
OLUSON
e
D
IRECTION
KTI106052, R
EVISION
10
S
ERVICE
M
ANUAL
3-78
Section 3-6 - Completing the Set Up
3-6-4-2-2
Recalibration by means of External Battery Charger
NOTE:
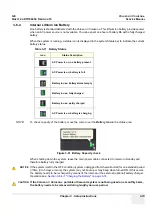
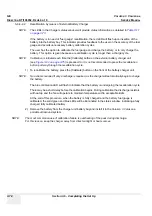
The LEDs in the Chargers status window will provide status information as detailed in
Table 3-11
on page 3-73
.
If the battery is in need of “fuel gauge” recalibration, the red LED will flash upon insertion of the
battery into the battery bay. This indicator provides feedback to the user on the accuracy of the fuel
gauge and avoids unnecessary battery calibration cycles.
The user has the option to calibrate the fuel gauge and charge the battery, or to only charge the
battery. This option is given because a recalibration cycle is longer than a charge cycle.
NOTE:
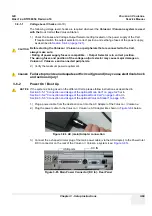
Calibration is initiated each time the [Calibrate] button on the external battery charger unit
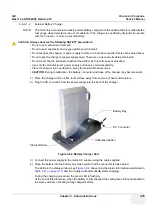
(see
Figure 3-92 on page 3-75
) is pressed. So it is not recommended to press the recalibration
button part way through the recalibration cycle.
1) To recalibrate the battery, press the [Calibrate] button on the front of the battery charger unit.
NOTE:
No action is required if only a recharge is required, as the charger will automatically begin to charge
the battery.
The blue calibration LED will flash to indicate that the battery is undergoing the recalibration cycle.
There may be a short delay before the calibration begins. During calibration the discharge resistors
will heat up and the fan will operate to maintain temperature within acceptable limits.
At the end of this procedure, when the battery is fully charged and the battery fuel gauge is
calibrated, the solid green and blue LEDs will be illuminated in the status window, indicating a fully
charged, fully calibrated battery.
2.) Remove the battery from the charger unit battery bay and install it in the Voluson i / Voluson e
portable ultrasound system.
NOTE:
The most common cause of calibration failure is overheating of the pack during discharge.
For this reason, keep the charger away from direct sunlight or heat sources.
Summary of Contents for H48651KR
Page 2: ......
Page 11: ...GE VOLUSON i VOLUSON e DIRECTION KTI106052 REVISION 10 SERVICE MANUAL ix ZH CN KO ...
Page 44: ...GE VOLUSON i VOLUSON e DIRECTION KTI106052 REVISION 10 SERVICE MANUAL xlii Table of Contents ...
Page 514: ...GE VOLUSON i VOLUSON e DIRECTION KTI106052 REVISION 10 SERVICE MANUAL IV Index ...
Page 515: ......

