3. HOW TO MANAGE CHARTS
3-32
3.23
How to Synchronize Chart Data
This section shows you how to synchronize chart data between FMD-3xx0, FAR-2xx9
and FCR-2xx9 units, so that all units share the same chart data. Synchronization can
be done automatically or manually (see section 3.23.2), however all units selected for
synchronization must be powered to complete the synchronization. Synchronization
includes the following actions:
• Synchronize public keys
• Synchronize chart permits and licenses
• Synchronize chart data
• Synchronize manual updates
Note 1:
Before synchronizing chart data, confirm that all units selected for synchroni-
zation are powered. (Do not turn off a unit during synchronizing.) If a unit is turned off
during the synchronizing, do the following on the unit which contains the medium:
• Open the [Sync Status] dialog box then click the [Disable Sync] button to disable
synchronization. Power all units registered for synchronization, then click the [Urge
Sync] button on the [Sync Status] dialog box on the unit containing the media to
forcibly synchronize.
• Make a group of all the units currently powered, referring to section 3.23.1, and reg-
ister the group with [Grouped with This Unit]. Reset the power on all units selected
for synchronization.
Note 2:
C-MAP charts are not automatically synchronized. C-MAP charts are only
synchronized immediately after installing or updating the C-MAP database. If the sys-
tem has several FMDs, make a group of associated units before you install C-MAP
charts.
3.23.1
How to select the units to synchronize
Do as follows to select the units to synchronize.
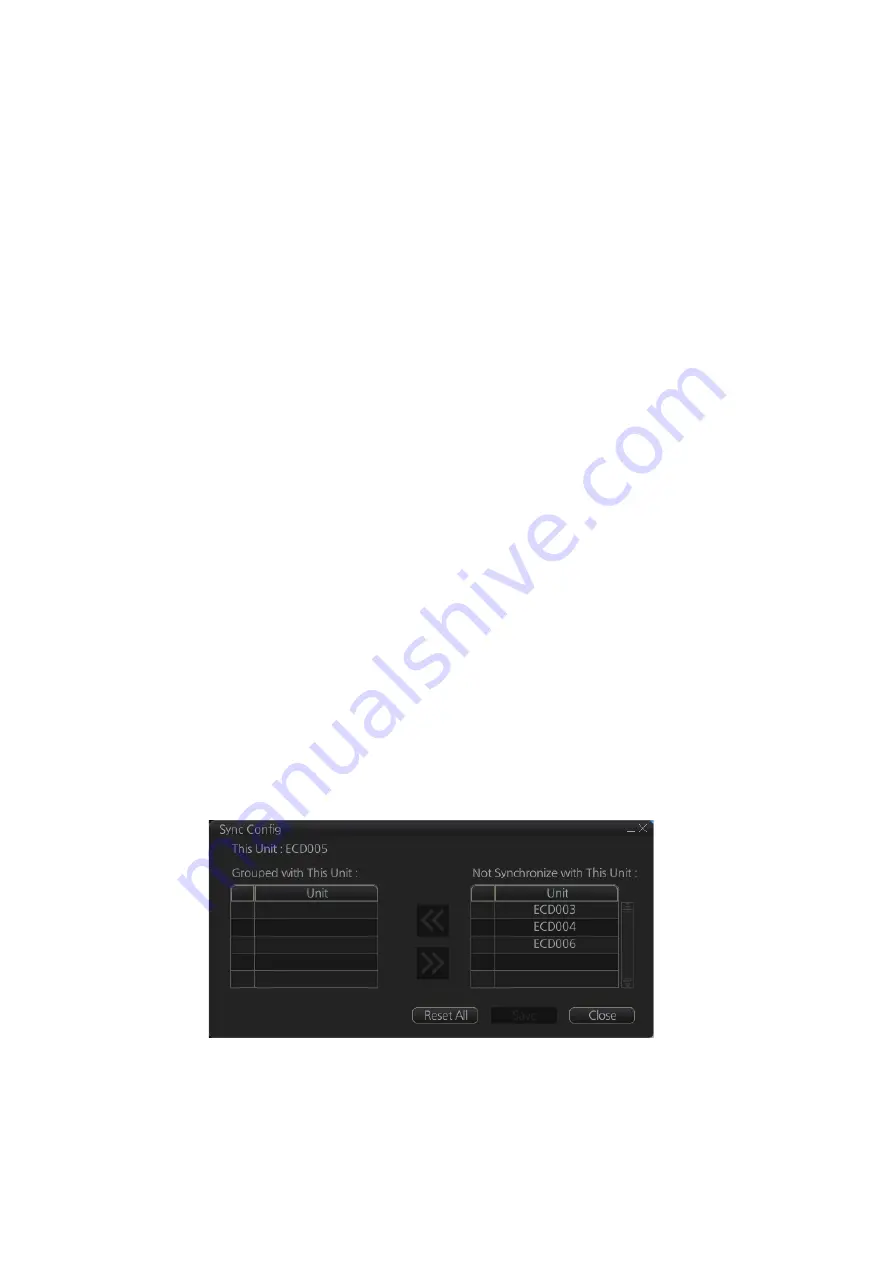
1. Get into the Chart maintenance mode. On the InstantAccess bar™, click [System]
followed by [Sync Config] to show the [Sync Config] dialog box.
[Grouped with This Unit]
: This window shows the units currently selected for
synchronization.
[Not Synchronize with This Unit]
: This windows shows the units not selected for
synchronization.
Summary of Contents for FMD3100
Page 36: ...1 INTRODUCTION 1 20 This page is intentionally left blank ...
Page 70: ...2 OPERATIONAL OVERVIEW 2 34 This page is intentionally left blank ...
Page 128: ...5 VECTOR S57 CHARTS 5 12 This page is intentionally left blank ...
Page 140: ...7 C MAP BY JEPESSEN CHARTS 7 6 This page is intentionally left blank ...
Page 206: ...11 HOW TO MONITOR ROUTES 11 16 This page is intentionally left blank ...
Page 230: ...13 TRACKED TARGET TT FUNCTIONS 13 10 This page is intentionally left blank ...
Page 244: ...14 AIS TARGET FUNCTIONS 14 14 This page is intentionally left blank ...
Page 250: ...15 AIS SAFETY NAVTEX MESSAGES 15 6 This page is intentionally left blank ...
Page 294: ...19 RECORDING FUNCTIONS PLAYBACK FUNCTIONS 19 14 This page is intentionally left blank ...
Page 312: ...20 ALERTS 20 18 This page is intentionally left blank ...
Page 332: ...22 SETTINGS MENU 22 16 This page is intentionally left blank ...
Page 338: ...23 MAINTENANCE AND TROUBLESHOOTING 23 6 This page is intentionally left blank ...
Page 395: ......


