17.2 Storage Expansion - Scale
CAUTION!
l
Install only system expansions that satisfy the requirements and rules governing
safety. If you install other expansions, you may damage the system or violate
these safety regulations. Information can be obtained from Fujitsu Technology
Solutions Customer Service or your local sales office.
l
If you cause a defect on the device by installing or exchanging system
expansions that are not released or qualified for ETERNUS CS800 S6, the warranty
is invalidated.
To add expansion modules make sure that you only use storage expansion
modules that are fully equipped and not manually configured. No preparations
of the ETERNUS DX100 S3 or the new expansion must be done. Just connect the
new expansion physically as described below and let the ETERNUS CS800 S6
software perform all steps necessary.
WARNING!
DO NOT run the "Add new enclosure" function provided by the ETERNUS DX100 S3.
Proceed as follows
1. Check the disks delivered with the new drive enclosure(s): Always 12 disks must be
inserted and they must be of the same size than used within the existing enclosures.
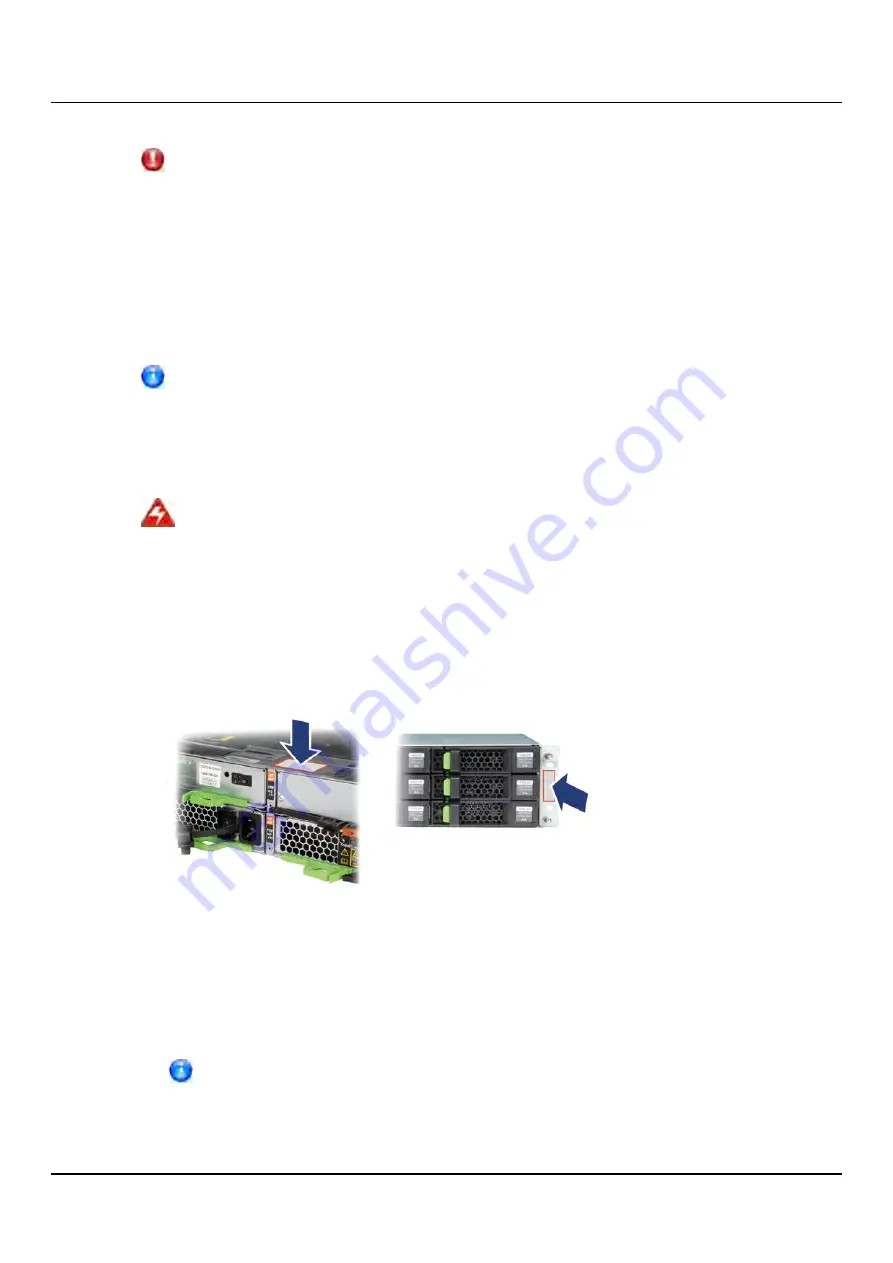
2. Verify if each of the already used ETERNUS DX100 S3 storage expansion modules is
correctly labeled with an identifier DE-x (x=1, 2, …, 9, a). The position of the labels is
shown by figure below.
Figure 325: Label positions of the ETERNUS JX40 S2 / DX100 S3 modules.
Verify the labels against the ID numbers displayed at the operation panels. If there are
none or wrong labels at the modules, label them correctly.
Label the new expansion module(s) with the always next currently unused identifier.
Also affix a label to both ends of their power cables.
A label sheet was provided together with the original ETERNUS CS800 S6
delivery.
3. Shutdown the ETERNUS CS800 S6 via the remote management pages (see
ETERNUS CS800
457
Summary of Contents for ETERNUS CS800 S6
Page 1: ...English ETERNUS CS800 S6 User Guide V3 2 7 Edition April 2017 ...
Page 131: ...7 3 The Remote Management Console Figure 98 Remote Management Pages Map ETERNUS CS800 131 ...
Page 173: ...8 8 AIS Connect Figure 132 AISConnect Wizard Confirm ETERNUS CS800 173 ...
Page 449: ...16 2 Storage Subsystem Figure 313 Inserting the 3 5 inch HDD module ETERNUS CS800 449 ...


