126
4 Paper
Paper Sizes/Paper Type for Trays 1 through 4
Though the printer can detect the size (only standard sizes) and orientation of paper loaded
in paper trays 1through 4, use the control panel to configure the size setting after loading
custom size paper.
Paper type cannot be detected and so the paper type setting also must be configured. If the
paper type setting does not match the actual type of the paper, toner may not fuse properly
to the paper, resulting in poor print quality. Make sure to configure the paper type settings
correctly. The initial factory default setting for all the trays is plain paper.
Refer to
• “ Setting the Paper Sizes of Trays” (P. 129)
• “ Changing the Paper Type Settings of Trays” (P. 131)
Note
• The printer performs image quality processing in accordance with the current paper type setting.
Configuration of [Image Quality] settings on the control panel also is required when using coarse paper
("coarse paper” refers to paper having conspicuous transparent characters when held up against the
light), or some types of thick paper such as business card paper. Refer to “ [Image Quality]” (P. 208) for
information about image quality and “ Configuring Image Quality Settings for Each Paper Type” (P. 132)
for information about configuring settings.
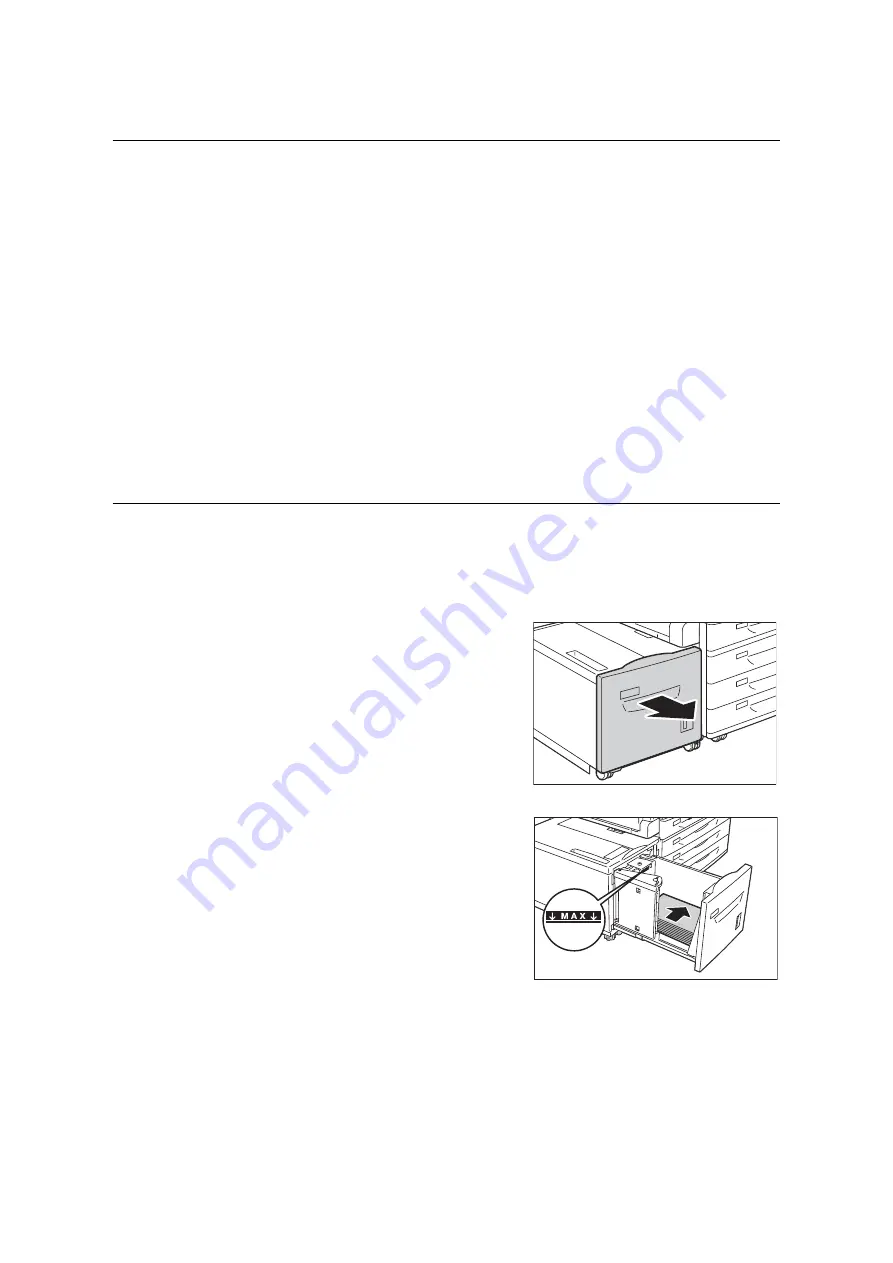
Loading Paper into Tray 6 (HCF B1)
When HCF B1 (optional) is installed, you can use Tray 6. The following describes the
procedure for loading paper into Tray 6.
When the machine runs out of paper during printing, a message is displayed on the display.
Add paper according to the displayed instructions. Printing is automatically resumed when
paper is added.
1.
Pull out the tray until it stops.
2.
Load the paper with its print side facing up
and its leading edge aligned with the left
side of the drawer.
Important
• Do not load paper of different types into the tray. Doing
so can cause paper jams.
• Do not load paper above the maximum fill line (the
position "MAX"). It may cause paper jams.


