Using Auto-SYNC for Digital Input Connections
168 TIMS MVP
™
Setup and Configuration Guide
Auto-SYNC Wizard Step 1: Creating an Area Of Interest for Digital
Connections
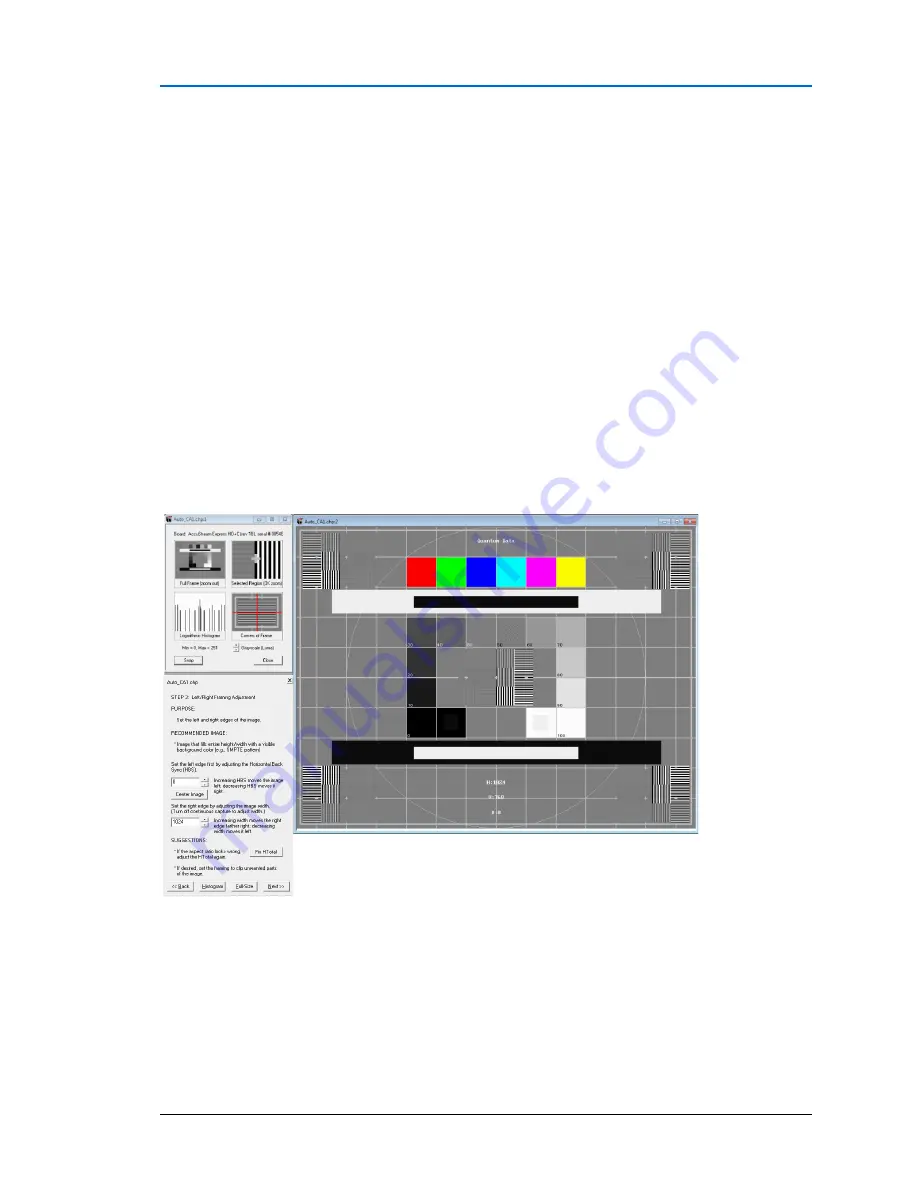
To set an Area Of Interest (AOI) we need to adjust the left/right framing of the image. The left
edge is set by adjusting (
HBS
) and then the image (
WIDTH
).
Increasing the
HBS
moves the image to the left.
Then we adjust the
VBS
to set the top of the image starting position and finally
reduce
HEIGHT
to set the bottom position of the image.
If the Auto-SYNC is not viewable then from the Auto-
SYNC toolbar select’ VIEW’
then ‘AUTO
-
SYNC WIZARD’ or press CTRL
-W.
Example
This first example shows a 1024x768-60Hz Digital video image with the correct values for
Left/Right Framing. Notice that both edges of the video image align against the edge; there is no
distortion or clipping.
Figure 71: Example of proper video image framing
Summary of Contents for TIMS 2000 EN
Page 1: ...060000 91 Rev 1...


