52
2.11 Finishing the Forward Fuselage
2.11.1
Tightening bolts
At this stage it is permissible to tighten most of the bolts, as the cabin frame now
forms a well braced structure. The exceptions are the bolts securing the lower ends
of the rear verticals to the main undercarriage cross-beam, as these will be undone
when fitting the undercarriage.
Check the basic alignment of the structure as you tighten the bolts, trying not to work
in such a fashion as to introduce any unnecessary distortions into the structure (e.g.
don‟t do all the bolts up along one side and then along the other).
Some slight misalignment is inevitable in a pre-drilled structure of this type, and
unless this is severe it is probably best to live with it rather than to open out too many
bolt holes. A slightly asymmetrical but well defined shape is preferable to a perfectly
aligned shape with sloppy bolts.
Remember to apply threadlock, and do not over tighten the bolts. The tubes should
not be visibly distorted. Remember the bolts are not relying on their tightness to stay
done-up, they only need to be tight enough to avoid the parts rattling against each
other. The Nyloc and the Loctite are responsible for keeping the bolts done-up.
2.11.2
Central brace
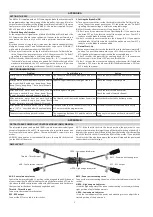
a) Fit the aluminium angles
2
and
3
linking the central cabin tubes
tu19
to the
seat front support tube
tu15
.
These are not pre-drilled, as the exact hole positions are affected by
the general alignment of the rest of the fuselage.
b) Bolt the angles to the seat front support tube
tu15
first, then drill them to
match the holes in the central cabin tubes
tu19
.
To aid clearance for the rudder and elevator cables, it is recommended
that (if supplied) both the lower saddle washers on the seat front
support tube
tu15
are omitted. This leaves only the side ones against
the central cabin tubes
tu19
.
An additional thin plastic washer may be fitted between the central
brace and the starboard central cabin tube to increase clearance for the
rudder cable.
The bolts should pass from the middle towards the outside, to clear the
elevator cables.
Summary of Contents for Nynja Build
Page 1: ...1 Nynja Build manual Version 1 0...
Page 2: ...2 Figure 1 tube numbering scheme...
Page 3: ...3 Figure 2 Basic frame Skyranger...
Page 4: ...4 Figure 3 uncovered Skyranger frame...
Page 5: ...5 Figure 4 Uncovered Nynja frame Figure 5 Nynja fuselage with rear fairings removed...
Page 6: ...6 Figure 6 Nynja fuselage with rear fairings removed rear view Figure 7 simply assemble thus...
Page 22: ...22 Figure 13 forward fuselage from front quarter Figure 14 Cabin upper rear corner...
Page 60: ...60 Figures 65 cable arrangement further overview...
Page 86: ...86 Figure 100 Nynja elevator joiner with integral control horn...
Page 113: ...113 Figure 135 front jury strut attachment Figure 136 rear jury strut attachment...
Page 183: ...183 Figure 231 heavy duty power wiring schematic Rotax 912...
Page 184: ...184 Figure 232 low current wiring schematic Rotax 912...
Page 185: ...185 Figure 233 instrument wiring schematic Rotax 912...
Page 200: ...200 Nynja Build manual 1 0 18 2 One Piece Door Figure 250 one piece door frame...
Page 256: ...256 Nynja Build manual 1 0...
Page 257: ...257 Nynja Build manual 1 0 27 2 Wire locking...
Page 258: ...258 Nynja Build manual 1 0...
Page 259: ...259 Nynja Build manual 1 0...
Page 260: ...260 Nynja Build manual 1 0...
Page 265: ...265 Nynja Build manual 1 0...