464
Data
Transmission
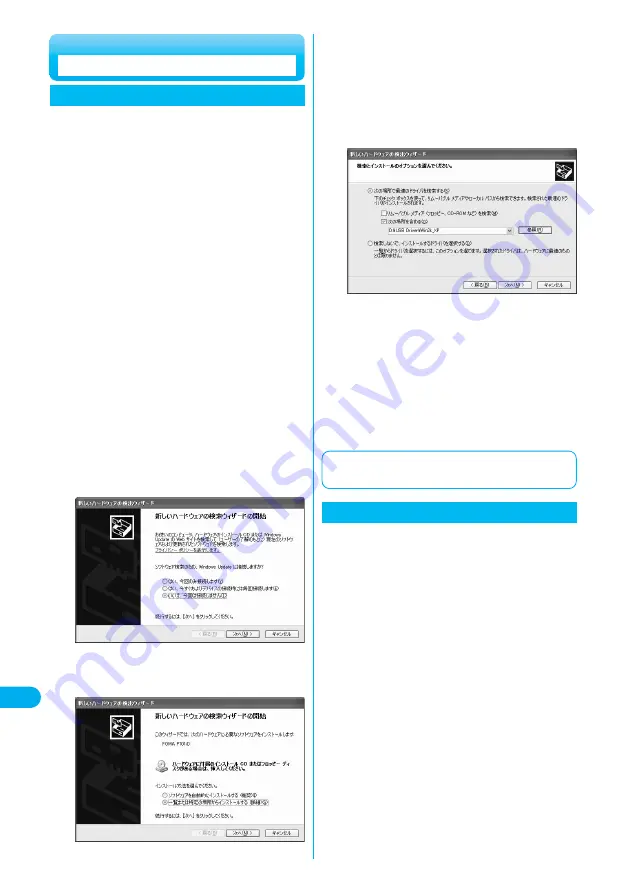
Start installation.
Pop-up message “
新しいハードウェアが見つかりました
(New
hardware was found)” is displayed for a few seconds, then the
screen below appears.
Select “
いいえ、今回は接続しません
(No, do not connect now)”
and click “
次へ
(Next)”.
●
This display might not appear depending on the personal
computer you use.
5
Select how to install.
Select “
一覧または特定の場所からインストールする(詳細)
[Install from the list or a specific place (details)]”, then click “
次へ
(Next)”.
6
Connect the FOMA phone and the FOMA USB
Cable (option). (See page 463)
1
Start Windows
®
, then set the “FOMA P701iD
CD-ROM” into the personal computer.
2
Exit the launcher screen.
●
This screen automatically appears when you set “FOMA P701iD
CD-ROM” into the personal computer. It may not appear
depending on settings of your personal computer. In this case,
go to step 4.
●
If this screen appears during installation of the P701iD
transmission setup files, click “
閉じる
(Close)”.
3
Turn on the power of the FOMA phone, then connect
the FOMA USB Cable, which is already connected to
the FOMA phone, to the personal computer.
4
When installing the P701iD transmission setup files (driver)
under Windows
®
XP, be sure to use the account of the
administrator right of the personal computer; otherwise, an
error will occur. For details on how to set administrator right
of the personal computer, contact the manufacturer of your
personal computer, or Microsoft Corporation.
Select a driver.
Select “
次の場所で最適のドライバを検索する
(Search for the
appropriate driver in the place below)”, and uncheck “
リムーバブル メ
ディア(フロッピー、
CD-ROM
など)を検索
[Search for the removable
media (floppy disk, CD-ROM, etc.)]”. Then check “
次の場所を含める
(Including the place below)”.
Click “
参照
(Browse)”; specify “<CD-ROM drive-name>:
¥
USB Driver
¥
Win2k_XP”; then click “
次へ
(Next)”. (In <CD-ROM drive-name>,
specify the CD-ROM drive name of your personal computer.)
●
The driver is common to Windows
®
2000 Professional.
7
Installing Transmission Setup Files
Installing into Windows
®
XP
Click “
完了
(Finish)”.
8
Then, install all the rest three P701iD
transmission setup files (driver) (see page
467) according to steps 5 to 8.
After you end the installation of all the P701iD transmission setup
files (driver), pop-up message “
新しいハードウェアがインストール
され、使用準備ができました。
(New hardware was installed, and
the system was ready.)” appears for a few seconds on the indicator
of the task bar.
9
Connect the FOMA phone and the FOMA USB
Cable (option). (See page 463)
1
Start Windows
®
, then set “FOMA P701iD
CD-ROM” into the personal computer.
2
Exit the launcher screen.
●
This screen automatically appears when you set “FOMA P701iD
CD-ROM” into the personal computer. It may not appear
depending on settings of your personal computer. In this case,
go to step 4.
●
If this screen appears during installation of the P701iD
transmission setup files, click “
閉じる
(Close)”.
3
Turn on the power of the FOMA phone, then
connect the FOMA USB Cable, which is
already connected to the FOMA phone, to the
personal computer.
4
When installing the P701iD transmission setup files
(driver) under Windows
®
2000 Professional, be sure to
use the administrator right. If user without the
administrator right installs the P701iD transmission
setup files (driver), an error will occur. For
administrator setting, contact the manufacturer of your
personal computer, or Microsoft Corporation.
Then confirm that the P701iD transmission setup files are installed
normally. (See page 466)
Installing into Windows
®
2000 Professional
Summary of Contents for FOMA P701iD
Page 98: ...96...
Page 339: ...i channel What is i channel 338 Using i channel 340 Using Detailed Functions 341 337...
Page 344: ...342...
Page 460: ...458...
Page 502: ...500...


