56
Setup
③
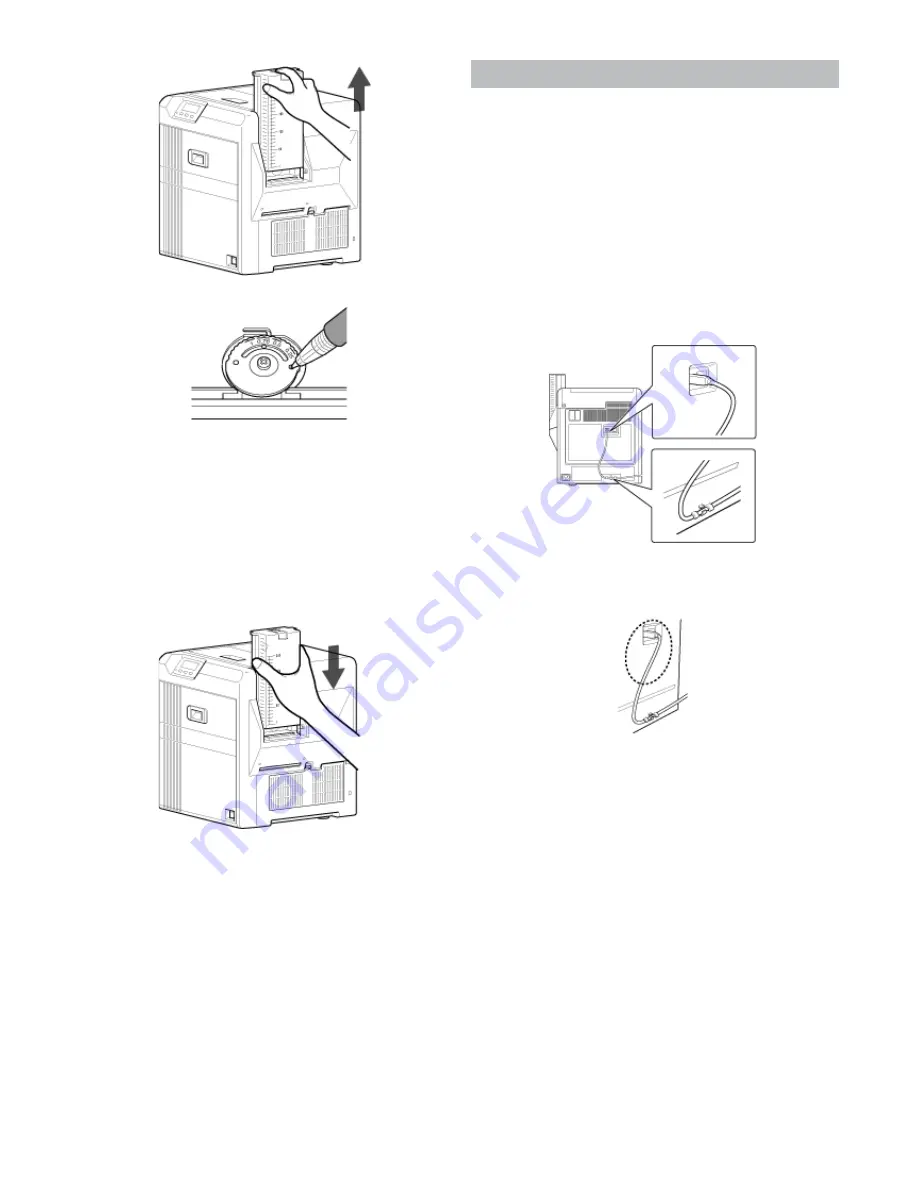
Insert a ballpoint pen into the card separator hole, and turn
slowly.
Memo:
●
If the card cannot be discharged during printing, adjust the
card thickness by turning the card separator in the clockwise
direction by one scale at a time.
●
If two cards are discharged at a time during printing, adjust
the card thickness by turning the card separator in the anti-
clockwise direction by one scale at a time.
●
If cards of different thickness are used frequently, purchase
of an additional card hopper according to the card thickness
is recommended.
For details on the purchase of card hoppers, please consult
our authorized dealers.
④
Attach the card hopper cover.
Printer and Computer Connection
Connecting with a USB Cable
Note:
●
While printing is in progress, do not turn off the power of the host com-
puter, or switch it to the sleep or standby mode. Doing so may stop the
movement of the cards inside the printer.
●
Plug the USB cable in correctly and firmly.
●
Do not connect the cable to the USB connectors on the monitor or key-
board of the host computer. The printer may not be correctly recog-
nized.
●
When using a USB hub, make use of one that is directly connected to
the host computer.
1
Turn off the power of the printer and host computer.
2
Plug the USB cable into the USB cable connection terminal at the rear
of the printer," and pass the"
A
page 7 USB cable through the cable
clamp.
Note:
●
As illustrated in the diagram, do not pull the USB cable excessively to-
ward the cable clamp. Doing so may subject the USB connector of the
printer to stress, thus resulting in connection problems.
3
Plug the other end of the USB cable into the USB cable connection
terminal of the host computer.
Connecting with a LAN Cable
Note:
●
Plug the LAN cable in correctly and firmly.
●
Make use of a shielded LAN cable to avoid any malfunction.
●
If a USB cable is also connected at the same time when the power is
turned on, priority will be given to USB.
1
Turn off the power of the printer and host computer.
2
Plug the LAN cable into the LAN cable connection terminal at the rear
of the printer.
Summary of Contents for EDIsecure X ID 8300
Page 14: ...14 Operation ...
Page 15: ...15 Operation ...


