Configuring the Printer
4.3 Set-up Mode Buttons and Indicators
4.3.3 Changing the Printer’s Configuration
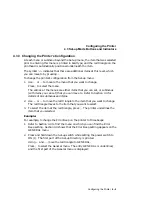
At each menu or submenu beyond the Set-up menu, the item that was selected
prior to entering this menu is printed in bold type, and the red triangle on the
printhead is automatically positioned underneath the item.
The symbol > > indicates that there are additional items at this level, which
you can move to by pressing
!
.
To change the printer’s configuration from the Set-up menu:
1.
Use
or
!
to move to the menu that you want to change.
Press
#
to select the menu.
The entries at the menus are either items that you can set, or submenus
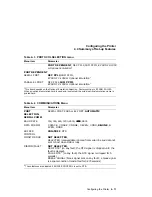
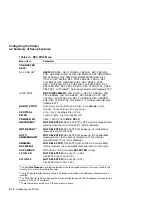
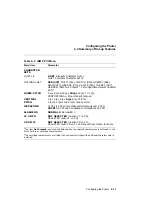
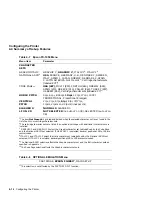
(with items you can set) that you can move to. Refer to Section 4.4 for
details of all submenus and items.
2.
Use
or
!
to move the red triangle to the item that you want to change.
The red triangle moves to the item that you want to select.
3.
To select the item at the red triangle, press
#
. The printer underlines the
item that you selected.
Example:
For example, to change the Error Beep on the printer to three beeps:
1.
Refer to Section 4.4 to find the menu on which you can find the Error
Beep setting. Section 4.4 shows that the Error Beep setting appears on the
GENERAL menu.
2.
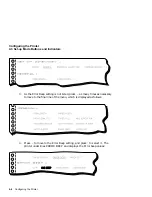
Press and hold down the Set-up switch while setting the power switch to
ON (1). The first part of the Set-up Directory is printed.
Using
and
!
, move the red triangle to GENERAL.
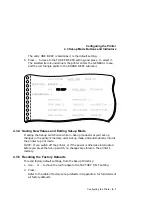
Press
#
to select the General menu. The entry GENERAL is underlined,
and the first part of the General menu is displayed:
Configuring the Printer 4–5


