301
5
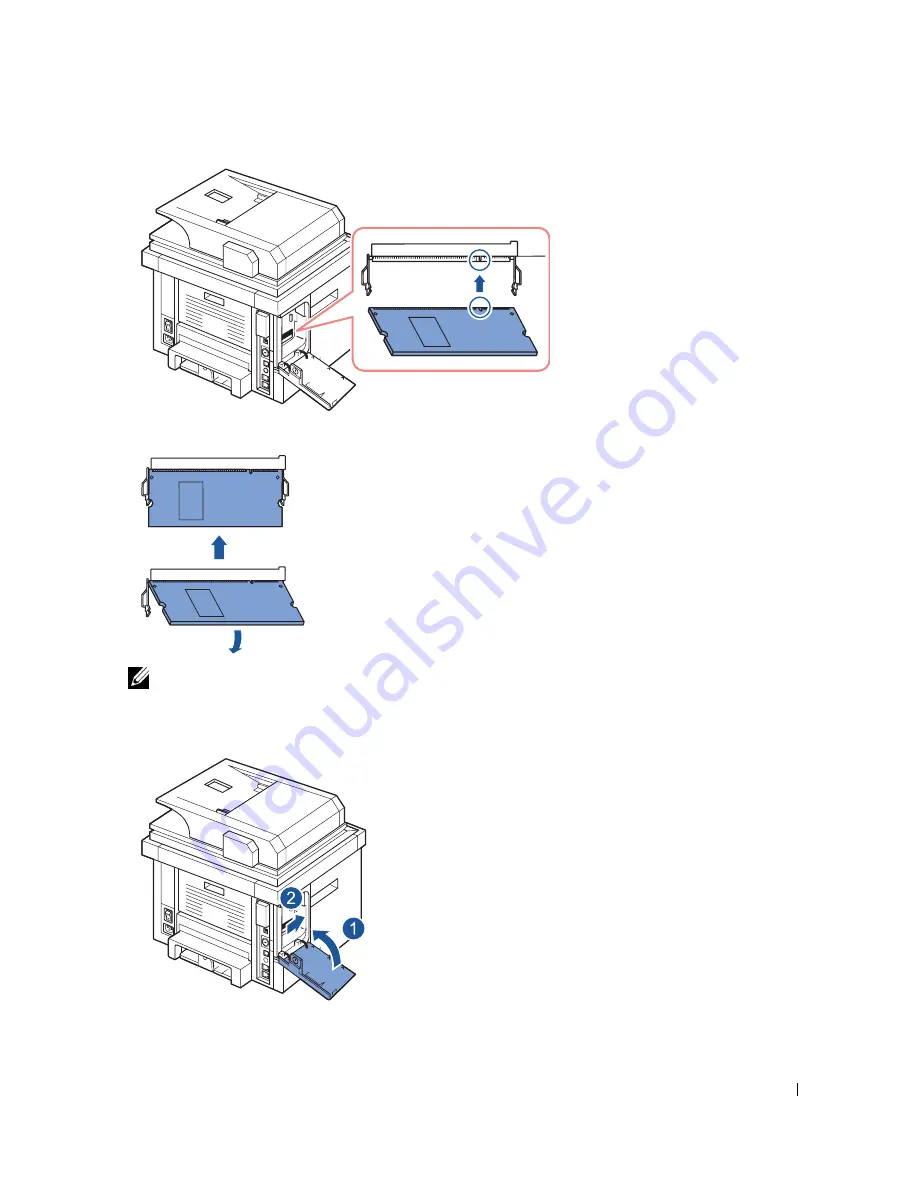
Press the memory module into the slot with care until you hear a “click”.
NOTE:
The notches and grooves illustrated above may not match those on an actual DIMM
and its slot.
6
Replace the control board cover.
7
Reconnect the power cord and printer cable, and turn the printer on.
After installing the memory DIMM, printer drivers will automatically configure the
updated memory.
Summary of Contents for 2355 Mono Laser
Page 1: ...Dell 2355dn Laser MFP User s Guide ...
Page 17: ...16 ...
Page 31: ...30 4 Close the front cover ...
Page 72: ...71 5 Click Update Firmware ...
Page 99: ...98 ...
Page 127: ...126 ...
Page 181: ...180 ...
Page 213: ...212 ...
Page 214: ...Macintosh Installing Software for Macintosh Setting Up the Printer Printing Scanning ...


