PS-28 Cruiser
PS-28N Cruiser
CR-MM-1-0-00
CHAPTER 12 – INSTRUMENTS AND AVIONICS
Revision No.: 23
Date of issue: 2020-01-15
12 - 66
Procedure to perform SkyView system upgrade:
(a) Check the issuance of the actual revision of the Service Bulletin SB-SC-xxx from CAG
website.
(b) Follow the instructions specified in the Service Bulletin SB-PS-025.
Procedure to perform Map Databases update:
(a) Check the issuance of actual revisions for the map databases from providers websites.
(b) Download the required databases and save them to the given USB flash drive.
(c) Turn on
MASTER BAT
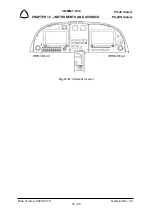
and screen EFIS1. Once the screen started, plug in the USB flash
drive to the USB port EFIS1 and press and hold buttons 7 and 8 until the menu SYSTEM
SOFTWARE (LOAD and EXPORT) for file transfer appears.
(d) With a given cursor, activate a function LOAD FILES and select related files to transfer.
By pressing button 8 LOAD, download related files from USB drive to the screen system.
Once files are downloaded, press the button 8 DONE to return to the menu.
(e) Continue update procedure of other databases according to the paragraph (d).
(f) To complete the update procedure, press button 2 EXIT.
(g) Turn on screen EFIS2. Once the screen started, wait until the transfer updated map
database from the screen EFIS1.
(h) To download the update terrain databases to EFIS2 screen plug in the USB flash drive to
the USB port EFIS2 and press and hold buttons 7 and 8 until the menu SYSTEM
SOFTWARE (LOAD and EXPORT) for file transfer appears and then proceed according
to point (d) to (f).
(i) Turn off screen EFIS1, EFIS2 and
MASTER BAT
.
Checking the last versions of the Map Databases within the SkyView system:
1. Turn on
MASTER BAT
, press button 7 and turn on EFIS1. Hold button 7 during the system
booting sequence until the SETUP MENU for system setting appears.
2. With a given cursor activate a function LOCAL DISPLAY SETUP and then INSTALLED
DATABASES.
3. Check the last installed databases.
4. The complete the last installed database check, press button 2 EXIT.
5. Press button 7 and turn on EFIS2. Hold button 7 during the system booting sequence until
the SETUP MENU for system setting appears and then proceed according to point (2) to
(4).
6. Turn off screen EFIS1, EFIS2 and
MASTER BAT
.

