CR-MM-1-0-00
PS-28 Cruiser
PS-28N Cruiser
CHAPTER 12 – INSTRUMENTS AND AVIONICS
Date of issue: 2018-09-27
Revision No.: 22
12 - 55
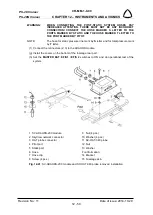
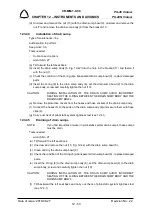
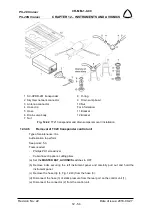
(f) Unscrew screws (5) and remove the control unit (1) from the panel.
(g) Install the protective covers on the connector and rear port of the control unit.
12.3.47
Installation of TC20 transponder control unit
Type of maintenance: line
Authorization to perform:
See point 2.5.3.
Tools needed:
-
Phillips PH1 screwdriver
-
Cobra hose clip pliers
(a) Remove the protective covers from the connector and rear port of the control unit.
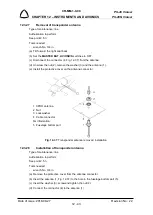
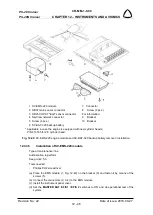
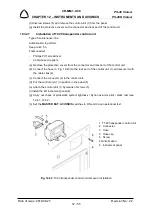
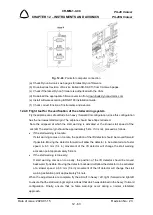
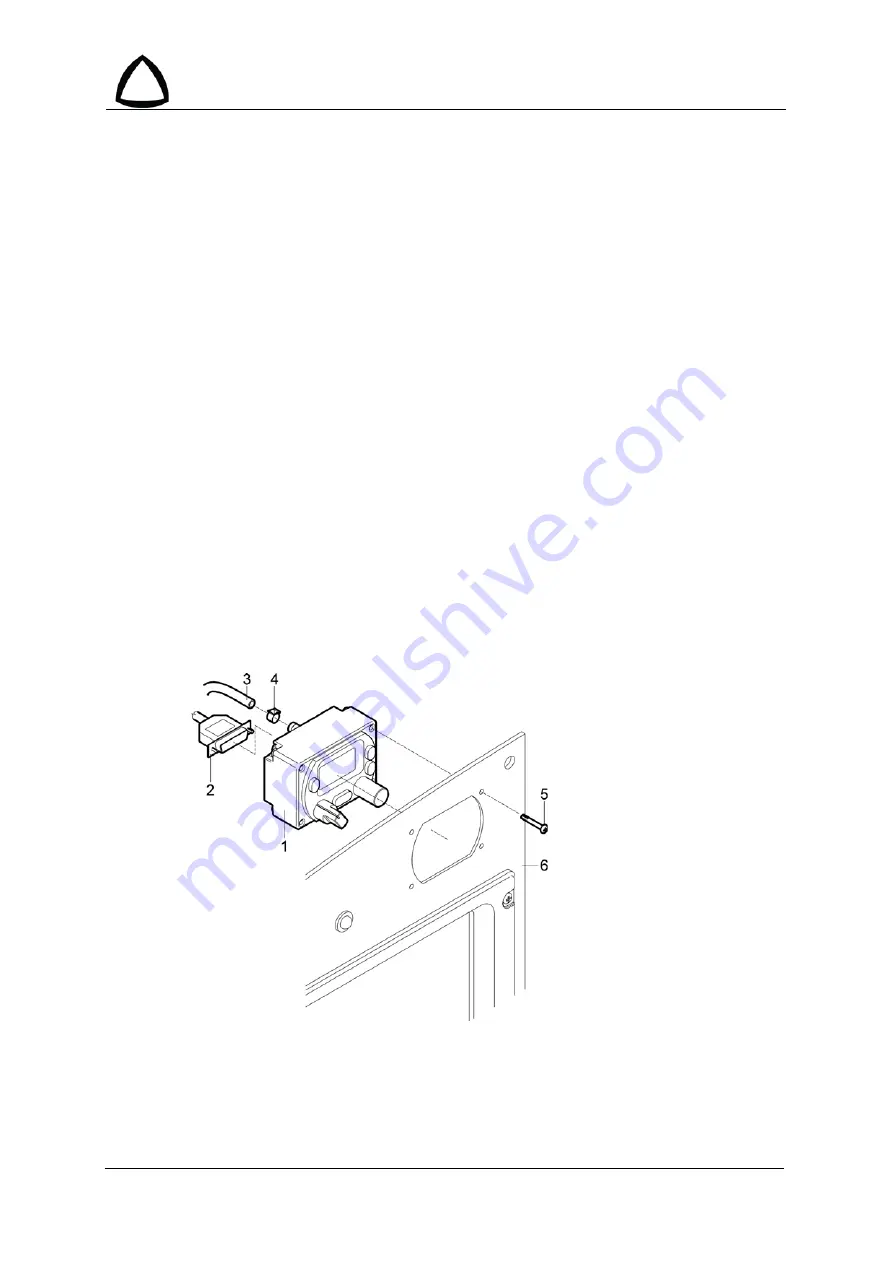
(b) Connect the hose (3, Fig. 12-43) to the rear port of the control unit (1) and secure it with
the cable clips (4).
(c) Connect the connector (2) to the control unit.
(d) Put the control unit (1) in position in the panel (5).
(e) Attach the control unit (1) by means of screws (5).
(f) Install the left instrument panel (6).
(g) Carry out check of pitot-static system tightness / Dynon avionics pitot / static test (see
12.4.1, 12.4.2)
(h) Set the
MASTER BAT
,
AVIONICS
switches to ON and
do an operational test.
Fig. 12-43
: TC20 transponder control unit removal / installation
1 TT20 transponder control unit
2 Connector
3 Hose
4 Hose clip
5 Screw
For information:
5 Instrument panel

