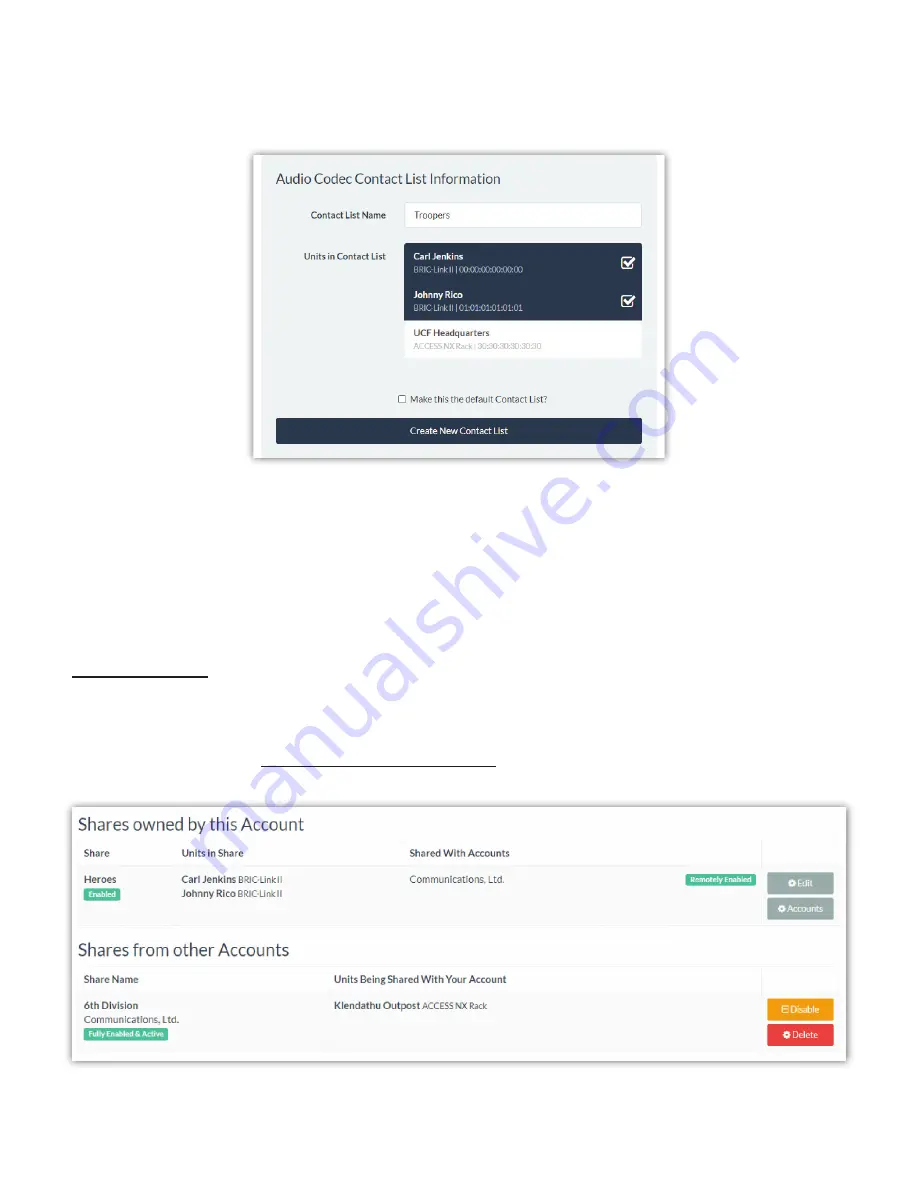
ADDING CONTACT LISTS
Clicking “Add New Contact List” brings up a dialogue box that will ask for a
List Name
and a selec on of codecs to
be included in the List (as seen in
Figure 50
).
All of the available codecs on an account are listed to choose from. Clicking any of the codecs adds a “check” mark
and includes that codec in the new List. Click a “checked” unit to remove the check mark and that unit will no
longer be included in the new List. Once the desired units are selected, and a
List Name
is entered, click the “Create
new Contact List” bu on to save the new List. This Contact List will now appear on the
Contact Lists Tab
and units
on the account will now be able to
Follow
this List from their
Unit Informa
Ɵ
on Page
on the
Audio Codecs Tab
.
SHARING TAB
The
Sharing Tab
displays a list of “Shares” that have been set up for the account (as seen in
Figure 51
), and allows
new Shares to be created (a new account will have no Shares listed yet). Shares are very similar to Contact Lists;
however, Shares allow units on a di
ff
erent Switchboard account to see and connect to certain units in this
fl
eet. On
this Tab, users can view and edit Shares created on this account, as well as Shares sent from other accounts.
Summary of Contents for BRIC-Link II
Page 1: ...Product Manual ...
Page 2: ...BRIC Link II June 2021 ...
Page 3: ... ...
Page 4: ... ...
Page 5: ... ...
Page 6: ... ...
Page 7: ... ...
Page 8: ... ...


