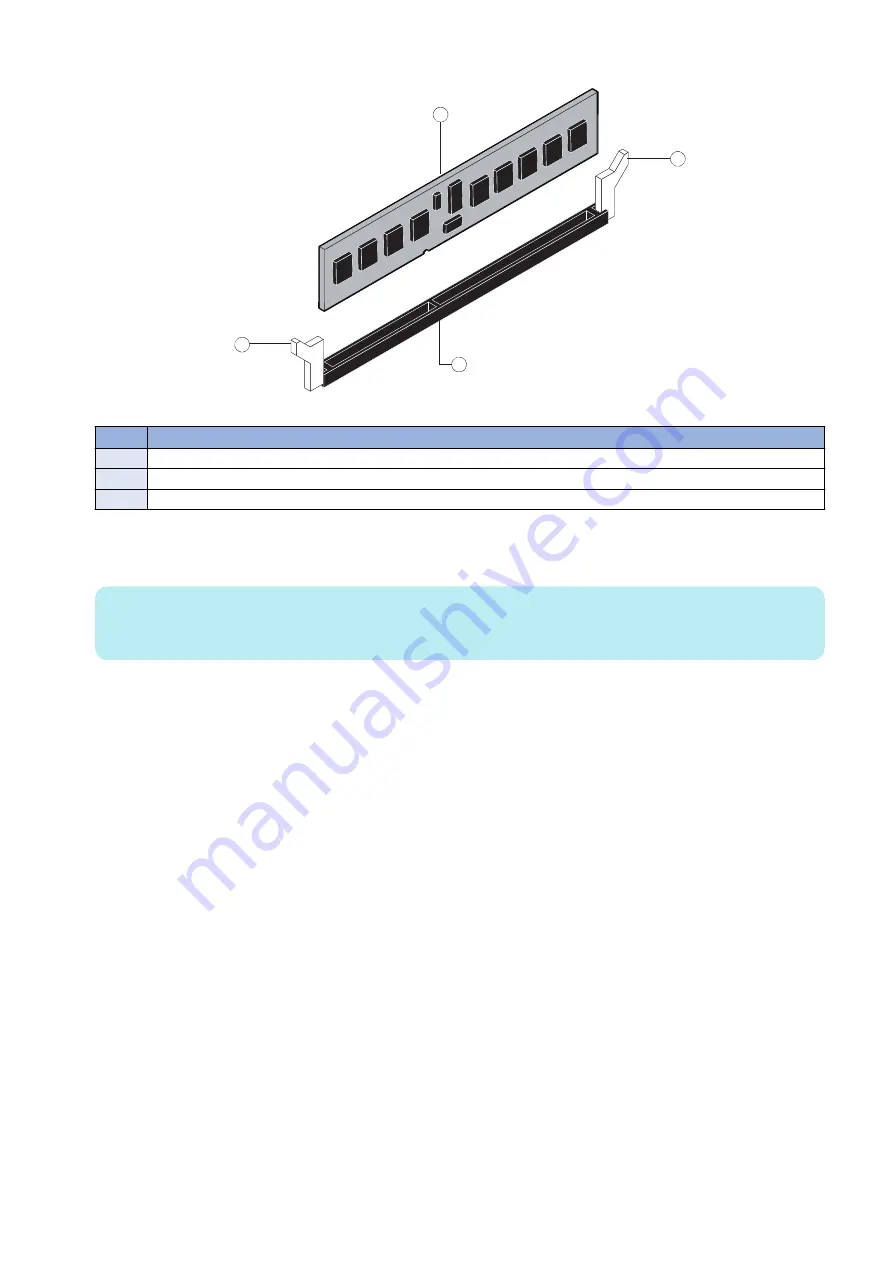
2. To release a DIMM, push outward on the levers on each side of the DIMM (see below figure).
1
2
3
1
Figure 11: Releasing a DIMM
No.
Item
1
Lever
2
DIMM
3
Slot notch
3. Lift the DIMM straight out of the slot.
4. To replace a DIMM, position the DIMM in the DIMM-A0 slot and press the DIMM straight down into the slot, so that the levers
lock the DIMM into place (see above figure).
NOTE:
DIMM fits in the slot only one way. The notch on the bottom of the DIMM should line up with the notch in the slot.
Make sure that the levers close securely around the ends of the DIMM and that the DIMM is fully seated in its slot.
5. Reassemble the imagePASS and verify its functionality(see
“Restoring imagePASS functionality after service” on page
.)
■ Motherboard
This section describes the battery and default jumper settings on the imagePASS motherboard, as well as procedures for
removing and replacing the motherboard.
● Battery
The battery is located on the motherboard. Spare batteries are not provided by your authorized service/support center. If you
must replace the battery, use a 3V manganese dioxide lithium coin cell battery (Panasonic CR2032 or equivalent).
3. REPLACING PARTS
21
Summary of Contents for imagePASS-P2
Page 1: ...Revision 1 1 imagePASS P2 Service Manual ...
Page 6: ...Introduction 1 Introduction 2 Specifications 6 ...
Page 13: ...Using the imagePASS 2 Using the imagePASS 9 ...
Page 16: ...Figure 3b The imagePASS Tools menu 2 Using the imagePASS 11 ...
Page 17: ...REPLACING PARTS 3 Replacing Parts 13 ...
Page 44: ...INSTALLING SYSTEM SOFTWARE 4 Installing System Software 40 ...


