


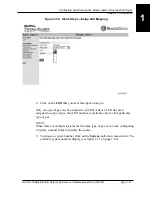

5. When the display shows the next option,
N2 Address
,
press the
Test key
to scroll from
1 through 255
.
NOTE:
When you get close to the number you want, scroll slowly; there is no “back”
button so you will have to start over.
NOTE:
A Combination Alarm that has a 30-Point Master Alarm with three Area Alarm
Modules cannot interface with a building automation system. The Area Alarm
Modules use the same connector that would otherwise connect with the building
automation system.
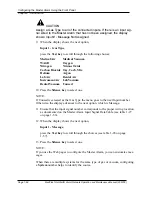
6. Press the
Silence key
to select a number.
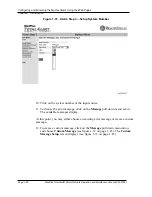
The next option is the
Clear Network
option. Choosing
Yes
for this option,
clears the device list memory from all of the devices on the alarm network.
Immediately after the memory is cleared, the devices automatically re-learn the
device list.
Clear the device list when you add, remove, or replace Area Alarm Modules that
are communicating with the Master Alarm. This option is normally used only
when part of the facility is under construction.
CAUTION:
If you do not clear the alarm network after removing or exchanging
devices, the missing device will display as a lost communication error.
7. When the display shows the next option,
Clear Network
,
press the
Test key
to scroll through the following choices:
No
Yes
8. Press the
Silence key
to select one.
NOTE:
If Yes is chosen, the device list clears, and the value immediately toggles back to
No.
MedPlus TotalAlert® Alarm Network Operation and Maintenance Manual (205728)
Page 1-67
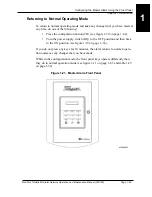
Configuring the Master Alarm Using the Front Panel
Chapter 1: Introduction
1
Summary of Contents for MedPlus TotalAlert
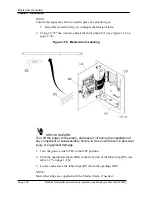
Page 370: ...Schematic Wiring Diagram Typical Local Alarm...
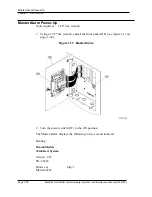
Page 371: ...Schematic Wiring Diagram Typical Master Alarm...
Page 372: ...Schematic Wiring Diagram Typical Master Alarm to Master Alarm...
Page 373: ...Schematic Wiring Diagram Typical Area Alarm...
Page 374: ...Schematic Wiring Diagram Typical Master Alarm to Three Area Alarm...
Page 375: ...Schematic Wiring Diagram Typical Master Alarm to Six Area Alarm Combination...


