


7.2 Configuring an 1133A Communication Port
49
7.2.1
To view COM Port Settings on the 1133A
Press and hold the STATUS/TIME button for three seconds and release when menu item changes
(it should indicate the Serial Number, ROM date and DSP date). Then, continue pressing the
STATUS/TIME button until the port settings are in view. See Section 5.2.5 for details on the
display indications.
7.2.2
Configure Ports – Communication Ports 1 and 2
Configure Communication Ports 1 and 2 in the same manner; they are both identical in structure
in PSCSV, except that each port may be RS-232, RS-485 or Modem. When you configure a port
on the 1133A, you are changing the port attributes, or settings.
Do not change the port settings
on the same port that you are connected. Doing so will disconnect you.
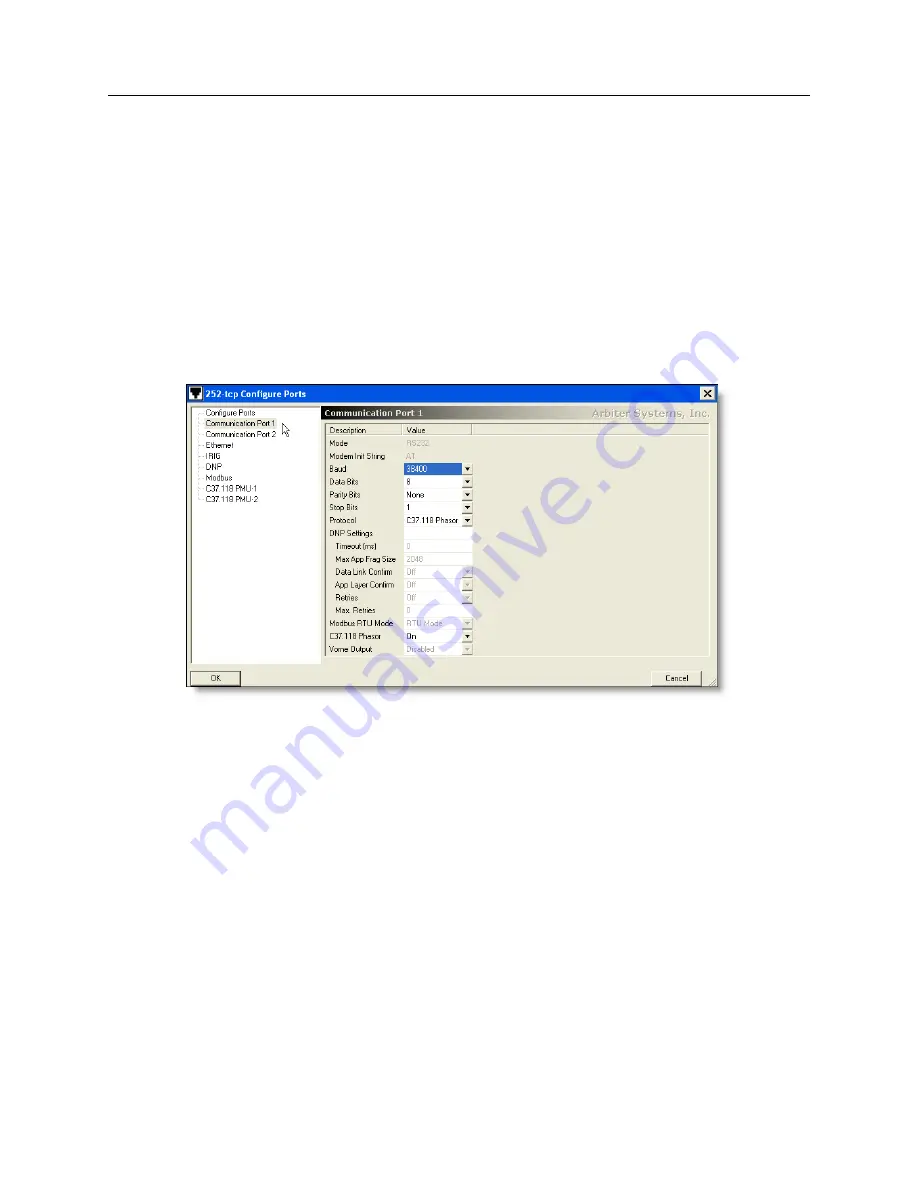
Figure 7.1: Configuring COM1 Settings
1. Make sure that you have permission to configure. If you are not sure, see Section 7.14.
2. Select Connection
>
Configure
>
Communication Ports (Shift + Ctrl + C) or click the
Configure Ports button. Select Communication Port 1 or 2 on the left panel and you should
see a list of port setting Descriptions and Values. See Figure 7.1.
3. Make sure to check the Protocol when first setting up the port settings. In this example, the
Protocol is set to C37.118. Other Protocol selections are None, DNP, Modbus and Vorne.
4. If you are planning to collect Broadcast data using PSCSV, then it would be acceptable to
set Protocol to “None.”
5. Make any other setting changes based on the type of Protocol as the values change with
chosen protocol.
(a) For C37.118 on Communication Port 1 or 2, make sure to check down to switch it to
ON under C37.118 Phasor (at the bottom of the list on the left panel).
(b) For DNP Protocol, make sure to check all of the settings under DNP Settings.


