13-12
IM 253710-01E
Selecting the data format
7.
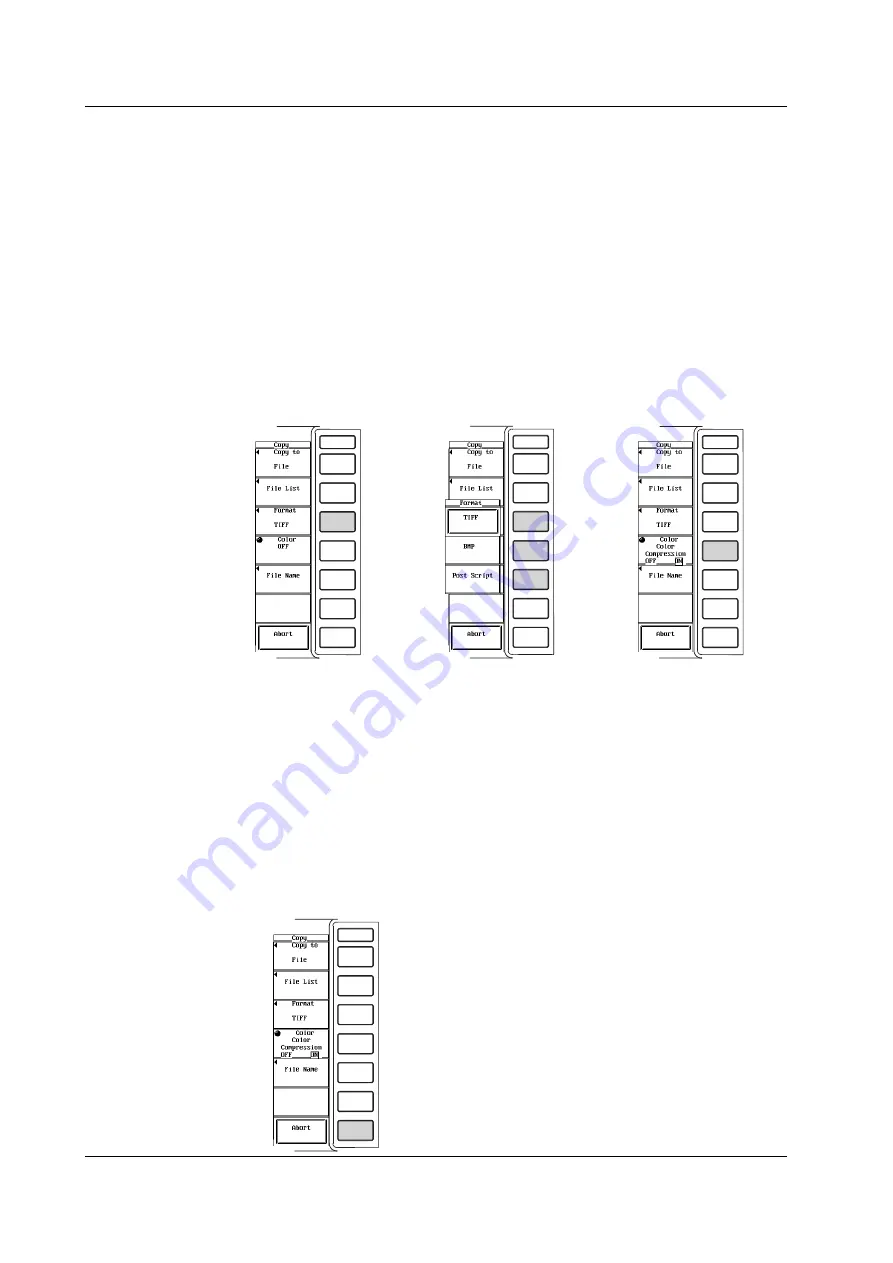
Press the [Format] soft key to display the data format selection menu.
8.
Press one of the keys from [TIFF] to [Post Script] to select the data format.
If you select [TIFF] or [BMP], go to step 9.
If you select [Post Script], go to step 11.
Selecting color output
(This step applies if [TIFF] or [BMP] was selected in step 8.)
9.
Turn the jog shuttle to select from [Color] to [OFF].
If you select [Color] or [Reverse], go to step 10.
If you select [OFF], go to step 11.
Select whether or not to compress the data (ON/OFF)
(This step applies if [Color] was selected in step 9.)
10.
Press the [Compression] soft key to select [ON] or [OFF].
Setting the file name and comment
11.
The procedures are the same as “Setting the file name and comment” in section
12.5.
Printing
12.
Display the screen that you wish to save.
13.
Press the START/STOP key to stop the data acquisition.
Check that the START/STOP indicator is OFF.
14.
Press the COPY key to save the screen image.
Canceling the save operation
15.
Press the [Abort] soft key in the Copy setting menu.
13.4 Saving Screen Images to Floppy Disk and SCSI Device


