Section 3 PREPARATIONS
3-5
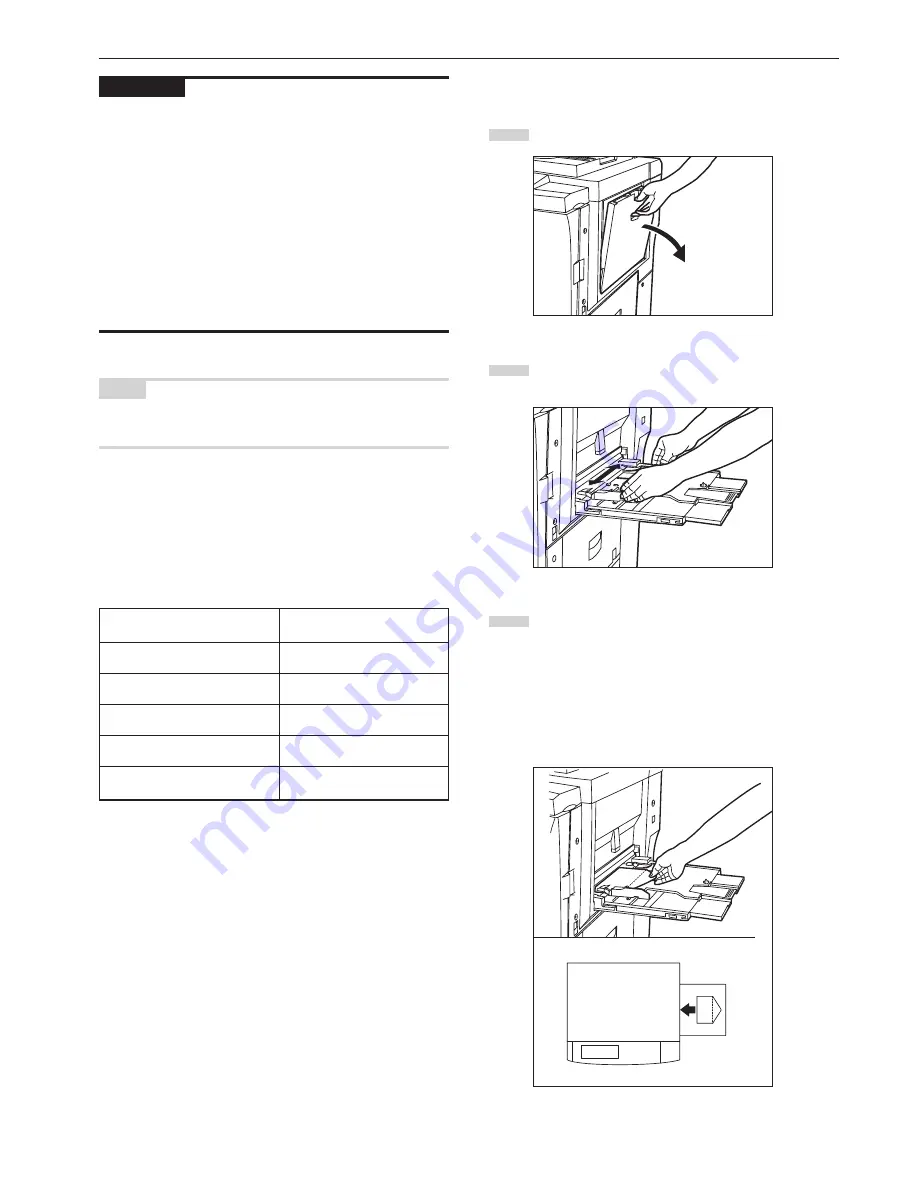
Perform the following procedure when setting envelopes onto the
multi-bypass tray.
1
Open the multi-bypass tray.
2
Adjust the insert guides to fit the width of the envelopes that
are to be set on the multi-bypass tray.
3
Open the flap and, with the flap facing away from the
direction of insertion, slide the envelopes all the way into the
multi-bypass tray, along the insert guides, as far as they will
go.
* If you do not set the envelopes in the proper orientation,
printing may be carried out onto the wrong side or in the
wrong direction.
* To register the size of envelopes that you want to use,
see “Multi-bypass tray paper settings” on page 7-66.
IMPORTANT!
• When you are loading paper onto the multi-bypass tray, make sure
that the side that was facing upward when you opened the package
is still facing upward.
Especially if the leading edge of the paper is curled at all, straighten
it out before setting it on the multi-bypass tray.
• If the paper is curled at all, straighten it out before setting it on the
multi-bypass tray. (The amount of paper curl should be under 10
mm for standard copy paper and 5 mm for postcards.) Depending
upon the paper quality, paper might not be fed properly into the
multi-bypass tray.
• Make sure there are no folds, etc., in the paper you set onto the
multi-bypass tray. Folds, etc., can cause paper jams.
• Make sure the insert guides are fully opened whenever you close
the multi-bypass tray.
NOTE
When you are setting paper onto the multi-bypass tray, make sure
that the side to be copied onto is facing upward.
• Setting envelopes onto the multi-bypass tray
It is possible to print onto envelopes when you are using the optional
printer functions of this machine.
Up to 10 envelopes can be set onto the multi-bypass tray at one time.
Refer to the following chart for the types and sizes of envelopes which
can be used.
Type
Business (Com 10)
ISO DL
ISO C5
YOUKEI2
YOUKEI4
Size
4
1/8
" x 9
1/2
"
110 mm x 220 mm
162 mm x 229 mm
162 mm x 114 mm
234 mm x 105 mm
Содержание DC 2075
Страница 1: ...INSTRUCTION HANDBOOK DC 2075...
Страница 44: ...Section 4 BASIC OPERATION 4 12...
Страница 230: ...Section 8 OPTIONAL EQUIPMENT 8 10...
Страница 261: ......
Страница 263: ...NOTE Deck unit connector output is non ClassII Finisher connector output is non ClassII...


