Operating Instructions
12-108
Customizing the function settings (Continued)
Management settings
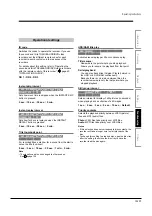
Security folder setting
Sets the security folder to turn on/off.
See
page 55.
Genre setting
HDD
DVD-RAM
DVD-RW
(VR)
DVD-RW
(Video)
DVD-R
(VR)
DVD-VIDEO
VCD
CD
DVD-R
(Video)
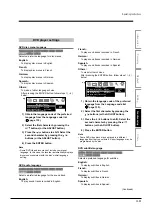
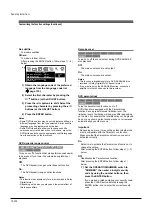
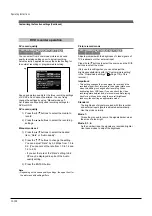
This registers a frequently used genre name onto the
menu. Genre names registered here are displayed in the
“Genre” on the Quick Menu.
1) Press the / buttons to select a position in
the “Current genre list” you want to change,
then press the ENTER button.
A list of genres appears.
2) Press the / buttons to select a genre,
then press the ENTER button.
A list of genre names appears.
You can turn the pages using the button.
3) Press the / buttons to select a genre
name, then press the ENTER button.
The selected genre name replaces the previous
one of the position you selected at step 1).
4) Repeat steps 1) to 3) to register genre names.
5) When genre names are registered, press the
RETURN button to return to the
“Management settings” menu.
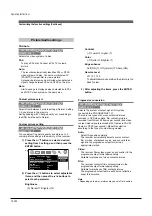
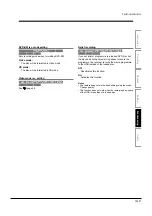
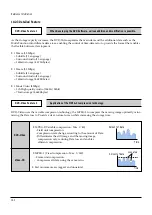
Power saving setting
This sets the front panel display in the standby mode and
the HDD auto stop mode.
Eco. mode
Sets the front panel display to turn on/off in the standby
mode.
Off:
Sets the front panel display to turn on in the standby
mode.
On:
Sets the front panel display to turn off in the standby
mode.
Yes
No
All titles are about to be deleted in
spite of title protected.
Proceed?
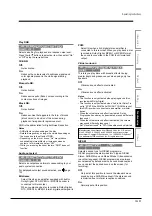
HDD auto stop
HDD
DVD-RAM
DVD-RW
(VR)
DVD-RW
(Video)
DVD-R
(VR)
DVD-VIDEO
VCD
CD
DVD-R
(Video)
Turns on or off a power saving function that stops the
HDD after a certain period of inactivity.
Off:
Turns off an HDD auto stop mode.
On:
Turns HDD drive off after recorder is idle for
approximately 5 minutes.
When the PLAY or REC button is pressed for the HDD
while the HDD drive is turned off, it takes a little longer
time to play or record.
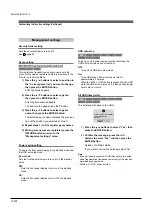
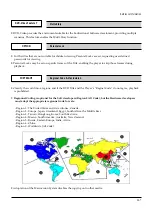
All HDD titles delete
HDD
DVD-RAM
DVD-RW
(VR)
DVD-RW
(Video)
DVD-R
(VR)
DVD-VIDEO
VCD
CD
DVD-R
(Video)
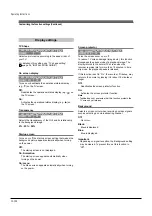
This deletes all the titles on the HDD.
1) Press the / buttons to select “Yes”, then
press the ENTER button.
2) Confirm the message, press the /
buttons to select “Yes” and then press the
ENTER button.
Deletion of all titles starts.
If you want to cancel the deleting, select “No”.
Note
• If you periodically execute All HDD titles delete, this holds
down fragmentation (increased complexity) of the disc and
maintains good operability.
• All titles in “LOCK” will be deleted.
Содержание RD-XS24SB
Страница 10: ...Product Specification 2 4 MEMO ...
Страница 12: ...3 2 Software Update MEMO ...
Страница 19: ...Disassembly and Reaasembly 4 7 4 2 PCB Location Fig 4 7 PCB Location S M P S PCB JACK PCB MAIN PCB ...
Страница 20: ...4 8 Disassembly and Reaasembly MEMO ...
Страница 34: ...Troubleshooting 5 14 MEMO ...
Страница 35: ...6 1 6 Exploded View and Parts List 6 1 Cabinet Assembly Page 6 2 ...
Страница 38: ...Exploded Views and Parts List 6 4 MEMO ...
Страница 50: ...Electrical Parts List 7 12 MEMO ...
Страница 160: ...Operating Instructions 12 110 MEMO ...
Страница 173: ...1 1 SHIBAURA 1 CHOME MINATO KU TOKYO 105 8001 JAPAN ...
Страница 177: ...Block Diagrams 8 3 8 2 Digital Block Diagram ...
Страница 180: ...Block Diagrams 8 6 8 5 AIC01 MSP3417 Block Diagram ...
Страница 181: ...Block Diagrams 8 7 8 6 AIC02 AIC07 MC14052 Block Diagram ...
Страница 182: ...Block Diagrams 8 8 8 7 AIC03 AK5357 Block Diagram ...
Страница 183: ...Block Diagrams 8 9 8 8 AIC04 PCM1753 Block Diagram ...
Страница 184: ...Block Diagrams 8 10 8 9 KIC01 PT6961 Block Diagram ...
Страница 185: ...Block Diagrams 8 11 8 10 MIC01 78F4225 Block Diagram ...
Страница 187: ...Block Diagrams 8 13 8 12 SIC01 MM1647 Block Diagram ...
Страница 188: ...Block Diagrams 8 14 8 13 VIC01 74HC4051 Block Diagram ...
Страница 189: ...Block Diagrams 8 15 8 14 VIC05 MM1568 Block Diagram ...
Страница 190: ...Block Diagrams 8 16 MEMO ...
Страница 191: ...9 Wiring Diagram 9 1 ...
Страница 192: ...Wiring Diagram 9 2 MEMO ...
Страница 193: ...10 1 10 PCB Diagrams 10 1 S M P S PCB 10 2 Main PCB 10 3 Jack PCB 10 4 Key PCB 10 2 10 4 10 6 10 8 ...
Страница 194: ...PCB Diagrams 10 2 10 1 S M P S PCB COMPONENT SIDE ...
Страница 195: ...PCB Diagrams 10 3 CONDUCTOR SIDE ...
Страница 196: ...PCB Diagrams 10 4 10 2 Main PCB COMPONENT SIDE ...
Страница 198: ...PCB Diagrams 10 6 10 3 Jack PCB COMPONENT SIDE ...
Страница 199: ...PCB Diagrams 10 7 CONDUCTOR SIDE ...
Страница 200: ...PCB Diagrams 10 8 10 4 Key PCB COMPONENT SIDE CONDUCTOR SIDE ...
Страница 202: ...Schematic Diagrams 11 2 11 1 S M P S SMPS PCB ...
Страница 203: ...Schematic Diagrams 11 3 11 2 Main Main PCB ...
Страница 204: ...Schematic Diagrams 11 4 11 3 Audio Jack PCB ...
Страница 205: ...Schematic Diagrams 11 5 11 4 Video Jack PCB ...
Страница 206: ...Schematic Diagrams 11 6 11 5 AV switch Scart Jack PCB ...
Страница 207: ...Schematic Diagrams 11 7 11 6 Tuner Front in Connection Jack PCB ...
Страница 208: ...Schematic Diagrams 11 8 11 7 Micom Jack PCB ...
Страница 209: ...Schematic Diagrams 11 9 11 8 Key Key PCB ...
Страница 210: ...Schematic Diagrams 11 10 MEMO ...

