Operating Instructions
12-102
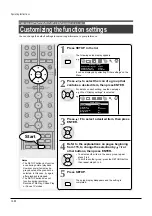
Customizing the function settings (Continued)
Picture/Audio settings
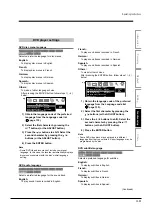
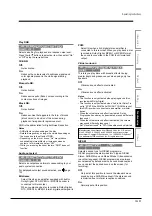
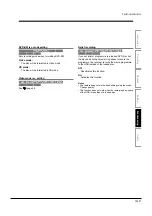
PAL/Auto
HDD
DVD-RAM
DVD-RW
(VR)
DVD-RW
(Video)
DVD-R
(VR)
DVD-VIDEO
VCD
CD
DVD-R
(Video)
Selects the video system of a disc.
PAL:
To play a PAL disc. Connect a PAL TV to view a
picture.
Auto:
The recorder automatically identifies PAL or NTSC
video system of a disc. Connect a multisystem TV
(PAL/NTSC compatible) to view a picture.
A playback picture may be distorted when detected a
signal change between PAL and NTSC on the disc.
Note:
Alert message is displayed when detected both PAL
and NTSC video system on the same disc.
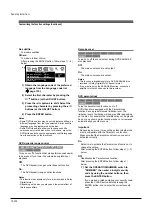
Custom picture select
HDD
DVD-RAM
DVD-RW
(VR)
DVD-RW
(Video)
DVD-R
(VR)
DVD-VIDEO
VCD
CD
DVD-R
(Video)
Selects from between 4 picture settings (Normal, Setting
1-3) you stored in the memory.
During dubbing with “Change quality” set or dubbing to
the HDD it will be set to Normal.
Custom picture setting
HDD
DVD-RAM
DVD-RW
(VR)
DVD-RW
(Video)
DVD-R
(VR)
DVD-VIDEO
VCD
CD
DVD-R
(Video)
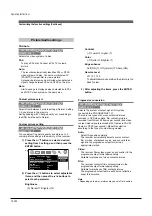
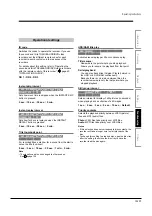
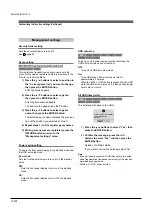
You can adjust fine picture quality and store up to 3
custom picture settings in the memory of the recorder.
1) Press the / button to select a desired
setting from 3 settings, and then press the
ENTER button.
2) Press the / buttons to select adjustable
items, and then press the / buttons to
select each parameter.
Brightness
(0) Darker
⇔
Brighter (14)
e.g.
Custom picture select
Off
Virtual surround
On
NICAM
PAL
PAL/Auto
Normal
Picture/Audio settings
Play DNR
Auto
Progressive conversion
Bitstream
Audio out select
Setting 1
Setting 2
Setting 3
Custom picture setting
Contrast
(–7) Lower
⇔
Higher (7)
Color
(–7) Duller
⇔
Brighter (7)
Edge enhance
Soft (ON)
⇔
Off (normal)
⇔
Sharp (ON)
Gamma Level
off
⇔
1
⇔
2
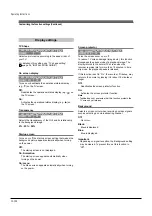
To adjust Gamma Level when the picture is too
dark to view.
3) After adjusting the items, press the ENTER
button.
Progressive conversion
HDD
DVD-RAM
DVD-RW
(VR)
DVD-RW
(Video)
DVD-R
(VR)
DVD-VIDEO
VCD
CD
DVD-R
(Video)
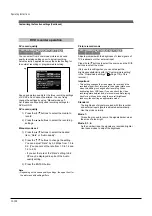
Selects the system of output signal. (Only when
connected to a PROGRESSIVE TV.)
There are two types of source content in pictures
recorded in DVD video discs: film content (pictures
recorded from films at 24 frames per second) and video
content (video signals recorded at 25 frames in PAL (30
frames in NTSC) per second). Make this selection
according to the type of content being viewed.
Auto:
Select this position normally.
The recorder automatically detects source content,
film or video, of playback source, and converts that
signal in the progressive output format in an
appropriate method.
Video:
The recorder filters video signal, and converts it in the
progressive output format appropriately.
Suitable for playback of video content pictures.
Film:
The recorder converts film content pictures in the
progressive output format appropriately.
Suitable for playback of film content pictures.
The progressive output feature will be most effective
under this selection.
Note
• Depending on the disc, pictures may be cut off or doubled.
Содержание RD-XS24SB
Страница 10: ...Product Specification 2 4 MEMO ...
Страница 12: ...3 2 Software Update MEMO ...
Страница 19: ...Disassembly and Reaasembly 4 7 4 2 PCB Location Fig 4 7 PCB Location S M P S PCB JACK PCB MAIN PCB ...
Страница 20: ...4 8 Disassembly and Reaasembly MEMO ...
Страница 34: ...Troubleshooting 5 14 MEMO ...
Страница 35: ...6 1 6 Exploded View and Parts List 6 1 Cabinet Assembly Page 6 2 ...
Страница 38: ...Exploded Views and Parts List 6 4 MEMO ...
Страница 50: ...Electrical Parts List 7 12 MEMO ...
Страница 160: ...Operating Instructions 12 110 MEMO ...
Страница 173: ...1 1 SHIBAURA 1 CHOME MINATO KU TOKYO 105 8001 JAPAN ...
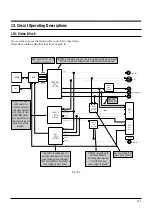
Страница 177: ...Block Diagrams 8 3 8 2 Digital Block Diagram ...
Страница 180: ...Block Diagrams 8 6 8 5 AIC01 MSP3417 Block Diagram ...
Страница 181: ...Block Diagrams 8 7 8 6 AIC02 AIC07 MC14052 Block Diagram ...
Страница 182: ...Block Diagrams 8 8 8 7 AIC03 AK5357 Block Diagram ...
Страница 183: ...Block Diagrams 8 9 8 8 AIC04 PCM1753 Block Diagram ...
Страница 184: ...Block Diagrams 8 10 8 9 KIC01 PT6961 Block Diagram ...
Страница 185: ...Block Diagrams 8 11 8 10 MIC01 78F4225 Block Diagram ...
Страница 187: ...Block Diagrams 8 13 8 12 SIC01 MM1647 Block Diagram ...
Страница 188: ...Block Diagrams 8 14 8 13 VIC01 74HC4051 Block Diagram ...
Страница 189: ...Block Diagrams 8 15 8 14 VIC05 MM1568 Block Diagram ...
Страница 190: ...Block Diagrams 8 16 MEMO ...
Страница 191: ...9 Wiring Diagram 9 1 ...
Страница 192: ...Wiring Diagram 9 2 MEMO ...
Страница 193: ...10 1 10 PCB Diagrams 10 1 S M P S PCB 10 2 Main PCB 10 3 Jack PCB 10 4 Key PCB 10 2 10 4 10 6 10 8 ...
Страница 194: ...PCB Diagrams 10 2 10 1 S M P S PCB COMPONENT SIDE ...
Страница 195: ...PCB Diagrams 10 3 CONDUCTOR SIDE ...
Страница 196: ...PCB Diagrams 10 4 10 2 Main PCB COMPONENT SIDE ...
Страница 198: ...PCB Diagrams 10 6 10 3 Jack PCB COMPONENT SIDE ...
Страница 199: ...PCB Diagrams 10 7 CONDUCTOR SIDE ...
Страница 200: ...PCB Diagrams 10 8 10 4 Key PCB COMPONENT SIDE CONDUCTOR SIDE ...
Страница 202: ...Schematic Diagrams 11 2 11 1 S M P S SMPS PCB ...
Страница 203: ...Schematic Diagrams 11 3 11 2 Main Main PCB ...
Страница 204: ...Schematic Diagrams 11 4 11 3 Audio Jack PCB ...
Страница 205: ...Schematic Diagrams 11 5 11 4 Video Jack PCB ...
Страница 206: ...Schematic Diagrams 11 6 11 5 AV switch Scart Jack PCB ...
Страница 207: ...Schematic Diagrams 11 7 11 6 Tuner Front in Connection Jack PCB ...
Страница 208: ...Schematic Diagrams 11 8 11 7 Micom Jack PCB ...
Страница 209: ...Schematic Diagrams 11 9 11 8 Key Key PCB ...
Страница 210: ...Schematic Diagrams 11 10 MEMO ...

