2
•
Do not use polyethylene glycol containing ointments at
insertion site.
•
Take care when infusing drugs with a high concentration
of alcohol.
•
Allow insertion site to dry completely prior to applying
dressing.
5.
Ensure catheter patency prior to use, including prior to
pressure injection. Do not use syringes smaller than 10 mL
(a fluid filled 1 mL syringe can exceed 300 psi [2068.4 kPa])
to reduce risk of intraluminal leakage or catheter rupture.
Power injector equipment may not prevent over pressurizing
an occluded or partially occluded catheter.
6.
Minimize catheter manipulation throughout procedure to
maintain proper catheter tip position.
Kits/Sets may not contain all accessory components
detailed in these instructions for use. Become familiar with
instructions for individual component(s) before beginning
the procedure.
A Suggested Procedure:
Use sterile technique.
Prep Puncture Site:
1. Prep clean skin with appropriate antiseptic agent.
2. Drape puncture site.
3. Administer local anesthetic per institutional policies and procedures.
SharpsAway II™ Locking Disposal Cup (where provided):
The SharpsAway II
™
Locking Disposal Cup is used for disposal of needles (15 Ga. - 30 Ga.).
•
Using one-handed technique, firmly push needles into disposal cup holes (refer to
Figure 1).
Figure 1
•
Once placed into disposal cup, needles will be automatically secured in place so that
they cannot be reused.
Caution: Do not attempt to remove needles that have been placed into
SharpsAway II Locking Disposal Cup. These needles are secured in place. Damage
may occur to needles if they are forced out of disposal cup.
•
Where provided, a foam SharpsAway® system may be utilized by pushing needles into
foam after use.
Caution: Do not re-use needles after they have been placed into the foam
SharpsAway system. Particulate matter may adhere to needle tip.
Prepare Catheter:
Refer to ARROW
®
VPS
®
instructions for use for additional instructions regarding preparation
of VPS
®
Stylet (where provided).
Trim Catheter:
Note: Trimming catheter may lead to precipitation from the infusion of incompatible
drugs since the exit ports may no longer be staggered.
4. Retract contamination guard.
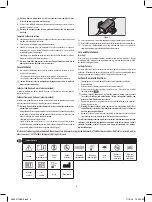
5. The catheter is marked to identify desired amount of catheter to be trimmed and
length of catheter that remains (refer to Figure 2).
Tip
Hub
45
10
50
5
Figure 2
•
First number designates centimeters from hub of catheter.
•
Second number designates centimeters from tip of catheter.
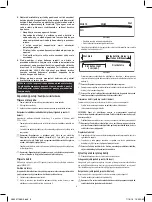
6. Withdraw placement wire through septum to retract wire a minimum of 4 cm behind
catheter cut location (refer to Figure 3).
Tip of wire
Tip of catheter
Length of catheter
to be trimmed
Wire retracted
4 cm (min)
Figure 3
7. Kink proximal end of placement wire at side-port connector to minimize risk of
placement wire exiting distal tip of catheter during insertion (refer to Figure 4).
Figure 4
Warning: Do not attempt to advance placement wire through septum.
8. Cut catheter straight across (90° to catheter cross-section) using trimming device
(where provided) to maintain a blunt tip.
Warning: Do not cut placement wire when trimming catheter to reduce risk of
damage to placement wire, wire fragment, or embolism.
Catheter Trimmer (where provided):
A catheter trimmer is a one-time use trimming device.
•
Insert catheter into hole on trimmer to desired cut location.
•
Depress blade to cut catheter.
NOTE: Resistance when cutting catheter is likely caused by insufficiently retracted
placement wire. Do not use catheter if placement wire has not been retracted.
9. Inspect cut surface for clean cut and no loose material.
Caution: Check that there is no wire in cut catheter segment after trimming.
If there is any evidence that placement wire has been cut or damaged, the
catheter and placement wire should not be used.
Flush Catheter:
10. Flush each lumen with sterile normal saline for injection to establish patency and
prime lumen(s).
11. Clamp or attach Luer-Lock connector(s) to extension line(s) to contain saline within
lumen(s).
Warning: Do not clamp extension line when placement wire is in catheter to
reduce risk of placement wire kinking.
A06041108B0.indb 2
7/18/16 10:33 AM


