Amplifiers
4-44
■
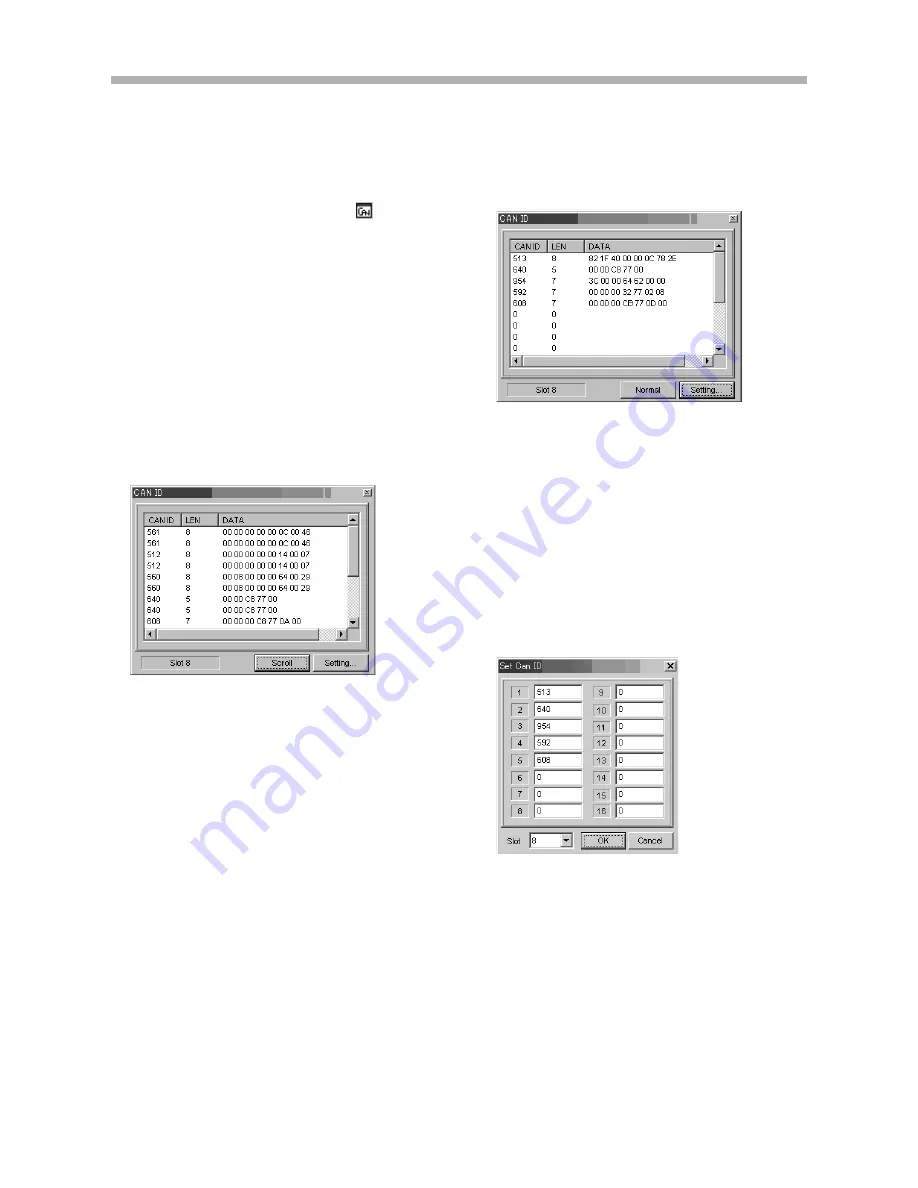
CAN Data Monitor
During recording, the CAN data monitor can monitor and dis-
play the ID, data length and data (hexadecimal). In the channel
selection palette, you specify that the CAN board data is to be
displayed, and click the CAN monitor button
in the tool-
bar. If you do not do this and thereby do not select the data to
be displayed, the following monitor functions have no effect.
In the CAN data monitor, there is a scroll mode that traces and
displays issued packets, and a normal mode that displays data
of a specified ID. To switch modes, you click the
Normal
or
Scroll
button. The label on this button displays the current dis-
play mode.
The CAN ID Dialog Box in Scroll Mode
The dialog box displays the issued packets in sequence.
•
Some data might be dropped depending on the timing at
which the display is refreshed. If you set an appropriate
sampling frequency, however, recorded data will not be
dropped.
•
If a value of 2 seconds or more is set for the Time Scale of
the waveform display, the display will not be refreshed. So
set a value of 1 second or less.
The CAN ID Dialog Box in Normal Mode
The dialog box displays the data for a specified ID.
•
There is no function for extracting (and displaying) each
label's data from the CAN data.
Specifying an ID to Display
To specify an ID to be displayed, click the
Setting
button. You
specify an ID in the dialog box that appears. You can specify up
to 16 IDs to be displayed, which is the maximum number of
recording IDs. Use decimal numbers to specify the IDs, as
shown below. In
Slot
in the lower left of the dialog box, you
specify the slot in which the CAN board is installed.
When you use the Waveform Display window or the Bar Meter
window, for an analog measurement channel the data being
recorded is displayed by waveforms or a bar graph. In such a
case, the waveform or bar graph of a channel that corresponds
to the CAN board displays the input packet data as unchanged
digital data, and does not display the data by data labels. So, the
data cannot be displayed as label signals.
Содержание GX-1
Страница 5: ...iv...
Страница 6: ...Introduction 1 1 Overview 1 3 Features 1 4 About TAFFmat 1 6 Precautions 1 6 Name of Each Part 1 7...
Страница 7: ...1 2...
Страница 15: ...1 10...
Страница 17: ...2 2...
Страница 27: ...2 12...
Страница 28: ...GX Navi 3 1...
Страница 29: ...3 2...
Страница 47: ...3 20...
Страница 67: ...3 40...
Страница 68: ...Technical Information 4 1...
Страница 69: ...4 2...
Страница 79: ...Specifications 4 12 External Dimensions Unit mm 300 85 200...
Страница 80: ...4 13...
Страница 81: ...4 14...
Страница 116: ...Appendix 5 1 In Case of Trouble 5 3 Index 5 4 Supplied Accessories 5 5 Separately Purchasable Options 5 5...
Страница 117: ...5 2...
Страница 121: ...5 6...


