Contents
Overview of basic functions
4
DRH-5700x
Overview of basic functions
1. Read the information on the hard drive (page 11), gen-
eral instructions, safety notes (page 6) and details on
setting up and connecting the unit (see 16).
2. Insert the batteries in the remote control.
3. Press button (1) to switch the unit on/off.
•
LED (2) lights up and DISPLAY (11) switches on,
•
The operating mode appears on the display (PR, HDD,
DVD, DATA DISC, etc.).
4. Press the POWER (65) button on the remote control to
switch the unit to or from standby.
•
The time appears on the DISPLAY (11) in standby mode.
First time setup
When setting up the unit for the first time, follow the instruc-
tions on page 21. The unit is set up according to your living
environment and a channel search starts automatically.
Setup menu
1. Press SETUP (46) to open the general setup menu.
Read the information on page 22.
Television channels
1. Press the HDD button (47).
2. Press the numerical buttons (29) to select the desired
channel/station directly. Press –CH+ (52, 54) to browse
through the channels.
CD/DVD playback
1. Press the OPEN/CLOSE (9) button or (28) on the re-
mote control to open the disc loader (10). The loader
opens forwards, do
not
obstruct the tray while the loader
is opening!
2. Then insert the disc with the labelled side facing up and
close the loader.
3. Playback begins automatically. If playback does not start,
press the PLAY
X
(7, 35) button. See page 30.
HDD playback, jukebox
1. Press HDD (47) to access stored TV channels and then
press MENU (56) to open the title list.
2. Press
W
S
X
T
to select the title and then press PLAY
X
. Playback begins. See page 30.
Jukebox
Data copied from your media (CD, DVD, USB) is stored
in the jukebox.
3. Press JUKEBOX. The file manager opens. This area is
your "private" folder on the HDD.
4. Press
T
,
S
to select [Picture], [Audio] or [Video]. The
data is displayed on the right. See page 35.
Recording onto DVD/hard drive
1. Connect the external device.
2. Set up the input signal.
3. Open the disc loader (10), insert the blank DVD with the
printed side facing up and then close the disc loader
(10).
4. Press the SOURCE button (40) to select the recording
source (PR, AV1, SV1, AV2, SV2, SCART or DV).
5. Press RECORD (6, 55) to start the recording.
6. Press STOP (8, 60) to stop the recording.
Recording onto the HDD: first press the HDD
button (47). Continue with step 5. See page 41.
USB playback
Insert the stick or connect the card reader and then press
the USB button (50). Press several times, if necessary.
Press the PLAY
X
button (7, 35) , the file manager opens
(page 35).
Recording with the timer function
See page 43 (DVD, hard disk).
Recording with the VideoPlus function
See page 45 (DVD, hard disk).
Recording from DV devices
See page 46.
Copying from HDD to DVD
See page 53.
Copying from USB to HDD
See page 40.
Time shift
1. While the television is on, press the PAUSE
II
button
(36) to freeze the picture. See page 42.
General information
appears on the screen if a function is un-
available.
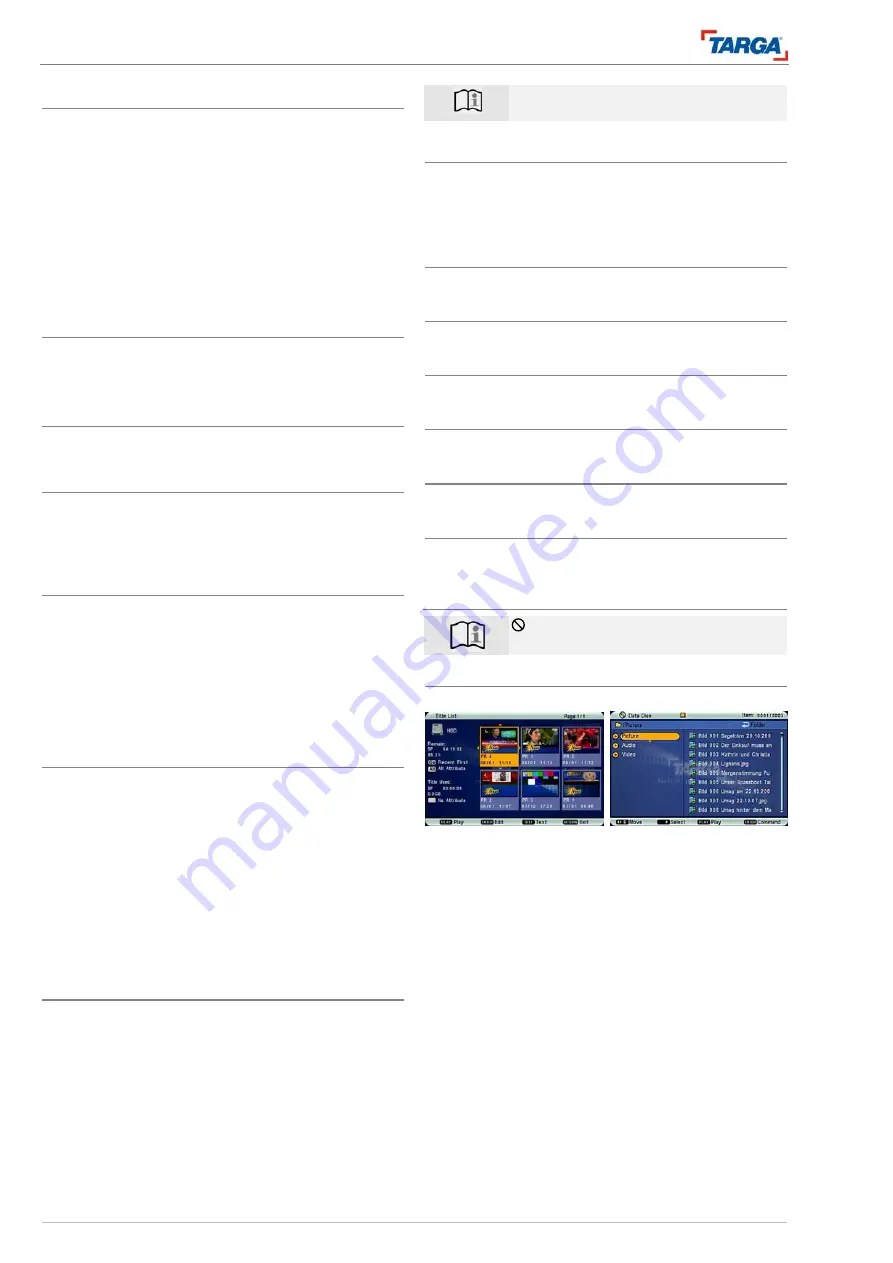
Title list menu, file manager
Title list
File manager
The title list or the file manager opens depending on the da-
ta displayed. Processes for navigation and operation are
similar.
An overview of the media/folder structure appears on the left
side of the window Each individual title/data appears on the
right. All available button functions appear in the bar at the
bottom of the screen.
You can activate different functions.
•
[ENTER] opens editing options such as playback, copy,
protect, edit, play list, sort, attribute, etc.
•
[RETURN] closes the option or the menu.
•
PLAY
X
starts playback.
•
W
S
X
T
navigation buttons for moving the cursor.
•
Title list menu: See page 48.
•
File manager: See page 35.


