


Objet260 User Guide
5 Using Objet Studio
DOC-37004 Rev. E
5-39
Setting Model
Dimensions
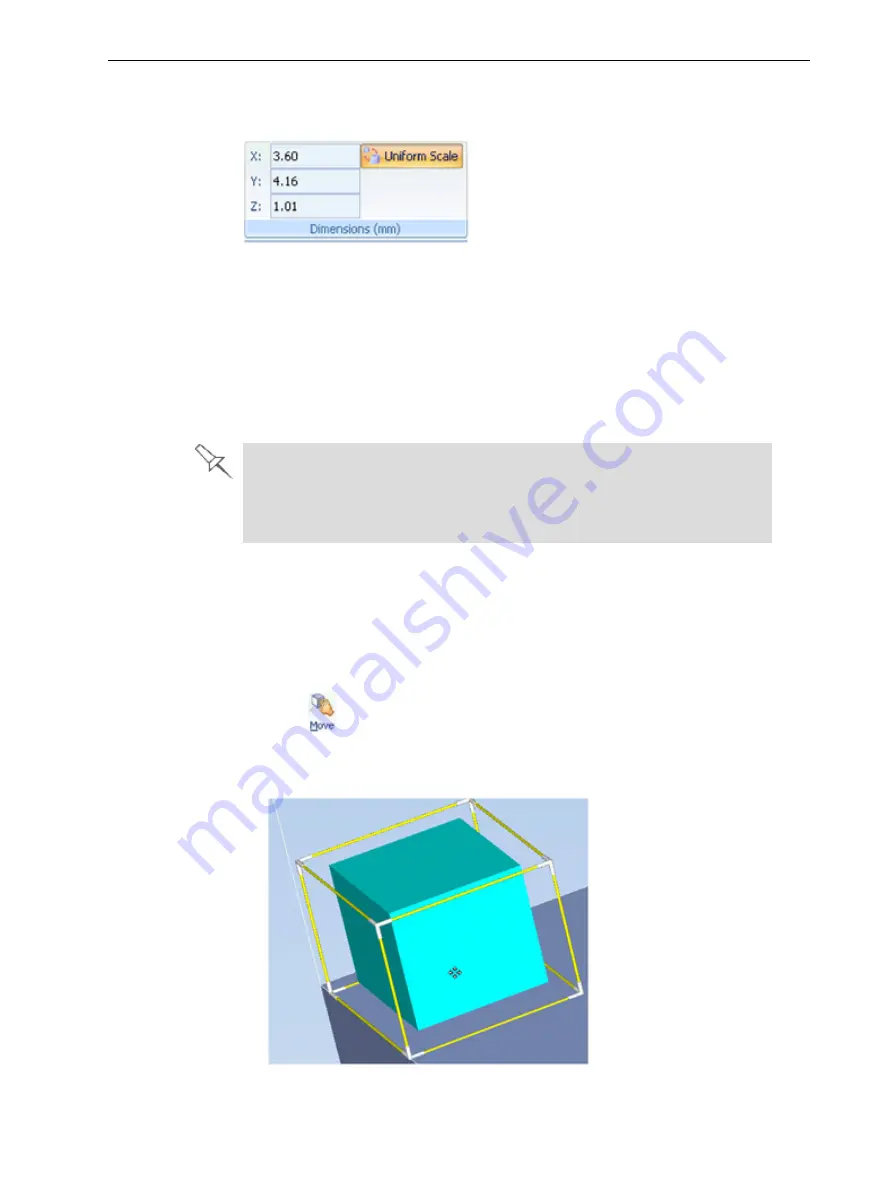
You can change an object’s dimensions by changing its size on the X-, Y-, and
Z-axes, from the
Dimensions
group on the
Model Settings
ribbon.
Figure 5-44
Dimensions
on the
Model Settings
ribbon
• If
Uniform Scale
is enabled, changing the object’s dimension on one axis
affects the other dimensions, proportionately.
• After changing a measurement, press Enter or click in another field in the
Dimensions
group.
Note:
You can change the height of the objects on the build tray only if this is
allowed by the Objet Studio settings (see "Positioning Objects on the Z-Axis" on
page 5-35).
The recommended minimum size for each object on the build tray is
800 mm (on the X-axis) and 130 mm (on the Y-axis). Although smaller
objects can be printed, these minimum dimensions ensure good print
quality.
Repositioning
Objects
You can manually move and rotate an object on the build tray with the arrow
keys, or by dragging it with the mouse.
To manually manipulate an object:
1. Select an object by clicking it on the build tray, or in the model tree pane.
2. Click
on the Model Toolbar, or on the
Model Settings
ribbon.
A frame appears around the object, and the cursor changes to indicate
that the object can be moved.
Figure 5-45 Manually moving an object


