16
Appendix D
SRS Residual Gas Analyzer
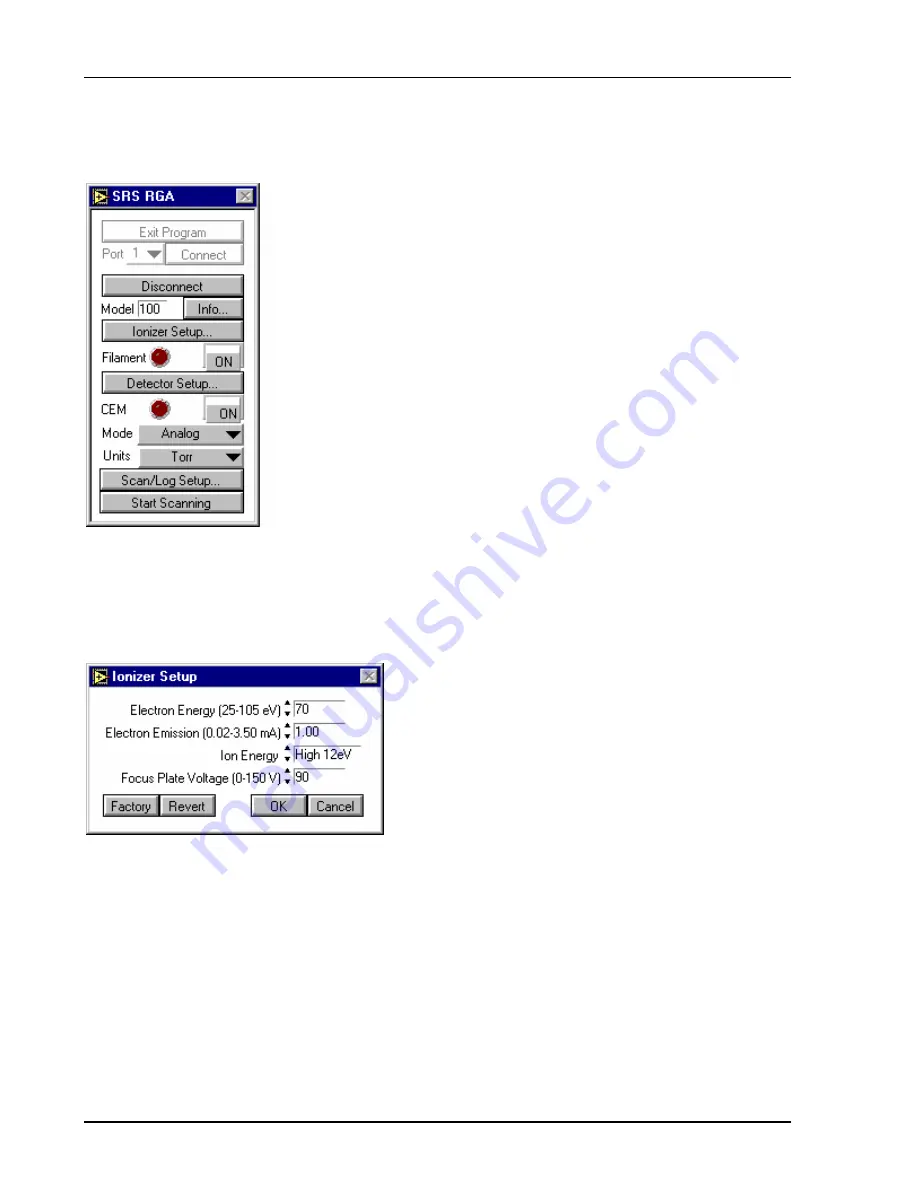
Press the “Connect” button. At this point, the application sends some queries to determine hardware
parameters and to perform initialization tasks. After a few moments, you should see a menu similar to the
next figure:
Notice that the window has re-sized to show new menu choices once RGA communication is established.
Also, you cannot exit the program without first disconnecting from the RGA.
Ionizer Setup Dialog
Click the button labeled “Ionizer Setup …”
This dialog allows you to change parameters relating to the ionizer hardware. Your parameter values may
differ from the figure; the dialog simply displays the last values used. If you should accidentally change
something and you wish to return all values to what the were when you opened the dialog, click the
“Revert” button. If you wish to restore the factory defaults for the ionizer parameters, click the “Factory”
button.
Exit the ionizer setup dialog by clicking the “Cancel” button.
Detector Setup Dialog
Click the button labeled “Detector Setup …”
Содержание RGA100
Страница 4: ...SRS Residual Gas Analyzer iv...
Страница 18: ...xviii Command List SRS Residual Gas Analyzer...
Страница 46: ...2 14 Residual Gas Analysis Basics SRS Residual Gas Analyzer...
Страница 66: ......
Страница 78: ...4 12 Mass Filter Power supply SRS Residual Gas Analyzer...
Страница 104: ......
Страница 107: ...Programming the RGA Head 6 3 SRS Residual Gas Analyzer Error Byte Definitions 6 69...
Страница 216: ...8 26 Quadrupole filter cleaning SRS Residual Gas Analyzer...
Страница 246: ...11 2 SRS Residual Gas Analyzer...
Страница 247: ......
Страница 248: ......
Страница 268: ...Appendix B SRS Residual Gas Analyzer 7...
Страница 310: ...Appendix D SRS Residual Gas Analyzer 25 Select TCP IP and click the Properties button to find the IP address...
Страница 312: ...Appendix D SRS Residual Gas Analyzer 27...
Страница 313: ...28 Appendix D SRS Residual Gas Analyzer...


