background image

133

PRINTING PHOTOS

Adding Backgrounds or Frames

Sometimes a background or frame is needed to set off a printed image and yet you don’t 
want to make changes to the image itself. You can select a background or frame for 
printing.

To add a background or frame:

1

If needed, drag the photo(s) you want to print from the Transporter.

2

Choose Output menu > Print, or click the Print tab.

3

Choose the Background or Frame menu to display the available backgrounds and 

frames.

4

Click each name to preview that background or frame.

5

Depending on the size of your image, you may need to click the tool button and 

select Scale up, Scale Down, or Crop and Fill.

6

Once you made your selection, click Print. 

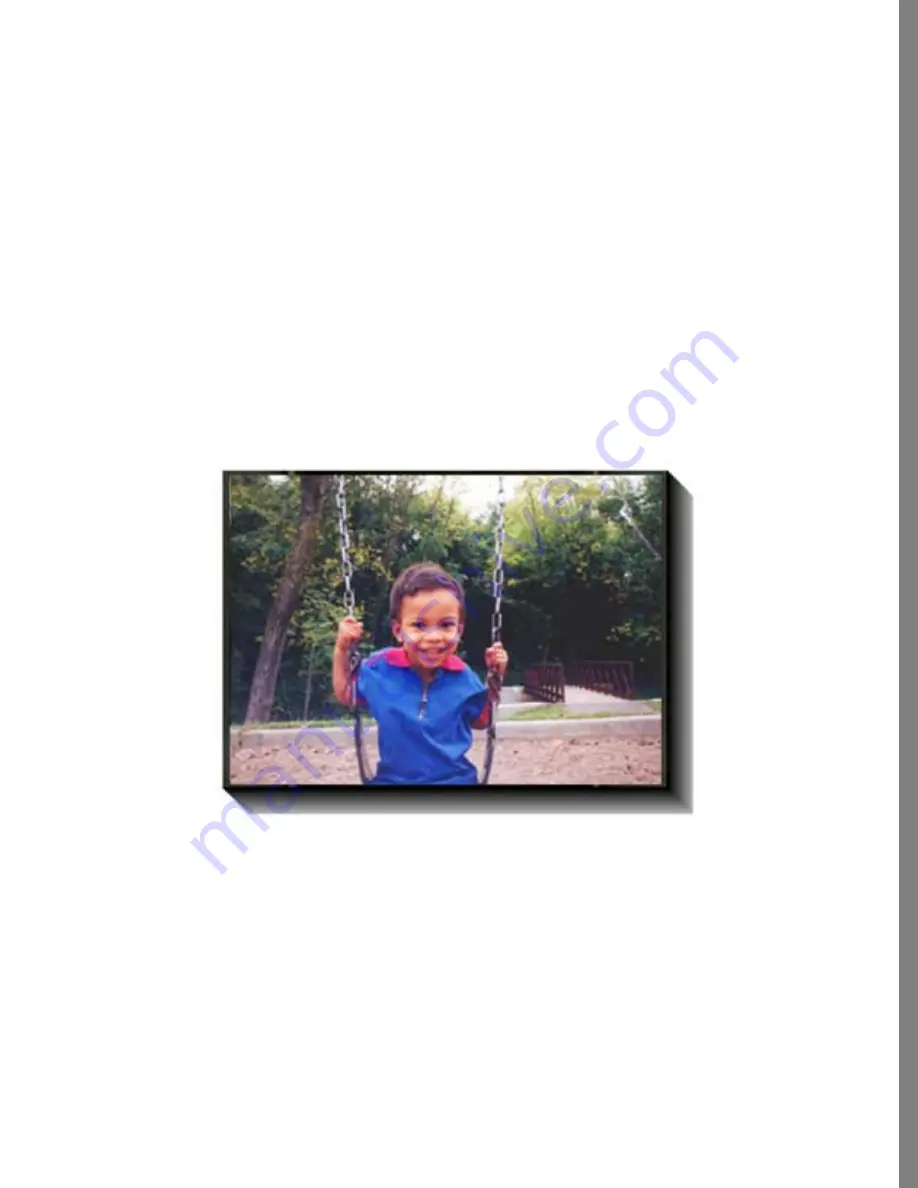
An image. with a frame.

Содержание KAI S PHOTO SOAP 2

Страница 1: ...1 User Guide for Windows and Macintosh...

Страница 2: ...in any form or by any means mechanical electronic magnetic optical chemical manual or otherwise without the prior written consent of ScanSoft Inc 9 Centennial Drive Peabody Massachusetts 01960 Printed...

Страница 3: ...Exporting Photos 27 Expanding Soap 2 s Power Installing Kai s Photo Soap 2 29 Organizing Photos 31 32 Overview 32 Loading Photos 33 Working with Thumbnails 37 Previewing Photos 38 Getting File Informa...

Страница 4: ...86 Having Fun with Masks Composing Images 91 92 Building Compositions 93 Working with Composition Layers 104 Adding Photos to your Composition 105 Adding Text 107 Adding Objects Backgrounds and Edges...

Страница 5: ...8 Loading Special Papers Correctly 129 Printing to Perforated Paper 130 Printing to Special Designs 132 Printing Posters 133 Adding Backgrounds or Frames 134 Scaling Up or Down 135 Rotating Photos to...

Страница 6: ...age 145 Exporting Photos as a PhotoCube Web Page PC only Using Plug Ins 147 Appendix A Tips About Photos 151 152 Tips About Scanning 152 Selecting Photos Appendix B Key Shortcuts 154 154 Using Soap 2...

Страница 7: ...hotos from your computer s hard drive a digital camera a scanner a picture CD or right off the Internet Collect photos correct them then tweak them with special tools and filters Present photos in dig...

Страница 8: ...damaged old photos create fun special effects add clip art text or cartoons to a photo composition create artful collages using multiple photos export photos or albums to use on the WEB prepare photo...

Страница 9: ...print photos in rows and columns or in popular sizes crop and rotate photos You can print in rows or in popular sizes No more messing with scissors to trim a photo to the correct size You can rotate...

Страница 10: ...10 rescue torn faded dusty or wrinkled photos make a photo brighter or sharper You can rescue torn faded dusty or wrinkled photos Adjust the brightness or tweak the contrast to get a better look...

Страница 11: ...D U C I N G S O A P 2 fix red eye or even remove a time date stamp create fun projects working with multiple photos using plug in filters adding clip art text backgrounds or frames Get rid of red eye...

Страница 12: ...u can fix color problems with the new QuickColor tool use Auto Enhance a way to handle some photo color problems one click at a time paint right on a photo and colorize photos for cool effects There a...

Страница 13: ...G S O A P 2 Getting Help You will find the answers to most of your questions within the pages of this User Guide If you need further assistance contact ScanSoft Technical Support on the World Wide We...

Страница 14: ...Refer to Saving your Work on page 24 for more about the ways you can save your work As a rule of thumb if you aren t ready to actually make changes to the photo file you re modifying save your work u...

Страница 15: ...Soap 2 sessions export a desktop of thumbnails as a Web page print selected photos see a quick photo slideshow and prepare photos to send with an e mail Soap 2 Load view and sort your photos in the Or...

Страница 16: ...t on a browser for a great way to pass photos around for review From here you can also print selected photos make slideshows and send selected photos via e mail Look at photos in Contact Sheet view fo...

Страница 17: ...ere you can print your Album or export an Album to use on the Web Display or print photos in cool electronic Albums Click Album then put photos into Albums or Frames to be presented printed e mailed o...

Страница 18: ...in Soap 2 s Clean area Drag a photo from the Transporter Click Clean to make changes to a photo Zoom in or out Adjust brush size Fix or enhance parts of your photo using the Soap 2 tools Move the phot...

Страница 19: ...hat looks best to YOU Each time you click a variation new variations are displayed Click until you get the look you like best Hit Reset anytime you want to start over And be sure to try the Auto Enhan...

Страница 20: ...text and generally have fun From here you can print export for use on the Web In the Compose area you can build a picture Drop photos on the canvas Resize or stretch them Rotate elements Add some tex...

Страница 21: ...ll of wallet sized photos It s like having a darkroom in your very own home The Print area gives you a preview of what you re printing and offers lots of great ways to print your photos Click to rotat...

Страница 22: ...using Albums drop one onto the Soap area to fix or enhance it Refer to Fixing Photos on page 48 for more about fixing photos drop one or more onto the Soap composition area to get creative Refer to C...

Страница 23: ...Undo an action Choose Edit menu Undo It s just that easy Refer to Using the Tools on page 50 for information about using the Soap 2 Eraser to make detailed changes to effects you re brushing onto part...

Страница 24: ...e Output Revert to Saved To save a desktop arrangement from the Organize area Choose Output menu Save Desktop Use the Output menu Save Desktop As command to save it using a new file name without overw...

Страница 25: ...t s that easy Add some text and your Album is complete Refer to Using Albums on page 114 for more information about using Albums Advanced users can even create their own Album styles to use with Kai s...

Страница 26: ...t creations Refer to Sending Photos with E mail on page 139 for more information about sending photos as e mail attachments Exporting a Desktop as a Web page Here s a quick way to make your own person...

Страница 27: ...ointly by Intel Corporation and MetaCreations Corporation It enables delivery and viewing of scalable 3D graphics To view a 3D PhotoCube you and those with whom you share the PhotoCube need to install...

Страница 28: ...g ins let you load or export photos like loading photos from your digital camera scanner or using special printing options Free Plug ins Soap 2 includes three of the four famous Kai s Power Tools 3 KP...

Страница 29: ...olor 24 preferred Windows Installation To install Soap 2 on a Windows computer 1 Launch Windows 2 Insert the Kai s Photo Soap 2 CD ROM into your computer s CD ROM drive The Install Soap 2 dialog appea...

Страница 30: ...e color on your monitor so that it matches the output of your printer That way when a photo looks great on your monitor you can print it without disappointment Working with photos requires a lot of me...

Страница 31: ...ction Overview 32 Loading Photos 32 Working with Thumbnails 33 Previewing Photos 37 Getting File Information 38 Removing Image Files from your Computer 39 Switching Views 40 Working with Desktops 41 S...

Страница 32: ...ing a contact sheet or viewing them on a Soap 2 lightbox move photos around and pile them into groups look at full size previews of one or more photos sort through photos organizing them by name date...

Страница 33: ...work with thumbnails you must select them In Soap 2 you can select one or more thumbnails You can move thumbnails around on the desktop to arrange them just as you might photos on your dining room tab...

Страница 34: ...Select All All thumbnails are selected To deselect all the thumbnails Choose Edit menu Select None Click on the desktop Changing Thumbnail Size To change the size of a thumbnail 1 Select the thumbnai...

Страница 35: ...Moving Thumbnails To move thumbnails 1 Select one or more thumbnail 2 Hold the mouse button down and drag the thumbnail s to a new location Drag thumbnails to a new location You can rotate or rename...

Страница 36: ...opied into memory A duplicate of the thumbnail appears on the desktop Grouping Thumbnails You can move thumbnails around on the desktop or pile them up into groups just like you might do on your dinin...

Страница 37: ...dit menu Delete Thumbnail or press the del delete key The selected thumbnail s are deleted from the Soap 2 Organize area To delete all the thumbnails 1 Choose Edit menu Select All 2 Choose Edit menu D...

Страница 38: ...iption or keywords you may have entered as well as any personal rating a beauty assignment you may have made Refer to Sorting and Searching for Photos on page 43 for more about using file information...

Страница 39: ...photo files from your computer 1 Select one or more thumbnails 2 Press Shift Delete Soap 2 displays a warning that you are about to remove photo file s and place them into the trash 3 Click on the ch...

Страница 40: ...hotos you ve loaded into Soap 2 are displayed When you have thumbnails selected only those that are selected are displayed in the new view making it easy to select a small group of photos to review To...

Страница 41: ...tos as thumbnail representations These thumbnail arrangements are referred to as desktops If you reopen Soap 2 the last desktop you worked with is the desktop you see Refer to Deleting Thumbnails on p...

Страница 42: ...he Organize area choose Output menu Save Desktop Use the Output menu Save Desktop As command to save it using a new file name without overwriting an existing file Once you have the right photos loaded...

Страница 43: ...generated file names when acquiring photos from a digital camera Enter a group name or rename files before entering file information or you might overwrite information entered for another photo of the...

Страница 44: ...d photos in the middle of the desktop after sorting them 2 Choose Sort menu Alphanumeric Sorting Photos by Date You can sort photos by the date when it was last modified That this is not necessarily t...

Страница 45: ...Photos by Height When you sort by size Soap 2 reorganizes thumbnails on your desktop according to thumbnail height To sort by height 1 Optional Select one or more thumbnails 2 Choose Sort menu Height...

Страница 46: ...sort You can group all of your night time photos seaside shots or any other group of photos that has a common color theme To sort by color 1 Optional Select one or more thumbnails 2 Choose Sort menu...

Страница 47: ...47 O R G A N I Z I N G P H O T O S To sort by description 1 Optional Select one or more thumbnails 2 Choose Sort menu Description...

Страница 48: ...ix 50 Using the Tools 50 Rotating and Sizing Photos 54 Adjusting Color 59 Automatically Fixing Photos 71 Healing Flaws 74 Smoothing and Sharpening 77 Removing Red Eye 79 Removing date and time stamps...

Страница 49: ...e Building Compositions on page 92 explains how to compose or enhance a photo you can add clipart edges or text and you can layer multiple images Fix or enhance photos in the Clean area Drag a photo f...

Страница 50: ...ating photos scanning photos and selecting which types of problem photos can be fixed refer to Appendix A Using the Tools Soap 2 contains powerful tools that are easy to use They can affect all or par...

Страница 51: ...ke a brush Magic Mask Refer to Using the Magic Mask on page 53 for more instructions Icicle Hardens edges of effects Water Drop Softens edges of effects Zoom Refer to Zooming and Panning on page 53 fo...

Страница 52: ...of the image To change the brush mode 1 Choose Image menu Effects and select an effect 2 Click the Brush to display the brush tools Use the middle slider in the Brush Effects Painter to set the flow...

Страница 53: ...he downward pointing triangle and choose Magic Mask If desired you can change the range for feathering blending You can also change the range of colors selected Zooming and Panning You can zoom in on...

Страница 54: ...ow Rotating and Sizing Photos Rotating Photos To rotate a photo 1 If needed drag the file you want to use from the Transporter 2 Choose Image menu Crop and Rotate 3 To freely rotate the photo click th...

Страница 55: ...rees or quarter turns 90 degrees Continue clicking until the picture is back in its original position You can also click the 90 degree rotate tool Flipping Photos To flip a photo 1 If needed drag the...

Страница 56: ...a higher resolution printer you may want to experiment and see whether a higher resolution will work any better When you resize a photo you are changing the file size Depending on the options you sel...

Страница 57: ...pi setting based on your intended use 3 If needed you can check Resample then manually set the dimensions and resolution Check Constrain proportions to avoid distorting the image The image size dialog...

Страница 58: ...you took at the pet parade has pooch looking small in comparison to all that background Crop away that extra background to bring out the subject of your photo Old photos often have white borders You...

Страница 59: ...contrast hue or saturation directly or use QuickColor Refer to Quick Color on page 72 for more information Adjusting Brightness Sometimes a photo appears too bright or too dim Soap 2 allows you to adj...

Страница 60: ...ss of a photo or you can adjust the lightness and darkness in a particular section For example only the area under the tree is too dark To lighten or darken a complete photo Move the Brightness slider...

Страница 61: ...se Image menu Effects and choose Color and Tone 3 Click the Brush icon to display the brush tools 4 Adjust the Brightness slider and the opacity slider 5 Select a paintbrush to apply the effect or the...

Страница 62: ...n use the Water Drop to soften the area where you changed color of the foliage to make the effect look more natural or you can use the Icicle to sharpen the edge where you applied an effect You can al...

Страница 63: ...To sharpen with the Icicle 1 Select the Icicle tool from the workspace 2 Adjust the brush size 3 Brush the effect area you want to sharpen You can brush over an area to sharpen the edges more Sharpen...

Страница 64: ...f needed drag a photo from the Transporter 2 Choose Image menu Effects and choose Color and Tone 3 Adjust the Brightness slider and the opacity slider to affect the entire image 4 To change part of th...

Страница 65: ...ose to each other a photo may appear to have higher contrast than a photo in which other tones separate the extreme colors Increasing or Decreasing the Contrast Each of the images shown below could be...

Страница 66: ...eeded Using Paintbrushes and Erasers Sometimes you only want to change the contrast in a certain area of the image You can do that using the paintbrushes and erasers To use paintbrushes and erasers 1...

Страница 67: ...color range by flattening them towards grey The final shade depends on the average brightness of the image To flatten towards grey 1 If needed drag a photo from the Transporter 2 Choose Image menu Eff...

Страница 68: ...image Or you may want to change the color of Benjamin s car or Brian s hair Experiment and discover some out of this world effects Then use Undo if you don t like the results How Color Effects Your Ph...

Страница 69: ...h colors you can shift the colors for the entire image or you can brush over an area to select it and localize your changes to that area Both methods can be used for either subtle or wild results To s...

Страница 70: ...ust the color of the entire image 4 To change specific areas click the brush to display the brush tools 5 Select a brush tool and brush the areas where you want to intensify the color Shifting specifi...

Страница 71: ...lection 1 Use the Magic Mask to select the area you want to change Press Shift click to add to your selection if needed 2 Then follow the steps listed above Automatically Fixing Photos Soap 2 allows y...

Страница 72: ...the larger image next to your original image 3 If needed click downward triangles located above the sets of left side and right side choices then choose the setting you want to adjust such as Brightn...

Страница 73: ...m and Pan tools if needed to view a specific area of the photo 3 Choose Image menu QuickColor 4 Click Auto Enhance then move the Pan control around to see changes to other parts of the image 5 Adjust...

Страница 74: ...b can make your subject s eyes look red or unnatural Healing Blemishes Wrinkles Dust Spots Rips and Creases Soap 2 s Heal tool fixes small imperfections almost magically With a click or a stroke of a...

Страница 75: ...ar following the path of the blemish 5 Use small or large brush strokes as needed depending on the type of flaw you are correcting You can also adjust the effect range using the slider at the bottom o...

Страница 76: ...to locate the area you want to use as a source for cloning Select an area that matches the texture surrounding the healed area You can clone this texture and apply it over the healed area to blend it...

Страница 77: ...wedding photo to draw attention to the bride and groom Or you may want to sharpen Mom s face Using the Smooth Effect To use the smooth effect 1 If needed drag a photo from the Transporter 2 Choose Im...

Страница 78: ...eded click the brush icon to display the brush tools Otherwise the effect is applied to the entire image The slider on the bottom adjusts the Smoothness The slider on the side adjusts the opacity Usin...

Страница 79: ...ise the effect is applied to the entire image The slider on the bottom adjusts the sharpness The slider on the side adjusts the opacity Removing Red Eye Red eye occurs when the light source typically...

Страница 80: ...e tool will correct that red area too You may need to zoom in to apply the tool on a smaller area Choosing an Eye Color To choose an eye color 1 If needed drag a photo from the Transporter 2 Choose Im...

Страница 81: ...k and drag following the path of the date and time stamp 5 If needed touch up an area using the Clone tool Duplicating photo elements You could you use Soap 2 to make Uncle Robert into twins You can d...

Страница 82: ...ond photo and replace your face in the first photo To clone between images 1 If needed drag a photo from the Transporter 2 Choose Image menu Effects and select Clone The Clone control displays a copy...

Страница 83: ...select Clone The Clone controller displays a copy of your image You can zoom or pan the image as needed to locate the area you want to use as a source for cloning 3 Click the color wheel then use the...

Страница 84: ...hoto When you first use a color it is wet and you can use the Hand tool to smudge it or you can sharpen it soften it or set the transparency When you click a new color the first color dries and can t...

Страница 85: ...ct Image menu Effects and Colorize 3 If desired drag the Saturation slider to desaturate the color and turn the image into black and white 4 Drag the Hue slider to cycle through the colors and select...

Страница 86: ...un Masking can also mean selecting a specific area in which to apply an effect That is how it is used in Soap 2 Unlike putting on a shirt to avoid a sunburn Soap 2 uses masks to determine where to app...

Страница 87: ...Brush Size on page 52 to learn how to adjust the size of a tool To create a mask 1 If needed drag a photo from the Transporter 2 Select an effect from the shortcut tray or the Image menu 3 Select one...

Страница 88: ...asked and then invert the mask For example if you want to change everything except Cousin Linda s face it may be easier to mask her face To invert a mask 1 If needed drag a photo from the Transporter...

Страница 89: ...hoose Effects menu Blur to blur the inverted mask Saving and Reusing Masks You can assign frequently reused masks to the mask tray Then you can replace or remove masks easily Cousin Linda Stored masks...

Страница 90: ...mask to the next available spot Click each in use spot in the tray to view the current stored masks Click the Plus button to assign a mask to a spot in the mask tray Click the Minus button or Alt cli...

Страница 91: ...Working with Composition Layers 93 Adding Photos to your Composition 104 Adding Text 105 Adding Objects Backgrounds and Edges 107 Adding Shadows to Layers 108 Adding a Canvas Color 110 Saving and Relo...

Страница 92: ...Choose Edit menu Canvas Size 2 Enter the desired Width 3 Enter the desired Height 4 Select between Inches and Pixels Soap 2 displays the dimensions of your canvas in the whichever format you select 5...

Страница 93: ...on you ll drop photo text and objects onto the canvas Each piece you add to your composition is a separate layer Layers work like this Imagine each part of your composition is drawn on a piece of clea...

Страница 94: ...the right piece of clip art to finish the piece These three separate layers combine to create a great keepsake for everyone who attended the reunion Because each element in your composition is a separ...

Страница 95: ...r you want to control To display the layer tray Click the layer icon at the upper left outside corner of the composition window Selecting a Layer To select a layer Click on a layer in the composition...

Страница 96: ...Click on a layer and hold the mouse button down 3 Drag the cursor upward to increase layer size or downward to decrease layer size As you move the cursor you ll see the layer change size 4 Release the...

Страница 97: ...layer and hold the mouse button down 3 Drag the cursor right to rotate the layer clockwise Drag the cursor left to rotate the layer counter clockwise As you move the cursor you ll see the layer rotat...

Страница 98: ...to See Adding a Canvas Color on page 110 for information about selecting a Canvas Color Refer to See Adding Objects Backgrounds and Edges on page 107 for information about using a Background Image Al...

Страница 99: ...rushes to soften the edges of a Composit Library Objects layer Try it on Composit Library Edges You can even create some very cool cutout effects To adjust transparency for an entire layer 1 Select a...

Страница 100: ...rency slider left to make the entire layer more transparent faded out Move it right to make the layer less transparent more pronounced To adjust transparency for part of a layer 1 Select a layer 2 Cho...

Страница 101: ...Move the layer until the part you want to keep is positioned correctly For example if your composition has a picture of aman and the layer you are placing on top is a picture of a cat you could posit...

Страница 102: ...ing below it in the list Imagine again that each layer of your composition is drawn on a piece of clear plastic or film As you lay each piece of film in place you build a composition When you get a fe...

Страница 103: ...een hidden 1 Select the layer either click on it or select it in the Layers tray 2 Click the space where the eye should be next to the selected layer When the eye is open the layer displays Soap 2 als...

Страница 104: ...Compose area Your work in the Clean area is reflected in your composition To add a photo to a composition Drag a photo from the Transporter onto the canvas A photo is added to your composition as a ne...

Страница 105: ...ext an even neater look Later you can rotate size or stretch text as you would any other layer Refer to Sizing and Stretching a Layer on page 96 for information about sizing and stretching Refer to Ro...

Страница 106: ...B medium or C small to set the text size relative to the size of your composition You can select one text size for each text layer You can adjust text size later by resize the text layer as you would...

Страница 107: ...ou dress up your image with a wide variety of backgrounds edge textures and objects including cool professionally drawn cartoons You can drop any of these into your compositions By using objects backg...

Страница 108: ...ize a layer on page 96 for more about resizing a layer to To rotate a layer on page 97 for more about rotating a layer Refer to To stretch a layer on page 96 for information on how to stretch the laye...

Страница 109: ...Shadows to turn on a shadow for the selected layer Selecting Cast Shadows is the same as clicking Drop Shadow box next to that layer in the Layers tray 5 Use the Magnitude slider to adjust the shadow...

Страница 110: ...d to match to the shadow settings for this layer 5 Click the X in the upper right corner to close the Transparency control Adding a Canvas Color You can add a solid Canvas Color to your composition Pi...

Страница 111: ...composition If you even think that you might want to work on your composition again be sure to save it in a layered format as a composition After you ve saved it as a composition you can build an ima...

Страница 112: ...112 If Soap 2 can t find a layer because one of the photo files you added to the composition was moved you can find it or opt to have Soap 2 ignore the missing layer...

Страница 113: ...113 C O M P O S I N G I M A G E S...

Страница 114: ...What s in this Section Overview 115 Selecting an Album Style 116 Changing the Layout 117 Loading Photos 118 Adding Text 119 Printing Albums 121 Saving Albums 122 Viewing Album Information 122 Sharing...

Страница 115: ...for too long Unlike regular albums Soap 2 albums don t gather dust in your closet and you can e mail them or post them on the Web as HTML files You can also easily change the album style or layout at...

Страница 116: ...yles are displayed at one time Albums have a cover title page and you can resize the photos Frames typically say frame in the title only have a left right page spread and you can t resize photos To cr...

Страница 117: ...erent album and frame styles 3 If needed click Next or Previous to view additional styles 4 Click Select once you ve chosen a new style Your photos and captions are loaded into the new style however y...

Страница 118: ...photo from the transporter to a photo placeholder Larger images are automatically resized to fit into the available space and you can drag them to adjust their size if desired Small images can t be e...

Страница 119: ...esired Arranging Photos and Captions You can adjust the location and size of photos and captions in albums However you can t adjust photo sizes when using a frame style To adjust photos or captions 1...

Страница 120: ...Edit menu Insert Page Set Navigating Through an Album Typically you will use the Next and Previous buttons to browse through the pages of the album To navigate through an album Click the Next or Prev...

Страница 121: ...e pictures and text stored in an album You can choose whether to print the artwork used to create the book and pages To print an album 1 If needed change to the Album view and load the album you want...

Страница 122: ...143 for details Viewing Album Information To view album information Choose Edit menu Album Info Sharing Albums Once you ve created an album why not share it with friends and family It s easy with Soap...

Страница 123: ...Kodak Papers 128 Loading Special Papers Correctly 128 Printing to Perforated Paper 129 Printing to Special Designs 130 Printing Posters 132 Adding Backgrounds or Frames 133 Scaling Up or Down 134 Rot...

Страница 124: ...124 Previewing 138 Page Setup 138...

Страница 125: ...ar sizes You can even create a poster or iron on transfer using Soap 2 and your standard color printer When printing from Soap 2 you can do the following Print a single photo Print rows and columns Pr...

Страница 126: ...print a single photo To print a single photo 1 If needed drag the photo you want to print from the Transporter 2 Choose Output menu Print or click the Print tab 3 Choose Print Options 1 Up 4 If neede...

Страница 127: ...you are printing one or many images To print in rows and columns 1 If needed drag the photo s you want to print from the Transporter 2 Choose Output menu Print or click the Print tab 3 Choose a selec...

Страница 128: ...regular paper and hold it up to the special paper to make sure the margins and image areas line up correctly If they don t you will need to adjust them before printing to the special paper Refer to P...

Страница 129: ...to your special paper to check that the print settings are set up correctly for your printer If your special paper is a non standard size cut a piece of regular paper to match Each printer is aligned...

Страница 130: ...s you want to print from the Transporter 2 Choose Output menu Print or click the Print tab 3 Select Special Designs and choose a design from the menu 4 Preview the different designs by selecting each...

Страница 131: ...the problem To adjust print settings 1 Click the 123 button if needed to display the print settings 2 Adjust the following values as needed Change the values for the left right top and bottom margins...

Страница 132: ...poster 1 If needed drag the photo you want to print from the Transporter 2 Choose Output menu Print or click the Print tab 3 Choose Poster 4 If needed click the tool button and select Scale up Scale D...

Страница 133: ...d or frame 1 If needed drag the photo s you want to print from the Transporter 2 Choose Output menu Print or click the Print tab 3 Choose the Background or Frame menu to display the available backgrou...

Страница 134: ...to s you want to print from the Transporter 2 Choose Output menu Print or click the Print tab 3 If needed click the Tool button to display the scale settings Select Scale Up to fit if your photo is sm...

Страница 135: ...If you have ever seen an iron on transfer you ll remember that the image was the reverse of how it appeared once it was ironed on To make an iron on image you need to create a reverse of the final ima...

Страница 136: ...r or both if desired 3 Click the ABC button next to the header or footer option and type the text you want to use 4 If needed click Page Number Starting At and type a number Printing Filenames Dates a...

Страница 137: ...rgins you want to use based on the type of paper you are using However margin settings are not available for special papers To set margins 1 Choose Output menu Print or click the Print tab 2 If needed...

Страница 138: ...ttings Page Setup Sometimes you need to change the page setup in order to specify a specific paper size or paper tray on your printer or to specify the orientation Orientation means that the image sho...

Страница 139: ...ned package When friends relatives or clients get a PhotoMailer they just double click the PhotoMailer attachment and click through a cool slideshow of your most recent creations There are differences...

Страница 140: ...n your computer monitor 5 Choose whether or not you want your recipient to be able to extract photos from the PhotoMailer you send them If you are concerned about copyright restrictions or would prefe...

Страница 141: ...mbnail arrangements Lightbox and Desktop views An HTML export of Lightbox view is friendlier to older browsers Use Lightbox view if you expect the people who will look at your Web pages will be using...

Страница 142: ...at when clicked opens an e mail dialog complete with your e mail address If you want people to be able to contact you easily include a return address An example of a complete email address is lynn hom...

Страница 143: ...b Page on page 141 for information about exporting a desktop of images for viewing on the Web 2 Select a Resolution Size The resolution setting determines how large photos are displayed when viewed at...

Страница 144: ...ght have another Web page or site where photos can be viewed If you enter a URL link Soap 2 creates a link on the HTML page that allows viewers to click directly to the location you specify An example...

Страница 145: ...maller files download more quickly Remember you can always drop the resulting HTML page on your browser to preview image quality at a selected resolution A rule of thumb is to use the smallest resolut...

Страница 146: ...ename or the data folder already exists It is important that you not rename the data folder The HTML page makes reference to the image files and some code that is contained inside the data folder The...

Страница 147: ...ng images from external devices like digital cameras or scanners Filter which manipulate dots or pixels in an image creating permutations and cool changes and Export special printing capabilities Some...

Страница 148: ...tiles welds twirls feedback vortexes and stereo noise Compact Filters Offer camera lens effects Lens f x Filters Input and Output Plug ins Some plug ins let you load photos directly from an external d...

Страница 149: ...S I N G P L U G I N S Free KPT 3 Plug ins with Soap 2 Soap 2 includes some famous Kai s Power Tools 3 KPT 3 filter plug ins Texture Explorer Planar Tile and Twirl An example of a KPT 3 plug in filter...

Страница 150: ...the mask tray if you want to work with it at a later time Refer to Using the Tools on page 50 for more about brushing on effects Sources for More Information Plug ins are such fun and add so much powe...

Страница 151: ...k the camera s manual your picture will be out of focus When shooting with a flash you should stay within the same range as the flash which is typically between five and 12 feet from your subject If y...

Страница 152: ...Even though your scanner may scan images at a very high resolution it isn t always necessary to do so You ll get the best results when you select a resolution based on how you plan to use the photo Sc...

Страница 153: ...and slight focus problems also can be easily fixed Low contrast images very dark or very light are more difficult to correct because of a lack of image information available to Soap 2 The image on th...

Страница 154: ...154 Using Soap 2 Keyboard Shortcuts APPENDIX B KEY SHORTCUTS...

Страница 155: ...lded Card Card 8 1 2 x 11 Landscape 43263 White Post Card Card 8 1 2 x 11 Portrait 13265 Half Fold Card Card 8 1 2 x 11 Portrait 13266 Quarter Fold Card Card 8 1 2 x 11 Portrait 13267 Full Size Card S...

Страница 156: ...it Blur An effect that you can apply to an entire photo or to parts of a photo using the brush tools Brightness Brightness describes a color s lightness or darkness regardless of its hue or saturatio...

Страница 157: ...zontally and vertically to adjust or crop the size of an image are known as crop bars Cross hair Crosshairs are the target used to select the area you wish to work in Place the crosshairs on the desir...

Страница 158: ...he different types of computer files that can be imported or exported Global Global changes are adjustments that effect entire image When you use an effect if you don t select a brush tool the change...

Страница 159: ...an build it up Pages Albums contain pages that display images and text Palette A controller for effects It contains sliders drawers and other controls for working with an effect Pan tool The pan tool...

Страница 160: ...Smooth effect blurs part or all of an image and is useful for reducing wrinkles or other unwanted details Thumbnails Thumbnails are small views of images that can positioned sized or sorted Tinting Ti...

Страница 161: ...softens edges of masks It softens the transition between masked and unmasked areas of the photo Web See Internet Zoom Use Zoom to change the degree of magnification while viewing a photo You can pan...

Страница 162: ...9 arranging photos and captions 119 changing layouts 117 creating 116 exporting as Web pages 143 keystrokes 120 loading photos 118 navigating 120 printing 121 saving 122 sharing 122 Web pages 27 align...

Страница 163: ...23 undoing 23 changing 97 album styles 117 colors 68 73 contrast 65 contrast in areas 66 height and width 97 layer order 102 layouts of albums 117 masks 53 orientation 55 photo size 56 viewing size t...

Страница 164: ...healing 74 76 creating albums 116 asks 87 black and white photos 68 compositions 92 creating Albums overview 17 creating photos guidelines 151 152 creating twins 81 83 Crop and Fill definition 134 cro...

Страница 165: ...e stamp 80 exit Soap 2 14 expanding Soap 2 27 147 experimenting with color 19 export plug ins 147 exporting photos e mail 26 exposure problems 71 extra tools 27 eye color choosing 80 correcting red 79...

Страница 166: ...towards 67 grouping by color 46 by description 46 thumbnails 36 guidelines for taking photos 151 152 H Hand tool 61 hard edges with brush 52 headlines adding 105 Heal effect 75 healing flaws 74 76 fuz...

Страница 167: ...transparency 98 what you can do with 94 Layers palette 95 99 layout albums 117 119 Lens f x Filters 28 148 letter head 125 light and time of day 151 Lightbox view 40 lighten colors 70 complete photos...

Страница 168: ...ting intense colors 70 N name sorting photos by 44 natural media 148 navigating albums 120 navigation keyboard 154 keystrokes 120 new features 12 Next button 120 Nudge values printing 131 nudging prin...

Страница 169: ...84 placing 104 printing 126 printing file data 136 printing mulitple 136 problems that can be fixed 50 resizing 57 revitalizing 73 rotating 54 rotating for print 135 scaling for print 134 scrolling wh...

Страница 170: ...ges 23 reducing photos 134 reflections of eyes 79 81 reloading a desktop 43 removable media 32 removing color cast 73 date and time stamps 80 photos 104 red eye 80 thumbnails 37 replacing from another...

Страница 171: ...s masking tools 53 print 131 138 shade matching colors 83 Shadow controls 109 shadows 108 110 adjusting 64 conforming 110 contrast 66 sharing albums 122 photos 115 139 sharpen effect 78 sharpen effect...

Страница 172: ...Texture Explorer 27 148 texture tools 148 thumbnails changing size 34 deleting 37 duplicating 36 grouping 36 inverting selection 34 moving 35 36 previewing 37 selecting 33 38 TIFF exporting 148 time...

Страница 173: ...Lightbox 40 vortexes 148 W wallet photos 125 Water Drop 62 Water Drop tool 51 Web pages 143 desktop 141 exporting 143 scanning for 152 Web site 147 albums 122 what s new 12 wide rips 75 width 97 sort...

Отзывы: