


15.1
Installing a MEM
15-14
501610 Rev. 07-01-19
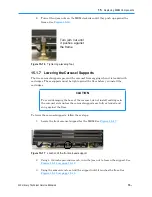
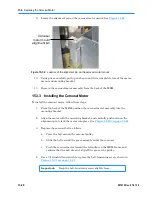
4.
Turn the carousel support another 1/4 to 1/8 of a turn until it is tight against the
floor.
5.
Using a 3/4-inch open-end wrench, turn the jam nut clockwise until it pushes up
against the frame. See
Figure 15-16 on page 15-13
.
6.
Repeat steps 2
–
5 to extend the back carousel support.
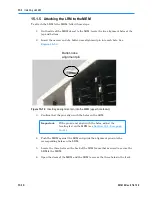
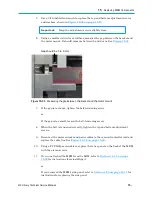
15.1.8 Installing the Side Panel on the MEM
To install the side panel on the MEM, follow these steps:
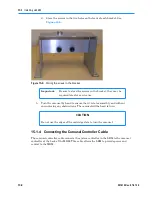
1.
Holding the side panel with both hands, place the panel next to the MEM and
carefully lower it until the hooks on the panel engage with the corresponding
slots on the
MEM’s
frame.
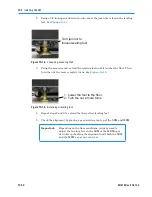
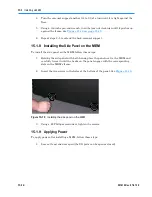
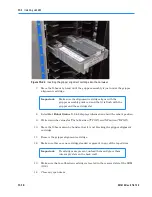
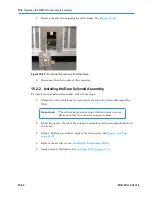
2.
Insert the two screws in the holes at the bottom of the panel. See
Figure 15-18
.
Figure 15-18
Installing the side panel on the MEM
3.
Using a #2 Phillips screwdriver, tighten the screws.
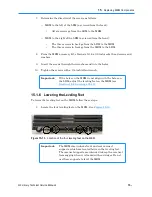
15.1.9 Applying Power
To apply power after installing a MEM, follow these steps:
1.
Leave at least one door open (the I/O ports can be open or closed).
Содержание XLS Series
Страница 1: ...Technical Service Manual Document No 501610 Rev 07 01 19 XLS Series of Tape Libraries...
Страница 14: ...501610 Rev 07 01 19 Part I Before You Begin Notes...
Страница 58: ...3 7 Cabling for the Carousel Controller 3 12 501610 Rev 07 01 19 Notes...
Страница 70: ...4 5 Inspecting and Cleaning the Gripper and Barcode Reader 4 12 501610 Rev 07 01 19 Notes...
Страница 72: ...Part II Using X Link 501610 Rev 07 01 19 Notes...
Страница 96: ...Part III Replacing FRUs 501610 Rev 07 01 19 Notes...
Страница 136: ...8 8 Bringing a Tape Drive Online 8 14 501610 Rev 07 01 19 Notes...
Страница 158: ...9 5 Replacing a Drive Bay with a Cartridge Bay 9 22 501610 Rev 07 01 19 Notes...
Страница 172: ...10 3 Replacing a Side Panel 10 14 501610 Rev 07 01 19 Notes...
Страница 186: ...11 3 Upgrading a Fixed Port Assembly to an I O Port 11 14 501610 Rev 07 01 19 Notes...
Страница 226: ...12 6 Replacing the Y Motor Assembly 12 40 501610 Rev 07 01 19 Notes...
Страница 324: ...Part IV Reference 501610 Rev 07 01 19 Notes...
Страница 352: ...B 2 Packing the XLS B 14 501610 Rev 07 01 19 Notes...
Страница 354: ...C 2 501610 Rev 07 01 19 Notes...
Страница 360: ...Glossary GL 6 501610 Rev 07 01 19 Notes...
Страница 366: ...Index IN 6 501610 Rev 07 01 19 Notes...


