


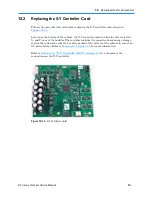
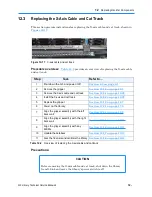


12.4
Replacing the X-Motor Assembly
12-22
501610 Rev. 07-01-19
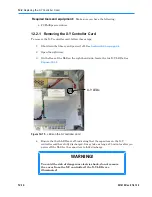
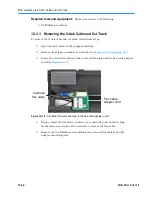
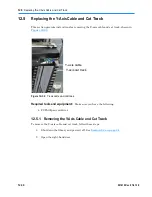
12.3.2 Installing the X-Axis Cable and Cat Track
To install the X-axis cable and cat track, follow these steps:
1.
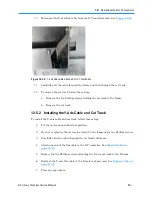
Put the cat track and cable into position.
2.
If you are replacing the cat track, attach it to the X-beam using two Phillips
screws.
3.
Carefully slide the cable through the cat track.
4.
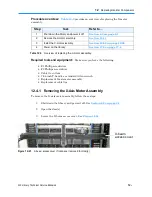
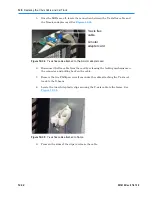
Lift up on the X-beam cover and slide the cable under the cover.
5.
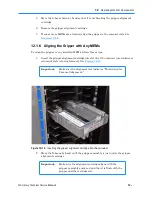
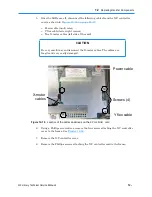
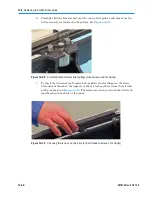
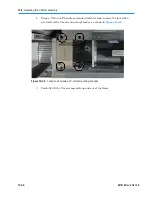
Attach one end of the flex cable to the X-motor adapter. See
Figure 12-19
.
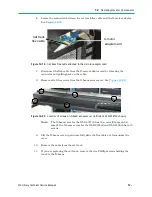
6.
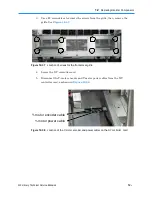
Replace the screws that hold the X-beam cover in place.
Note:
The X-beam cover for the XLS-832700 has 12 screws (6 large and 6
small); the X-beam covers for the XLS-820500 and XLS-812300 have 10
screws.
7.
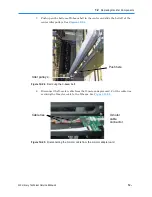
Replace the two screws attaching the cat track flex cable to the mounting bracket
for the flex cable adapter.
8.
Reattach the flex cable to the adapter card. See
Figure 12-18 on page 12-20
.
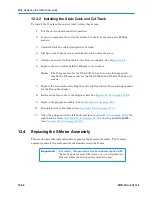
9.
Replace the gripper assembly. See
Section 12.1.3 on page 12-7
.
10.
Reapply power to the library. See
Section 17.4.1 on page 17-8
.
11.
Align the gripper with the left back wall (see
Section 12.1.4 on page 12-9
), the
right back wall (see
Section 12.1.5 on page 12-10
), and any installed MEMs
(see
Section 12.1.6 on page 12-11
).
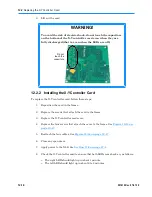
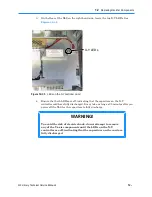
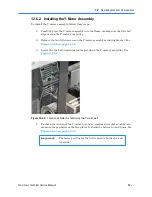
12.4
Replacing the X-Motor Assembly
This section provides instructions for replacing the X-motor assembly. The X-motor
assembly controls the movement of the handler along the X-axis.
Important:
For clarity, this procedure has been photographed with
the front panel removed. However, you can replace the
X-motor while the front panel remains in place.
Содержание XLS Series
Страница 1: ...Technical Service Manual Document No 501610 Rev 07 01 19 XLS Series of Tape Libraries...
Страница 14: ...501610 Rev 07 01 19 Part I Before You Begin Notes...
Страница 58: ...3 7 Cabling for the Carousel Controller 3 12 501610 Rev 07 01 19 Notes...
Страница 70: ...4 5 Inspecting and Cleaning the Gripper and Barcode Reader 4 12 501610 Rev 07 01 19 Notes...
Страница 72: ...Part II Using X Link 501610 Rev 07 01 19 Notes...
Страница 96: ...Part III Replacing FRUs 501610 Rev 07 01 19 Notes...
Страница 136: ...8 8 Bringing a Tape Drive Online 8 14 501610 Rev 07 01 19 Notes...
Страница 158: ...9 5 Replacing a Drive Bay with a Cartridge Bay 9 22 501610 Rev 07 01 19 Notes...
Страница 172: ...10 3 Replacing a Side Panel 10 14 501610 Rev 07 01 19 Notes...
Страница 186: ...11 3 Upgrading a Fixed Port Assembly to an I O Port 11 14 501610 Rev 07 01 19 Notes...
Страница 226: ...12 6 Replacing the Y Motor Assembly 12 40 501610 Rev 07 01 19 Notes...
Страница 324: ...Part IV Reference 501610 Rev 07 01 19 Notes...
Страница 352: ...B 2 Packing the XLS B 14 501610 Rev 07 01 19 Notes...
Страница 354: ...C 2 501610 Rev 07 01 19 Notes...
Страница 360: ...Glossary GL 6 501610 Rev 07 01 19 Notes...
Страница 366: ...Index IN 6 501610 Rev 07 01 19 Notes...


