
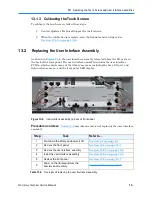


13.2
Replacing the User Interface Assembly
13-6
501610 Rev. 07-01-19
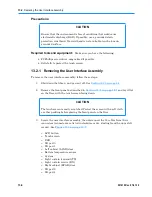
Precautions:
CAUTION
Ensure that the environment is free of conditions that could cause
electrostatic discharge (ESD). If possible, use a grounded static
protection wristband. If a wristband is not available, touch a known
grounded surface.
Required tools and equipment:
Make sure you have the following:
•
#2 Phillips screwdriver. magnetized if possible
•
Soft cloth to protect the touch screen
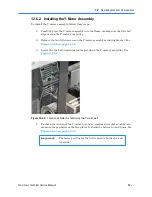
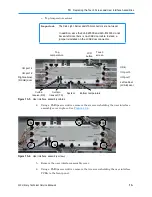
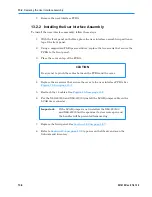
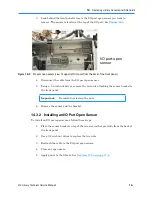
13.2.1 Removing the User Interface Assembly
To remove the user interface assembly, follow these steps:
1.
Shut down the library and power it off. See
Section 6.2 on page 6-1
.
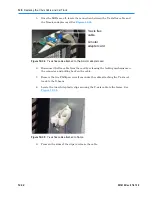
2.
Remove the front panel as described in
Section 10.1 on page 10-1
and lay it flat
on the floor, with the touch screen facing down.
CAUTION
The touch screen is easily scratched. Protect the screen with a soft cloth
or other padding before placing the front panel on the floor.
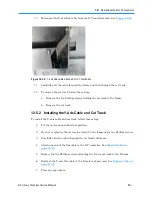
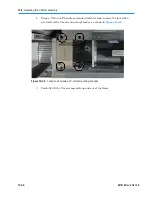
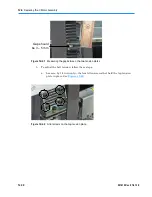
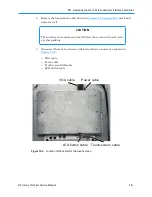
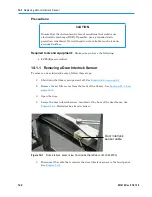
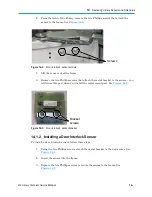
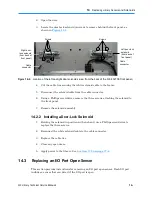
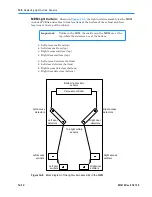
3.
Locate the user interface assembly, then disconnect the 14 cables from their
connectors (connectors are listed in clockwise order, starting from the upper left
corner). See
Figure 13-5 on page 13-7
.
–
LCD button
–
Touch screen
–
USB
–
I/O port 3
–
I/O port 1
–
Left cabinet (LCAB) door
–
Bottom temperature sensor
–
System
–
Light curtain transmit (TX)
–
Light curtain receive (RX)
–
Right cabinet (RCAB) door
–
I/O port 2
–
I/O port 4
Содержание XLS Series
Страница 1: ...Technical Service Manual Document No 501610 Rev 07 01 19 XLS Series of Tape Libraries...
Страница 14: ...501610 Rev 07 01 19 Part I Before You Begin Notes...
Страница 58: ...3 7 Cabling for the Carousel Controller 3 12 501610 Rev 07 01 19 Notes...
Страница 70: ...4 5 Inspecting and Cleaning the Gripper and Barcode Reader 4 12 501610 Rev 07 01 19 Notes...
Страница 72: ...Part II Using X Link 501610 Rev 07 01 19 Notes...
Страница 96: ...Part III Replacing FRUs 501610 Rev 07 01 19 Notes...
Страница 136: ...8 8 Bringing a Tape Drive Online 8 14 501610 Rev 07 01 19 Notes...
Страница 158: ...9 5 Replacing a Drive Bay with a Cartridge Bay 9 22 501610 Rev 07 01 19 Notes...
Страница 172: ...10 3 Replacing a Side Panel 10 14 501610 Rev 07 01 19 Notes...
Страница 186: ...11 3 Upgrading a Fixed Port Assembly to an I O Port 11 14 501610 Rev 07 01 19 Notes...
Страница 226: ...12 6 Replacing the Y Motor Assembly 12 40 501610 Rev 07 01 19 Notes...
Страница 324: ...Part IV Reference 501610 Rev 07 01 19 Notes...
Страница 352: ...B 2 Packing the XLS B 14 501610 Rev 07 01 19 Notes...
Страница 354: ...C 2 501610 Rev 07 01 19 Notes...
Страница 360: ...Glossary GL 6 501610 Rev 07 01 19 Notes...
Страница 366: ...Index IN 6 501610 Rev 07 01 19 Notes...


