


15
Replacing MEM Components
XLS Library Technical Service Manual
15-
253
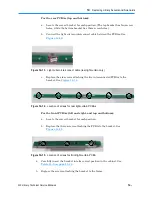
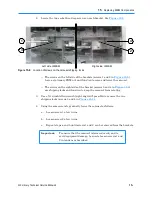
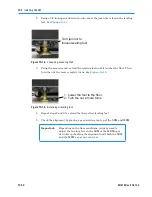
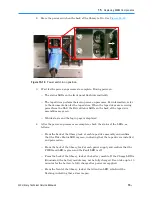
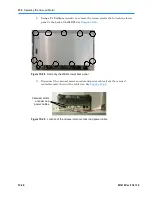
6. Turn all four jam nuts on the MEM clockwise until they push up against the
frame. See
Figure 15-16
.
Turn jam nut until
it pushes against
the frame
Figure 15-16
Tightening a leveling foot
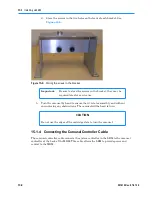
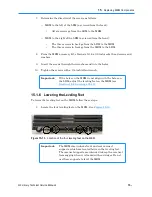
15.1.7 Lowering the Carousel Supports
The two carousel supports prevent the carousel from sagging when it is loaded with
cartridges. These supports must be tight against the floor before you install the
cartridges.
CAUTION
To avoid damaging the base of the carousel, do not install cartridges in
the carousel slots unless the carousel supports are fully extended and
snug against the floor.
To lower the carousel supports, follow these steps:
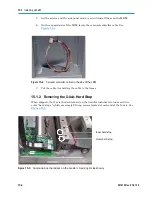
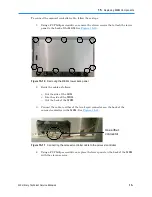
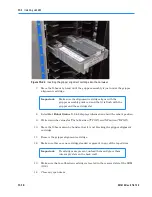
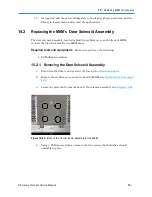
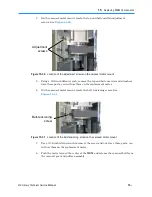
1. Locate the front carousel support for the MEM. See
Figure 15-17
.
Figure 15-17
Location of the front carousel support
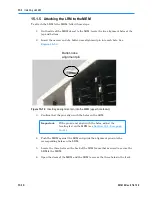
2. Using a 3/4-inch open-end wrench, turn the jam nut to loosen the support. See
Figure 15-14 on page 15-12
.
3. Using the same wrench, extend the support until it touches the floor. See
Figure 15-15 on page 15-12
.
Содержание XLS Series
Страница 1: ...Technical Service Manual Document No 501610 Rev 07 01 19 XLS Series of Tape Libraries...
Страница 14: ...501610 Rev 07 01 19 Part I Before You Begin Notes...
Страница 58: ...3 7 Cabling for the Carousel Controller 3 12 501610 Rev 07 01 19 Notes...
Страница 70: ...4 5 Inspecting and Cleaning the Gripper and Barcode Reader 4 12 501610 Rev 07 01 19 Notes...
Страница 72: ...Part II Using X Link 501610 Rev 07 01 19 Notes...
Страница 96: ...Part III Replacing FRUs 501610 Rev 07 01 19 Notes...
Страница 136: ...8 8 Bringing a Tape Drive Online 8 14 501610 Rev 07 01 19 Notes...
Страница 158: ...9 5 Replacing a Drive Bay with a Cartridge Bay 9 22 501610 Rev 07 01 19 Notes...
Страница 172: ...10 3 Replacing a Side Panel 10 14 501610 Rev 07 01 19 Notes...
Страница 186: ...11 3 Upgrading a Fixed Port Assembly to an I O Port 11 14 501610 Rev 07 01 19 Notes...
Страница 226: ...12 6 Replacing the Y Motor Assembly 12 40 501610 Rev 07 01 19 Notes...
Страница 324: ...Part IV Reference 501610 Rev 07 01 19 Notes...
Страница 352: ...B 2 Packing the XLS B 14 501610 Rev 07 01 19 Notes...
Страница 354: ...C 2 501610 Rev 07 01 19 Notes...
Страница 360: ...Glossary GL 6 501610 Rev 07 01 19 Notes...
Страница 366: ...Index IN 6 501610 Rev 07 01 19 Notes...


