Direction for use
GB 44
VR120
3.
P
ROBLEM
SOLUTION
No
picture
when
you
play
a
cassette:
b
There
is
no
recording
on
the
cassette:
change
the
cassette.
b
You
have
selected
the
wrong
programme
number
on
the
TV
for
playing
cassette:
on
the
TV
,
select
the
correct
programme
number
for
the
video
recorder.
b
The
cable
connecting
the
TV
set
and
the
video
recorder
has
come
loose:
check
the
cable.
Poor
picture
quality
when
you
play
a
cassette:
b
Your
TV
set
is
not
properly
adjusted.
b
The
cassette
is
badly
worn
or
of
poor
quality:
use
new
cassette.
b
Tracking
is
not
properly
adjusted:
turn
to
chapter
'Eliminating
picture
interference'
and
read
th
e
section
'Optimising
tracking'.
b
Read
the
section
'Selecting
the
picture
settings
(SMART
PICTURE)'
in
the
chapter
'Playback'.
b
You
haven't
selected
the
correct
video
(colour)
system
for
playback:
Turn
to
chapter
'Addition
al
functions'
section
'Changing
the
video
(colour)
system'.
No
recording
possible:
b
The
TV
channel
you
want
to
record
is
not
stored
or
you
selected
the
wrong
programme
numbe
r:
check
TV
channels
stored.
b
A
cassette
was
inserted
that
does
not
have
the
security
tab
(cannot
be
used
to
record):
Insert
a
cassette
with
an
intact
security
tab
or
change
cassette.
For
more
information,
please
see
th
e
section
'Preventing
accidental
erasing
of
cassettes'
in
chapter
'Manual
Recording'.
b
'VPS/PDC'
switched
on
but
'VPS/PDCtime'
wrong:
'enter
'VPS/PDCtime
exactly
to
the
minut
e.
Have
your
aerial
checked.
Programmed
recording
does
not
work:
b
You
have
programmed
the
wrong
time
or
date:
check
time
and
date.
b
Check
time
and
date.
If
time
and
date
are
wrong
despite
manual
setting,
you
can
switch
'SMAR
T
CLOCK'
off.
Please
read
the
section
'Setting
the
time
and
date'
in
the
chapter
'Installing
you
r
video
recorder'.
b
You
have
not
set
the
TIMER
properly:
Check
the
programmed
recordings
(TIMER
block).
b
You
have
put
in
a
cassette
that
cannot
be
recorded
on:
undo
the
erase
protection
on
th
e
cassette.
The
wrong
TV
channel
was
decoded
(entered)
after
you
programmed
a
recording
using
ShowView
b
1.
Enter
the
ShowView
programming
number
of
the
desired
TV
channel.
2.
Confirm
with
OK
.
3.
Check
the
programme
number/channel
name
in
the
'
PROG.
'
input
field
4.
If
this
does
not
correspond
to
the
desired
TV
channel,
select
the
input
field
and
change
th
e
programme
number/channel
name.
5.
Confirm
with
TIMER
k
.
There
is
picture
or
sound
interference
on
TV
reception:
b
Turn
to
chapter
'Suppressing
interference'
and
read
'Optimising
the
modulator'
and
'Switchin
g
on/off
the
modulator'.
b
Have
your
aerial
checked.
b
You
will
find
information
on
how
to
switch
the
TV
system
in
chapter
'Installing
your
vide
o
recorder'
section
'Manual
TV
channel
search'.
Содержание VR570
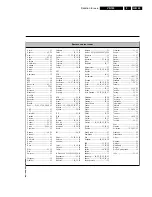
Страница 12: ...Direction for use GB 12 VR120 3 3 Direction for use RT111 RT116 RT112 RT114 RT123 RT121 RT128 ...
Страница 15: ...Direction for use GB 15 VR120 3 SAT VR870L VR870CC VR720 Set width 435 mm ...
Страница 56: ...Service modes Repair tips GB 56 VR120 5 Engineer s remarks ...
Страница 60: ...60 VR120 6 Block diagrams Waveforms 6 4 Supply voltages and Bus diagram 1941 SAT MOUSE o M63100BFP ...
Страница 79: ...Circuit diagrams and PWB layouts Wiring diagram 79 VR120 7 7 16 Wiring Diagram Motherboard ...
Страница 80: ...80 VR120 7 Circuit diagrams and PWB layouts Wiring diagram 7 17 Mother board solder side 7172 CLOCK ADJUST ...
Страница 81: ...Circuit diagrams and PWB layouts Wiring diagram 81 VR120 7 Engineer s remarks ...
Страница 82: ...82 VR120 7 Circuit diagrams and PWB layouts Wiring diagram Engineer s remarks ...
Страница 83: ...Circuit diagrams and PWB layouts Wiring diagram 83 VR120 7 7 18 Mother board component side ...
Страница 119: ...Tape deck GB 119 VR120 10 ...
Страница 123: ...Tape deck GB 123 VR120 10 Engineer s remarks ...


