12
1
“
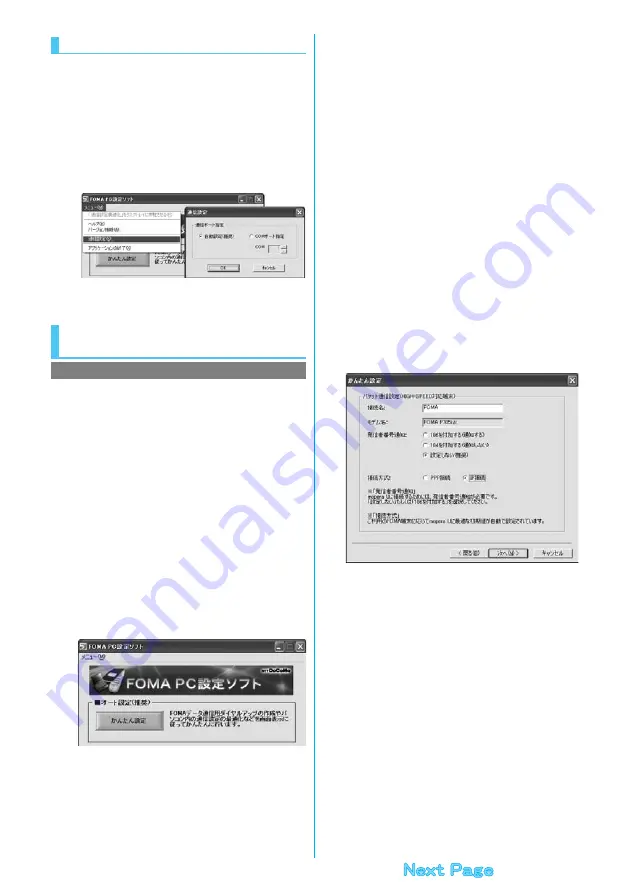
メニュー
(Menu)” of “FOMA PC setup
software”
1
Select “
通信設定
(Communication
setup)”.
・ 自動設定(推奨)
[Auto-setup (recommended)]
The connected FOMA phone is automatically specified. Usually,
select “Auto-setup”.
・
COM
ポート指定
(Specifying COM port)
When specifying a COM port number, specify the COM port
number (COM1 through 99) the FOMA phone is connected to.
≥
See page 20 for how to check the COM port number.
2
Click “OK”.
The settings are applied.
This section explains how to make settings for a
high-speed packet communication of 3.6 Mbps maximum.
This setting is for when you use DoCoMo Internet
connection service “mopera U” or “mopera” as a provider.
High-speed packet communication:
You are charged according to the amount of data sent/
received. You can execute data communication without
worrying about time.
High-speed packet communication of up to 3.6 Mbps for
receiving and up to 384 kbps for sending is available.
Note that a communication fee becomes expensive if
you send/receive a large amount of data such as by
browsing web pages having many images, or by
downloading the data.
≥
The communication speed for both sending and receiving is up to
384 kbps for “mopera” connection.
1
Click “
かんたん設定
(Easy Setting)”.
2
Select “
パケット通信(
HIGH-SPEED
対応端末)
(Packet communication (HIGH-SPEED
compatible terminal))”, then click “
次へ
(Next)”.
Confirm that “
パケット通信(
HIGH-SPEED
対応端末)
(Packet
communication (HIGH-SPEED compatible terminal))” is checked,
then click “
次へ
(Next)”.
Specify Communication Port
Select Packet Communication from
“
かんたん設定
(Easy Setting)”
Using “mopera U” or “mopera” as an access point
3
Select “
『
mopera U
』への接続
(Connect to
mopera U)” or “
『
mopera
』への接続
(Connect
to mopera)”, then click “
次へ
(Next)”.
To use “mopera U”, select “
『
mopera U
』への接続
(Connect to
mopera U)”. To use “mopera”, select “
『
mopera
』への接続
(Connect
to mopera)”.
When “
『
mopera U
』への接続
(Connect to mopera U)” is selected,
the confirmation display appears asking whether you have signed up
for it. If you have signed up, click “
はい
(YES)”.
≥
See page 13 for using a provider other than “mopera U” or
“mopera”.
4
Click “OK”.
≥
The system obtains the access point name (APN) setting from the
FOMA phone connected to the personal computer. Wait for a while.
5
Enter an access point name, then click “
次へ
(Next)”.
You can specify any name for the currently created connection.
Enter a plain name in the “
接続名
(Connection name)” field.
≥
You cannot enter the following half-pitch characters:
¥, /, :,
¢
, ?, !, <, >, |, and ”.
≥
For the setting of “
発信者番号通知
(caller ID notification)”, select
“
設定しない(推奨)
[Not set (recommended)]” for overseas use.
≥
“mopera U” supports connection types of both “
PPP接続
(PPP
connection)” and “
IP接続
(IP connection)”. For overseas use,
select “
IP接続
(IP connection)”.
6
Click “
次へ
(Next)”.
If the access point is “mopera U” or “mopera”, you can connect even
if the “
ユーザ名
(user name)” and “
パスワード
(password)” fields are
blank.
≥
Select a user optionally.
7
Put a check mark for “
最適化を行う
(Optimize)”, then click “
次へ
(Next)”.
≥
If optimized already, the confirmation display to optimize does not
appear.
8
Confirm the set information, then click “
完了
(Complete)”.
The set contents are listed on the display. Confirm that there is no
problem on the set contents, then click “
完了
(Complete)”.
≥
To change the set contents, click “
戻る
(Back)”.
≥
If “
デスクトップにダイヤルアップのショートカットを作成する
(Create a dial-up shortcut on the desktop)” is checked, a dial-up
shortcut will be created on the desktop.
Содержание Foma p705im
Страница 50: ...48 ...
Страница 120: ...118 ...
Страница 230: ...228 ...
Страница 270: ...268 ...
Страница 320: ...318 ...
Страница 342: ...340 ...
Страница 468: ...466 MEMO ...
Страница 469: ...467 MEMO ...
Страница 470: ...468 ...
Страница 471: ...469 Index Quick Manual Index 470 Quick Manual 478 ...
Страница 550: ...Kuten Code List ...


