8-2
Transferring Screen Data through the PLC
8-2-2 Procedure
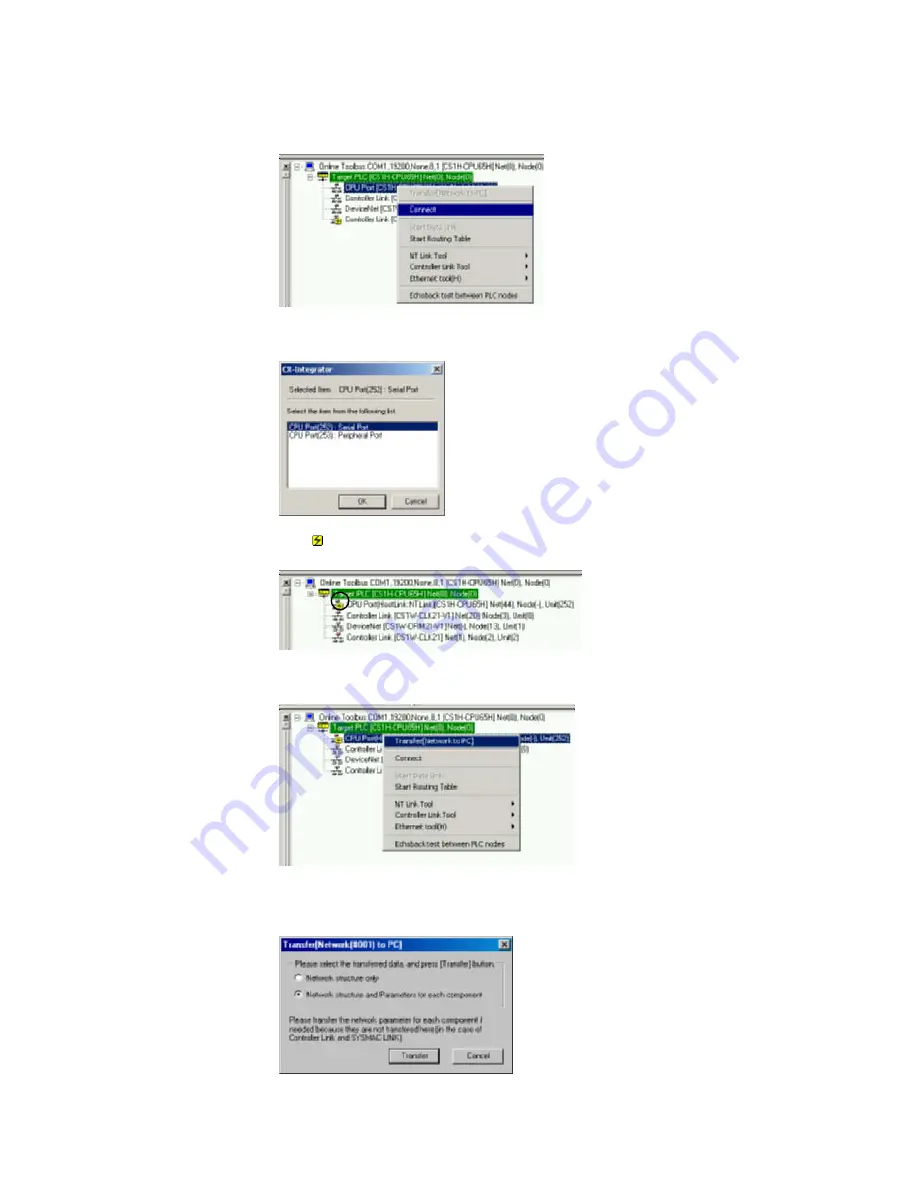
3. The PLC will be connected online to the computer and the PLC’s rack configuration
will be displayed in the Online Information Window.
Right-click the CPU port and select
Connect
from the pop-up menu.
4. A dialog box will be displayed to select the CPU Unit’s serial port.
Select
Serial Port
(the RS-232C port) and click the
OK
Button.
5. The icon will be displayed next to the CPU Unit’s RS-232C port to indicate that
the port can be accessed with NT Link protocol.
6. Right-click the CPU Unit in the Online Information Window and select
Transfer
[Network to PC]
.
7. The following dialog box will be displayed to confirm the transfer.
Click the
Yes
Button to transfer the network configuration of the NT Link network
connected to the CPU Unit’s built-in RS-232C port.
8-7
Содержание CX-INTEGRATOR - V1.1
Страница 1: ...OPERATION MANUAL CX Integrator Ver 1 1 SYSMAC CXONE AL C E Cat No W445 E1 02...
Страница 2: ...CXONE AL C E CX Integrator Ver 1 1 Operation Manual Revised November 2005...
Страница 3: ...iv...
Страница 5: ...vi...
Страница 13: ...xiv...
Страница 120: ...Communications Section 3 Routing Tables This section describes how to set the routing tables 3...
Страница 200: ...Communications Section 5 Ethernet This section describes the operations specific to Ethernet 5...
Страница 292: ...Communications Section 8 NT Links This section explains the settings and operations specific to the NT Link system 8...
Страница 328: ...Appendices A...
Страница 336: ......


