How to Operate the Arizona T220UV
59
Diagnostic Nozzle Print
Introduction
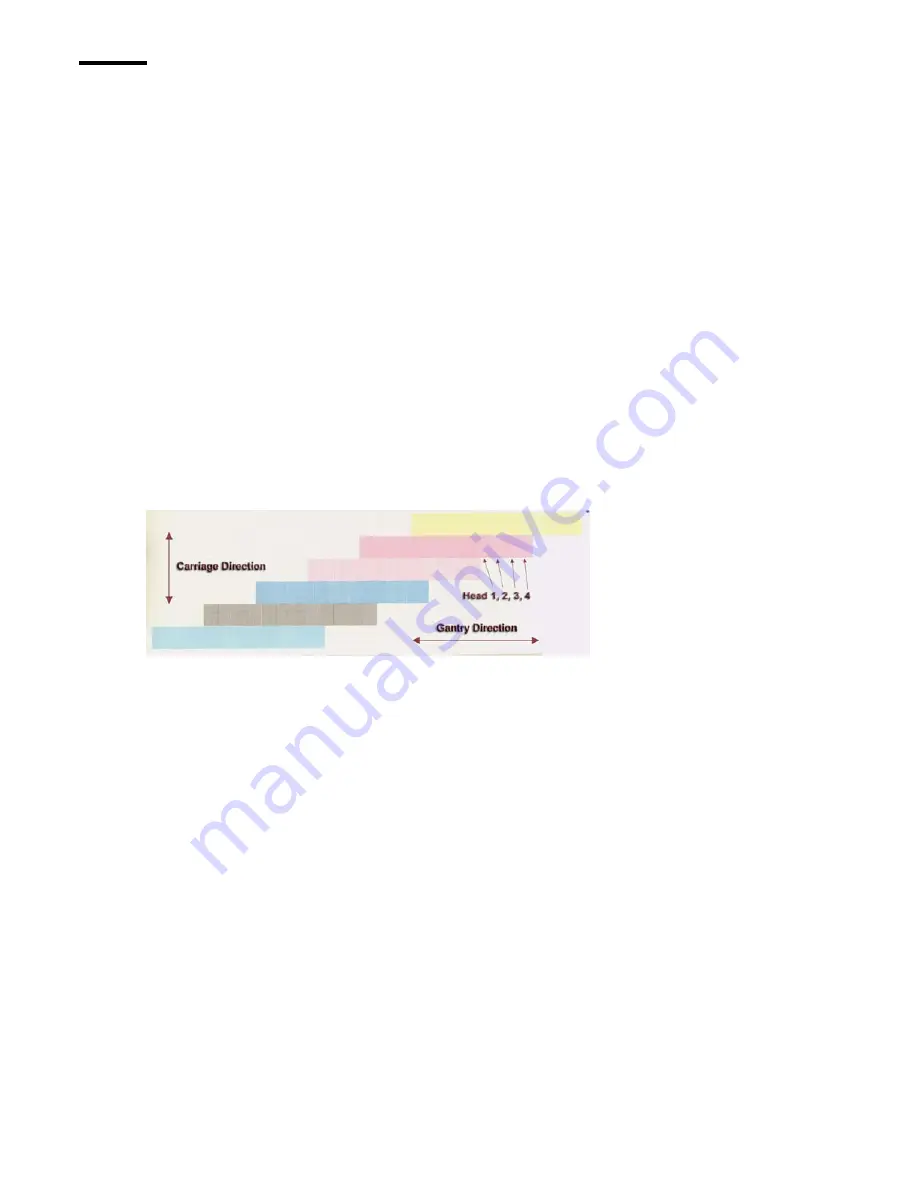
The Diagnostic Nozzle print illustrates the results of firing all nozzles on all of the printheads. This allows you to evaluate
any problems with nozzles or heads.
Purpose
The Diagnostic Nozzle print lets you know if the nozzles are firing properly on all of the print heads.
When to do
Turn on the Diagnostic Stripe while printing to get a general sense of the print head and nozzle condition and to help identify
causes of banding. However, when troubleshooting a persistent banding problem, we recommend that you print both the
Standard and Diagnostic Nozzle prints to get more detailed insight into the problem. The Diagnostic Nozzle print is similar
to the Diagnostic stripe but has the advantage of not overlapping heads 1 and 4 of adjacent colors in the printed test image.
Hence the Diagnostic Nozzle print is superior to the Diagnostic stripe in that it shows all nozzles of all heads without overlap.
Also, the image is repeated in the carriage direction and can be run independent of a production image.
Note:
Select multiple copies when you perform a nozzle print since this illustrates the relationship between heads 1 and 4 of
adjacent colors. In the example below, three (3) copies was selected in the Nozzle Print menu.
Illustration
[15] Diagnostic Nozzle Print
[15] Diagnostic Nozzle Print
How to Use the Diagnostic Nozzle Print
1.
Navigate to the Operator/Test Prints menu and select Diagnostic to perform a Nozzle Print that verifies all nozzles are firing.
2.
Select the number of copies (this means the number of times that each head repeats the test print - in the example above, 3
copies was selected).
3.
Identify any nozzles that are not working and repeat the nozzle print, preferably on the same media with a slight offset.
4.
Perform a High Purge on individual colors for any nozzles that are not working in both previous tests.
5.
Repeat the Nozzle Print. Perform a Recovery Purge on individual colors for any nozzles that still do not fire.
6.
Repeat Nozzle Print. If any nozzles have not fired in all of these nozzle prints, manually flush the print heads associated with
those nozzles.
7.
Repeat the Nozzle Print and if any heads still have nozzles that do not fire, have them replaced.
Note:
If you need to replace any heads, contact your Océ service representative.
Содержание Arizona T220UV
Страница 1: ...Arizona T220UV User Guide...
Страница 5: ...5 Arizona T220UV User Guide Chapter 1 Introduction...
Страница 10: ...10 T220UV User Guide...
Страница 11: ...11 Arizona T220UV User Guide Chapter 2 Product Overview...
Страница 15: ...15 Arizona T220UV User Guide Chapter 3 Safety Information...
Страница 30: ...30 T220UV User Guide...
Страница 31: ...31 Arizona T220UV User Guide Chapter 4 User Interface...
Страница 40: ...40 T220UV User Guide...
Страница 41: ...41 Arizona T220UV User Guide Chapter 5 How to Operate the Arizona T220UV...
Страница 63: ...63 Arizona T220UV User Guide Chapter 6 Ink System Management...
Страница 71: ...71 Arizona T220UV User Guide Chapter 7 Media Management...
Страница 77: ...77 Arizona T220UV User Guide Chapter 8 Error Handling and Troubleshooting...
Страница 92: ...92 T220UV User Guide...
Страница 93: ...93 Arizona T220UV User Guide Chapter 9 Printer Maintenance...
Страница 114: ...114 T220UV User Guide...


