78
Chapter 3 Managing the network access devices
320818-A
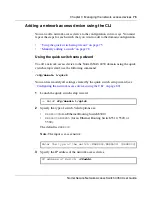
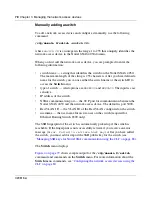
Manually adding a switch
To add a network access device and configure it manually, use the following
command:
/cfg/domain #/switch <
switch ID
>
where
switch ID
is an integer in the range 1 to 255 that uniquely identifies the
network access device in the Nortel SNAS 4050 domain.
When you first add the network access device, you are prompted to enter the
following information:
•
switch name — a string that identifies the switch on the Nortel SNAS 4050.
The maximum length of the string is 255 characters. After you have defined a
name for the switch, you can use either the switch name or the switch ID to
access the
Switch
menu.
•
type of switch — valid options are
ERS8300
and
ERS5500
. The input is case
sensitive.
•
IP address of the switch.
•
NSNA communication port — the TCP port for communication between the
Nortel SNAS 4050 and the network access device. The default is port 5000.
•
Red VLAN ID — the VLAN ID of the Red VLAN configured on the switch.
•
username — the user name for an rwa user on the switch (required for
Ethernet Routing Switch 8300 only).
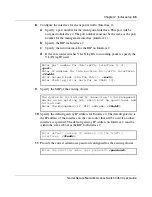
The SSH fingerprint of the switch is automatically picked up if the switch is
reachable. If the fingerprint is not successfully retrieved, you receive an error
message (
Error: Failed to retrieve host key
). After you have added
the switch, you must add or import the SSH public key for the switch (see
“Managing SSH keys for Nortel SNA communication using the CLI” on page 88
).
The
Switch
menu displays.
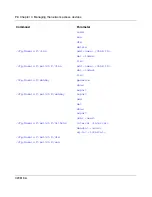
Figure 4 on page 79
shows sample output for the
/cfg/domain #/switch
command and commands on the
Switch
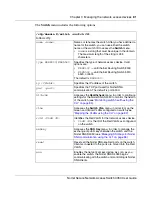
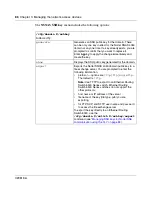
menu. For more information about the
Switch
menu commands, see
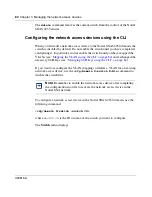
“Configuring the network access devices using the
CLI” on page 80
.
Содержание 4050
Страница 24: ...24 Contents 320818 A ...
Страница 48: ...48 Chapter 1 Overview 320818 A ...
Страница 70: ...70 Chapter 2 Initial setup 320818 A ...
Страница 190: ...190 Chapter 4 Configuring the domain 320818 A ...
Страница 232: ...232 Chapter 5 Configuring groups and profiles 320818 A ...
Страница 352: ...352 Chapter 7 TunnelGuard SRS Builder 320818 A ...
Страница 456: ...456 Chapter 9 Customizing the portal and user logon 320818 A ...
Страница 568: ...568 Chapter 10 Configuring system settings 320818 A ...
Страница 722: ...722 Chapter 13 Viewing system information and performance statistics 320818 A ...
Страница 756: ...756 Chapter 14 Maintaining and managing the system 320818 A ...
Страница 768: ...768 Chapter 15 Upgrading or reinstalling the software 320818 A ...
Страница 802: ...802 Chapter 17 Configuration example 320818 A ...
Страница 880: ...880 Appendix C Supported MIBs 320818 A ...
Страница 900: ...900 Appendix F Configuring DHCP to auto configure IP Phones 320818 A ...


