772
Chapter 16 The Command Line Interface
320818-A
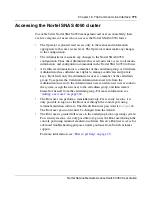
Establishing a Telnet connection
A Telnet connection offers the convenience of accessing the Nortel SNAS 4050
cluster from any workstation connected to the network. Telnet access provides the
same options for user access and administrator access as those available through
the console port.
When you use a Telnet connection to access the Nortel SNAS 4050 from a
workstation connected to the network, the communication channel is not secure.
All data flowing back and forth between the Telnet client and the Nortel
SNAS 4050 is sent unencrypted (including the password), and there is no server
host authentication.
To configure the Nortel SNAS 4050 cluster for Telnet access, you need to have a
device with Telnet client software located on the same network as the Nortel
SNAS 4050 device or cluster. The Nortel SNAS 4050 must have a RIP and a MIP.
If you have already performed the initial setup by selecting
new
or
join
in the
Setup menu, the assignment of IP addresses is complete.
When you are making configuration changes to a cluster of Nortel SNAS 4050
devices using Telnet, Nortel recommends that you connect to the MIP. However, if
you want to halt or reboot a particular Nortel SNAS 4050 in a cluster, or reset all
configuration to the factory default settings, you must connect to the RIP (the IP
address of the particular Nortel SNAS 4050 device). To view the IP addresses of
all Nortel SNAS 4050 devices in a cluster, use the
/info/contlist
command
(see
page 664
).
Enabling and restricting Telnet access
Telnet access to the Nortel SNAS 4050 cluster is disabled by default, for security
reasons. However, depending on the severity of your security policy, you may
want to enable Telnet access. You may also restrict Telnet access to one or more
specific machines.
For more information on how to enable Telnet access, see the
/cfg/sys/adm/telnet
command (see
page 484
). For more information on
how to restrict Telnet access to one or more specific machines, see
“Configuring
the Access List using the CLI” on page 474
.
Содержание 4050
Страница 24: ...24 Contents 320818 A ...
Страница 48: ...48 Chapter 1 Overview 320818 A ...
Страница 70: ...70 Chapter 2 Initial setup 320818 A ...
Страница 190: ...190 Chapter 4 Configuring the domain 320818 A ...
Страница 232: ...232 Chapter 5 Configuring groups and profiles 320818 A ...
Страница 352: ...352 Chapter 7 TunnelGuard SRS Builder 320818 A ...
Страница 456: ...456 Chapter 9 Customizing the portal and user logon 320818 A ...
Страница 568: ...568 Chapter 10 Configuring system settings 320818 A ...
Страница 722: ...722 Chapter 13 Viewing system information and performance statistics 320818 A ...
Страница 756: ...756 Chapter 14 Maintaining and managing the system 320818 A ...
Страница 768: ...768 Chapter 15 Upgrading or reinstalling the software 320818 A ...
Страница 802: ...802 Chapter 17 Configuration example 320818 A ...
Страница 880: ...880 Appendix C Supported MIBs 320818 A ...
Страница 900: ...900 Appendix F Configuring DHCP to auto configure IP Phones 320818 A ...


