Replacing ink cartridge 111
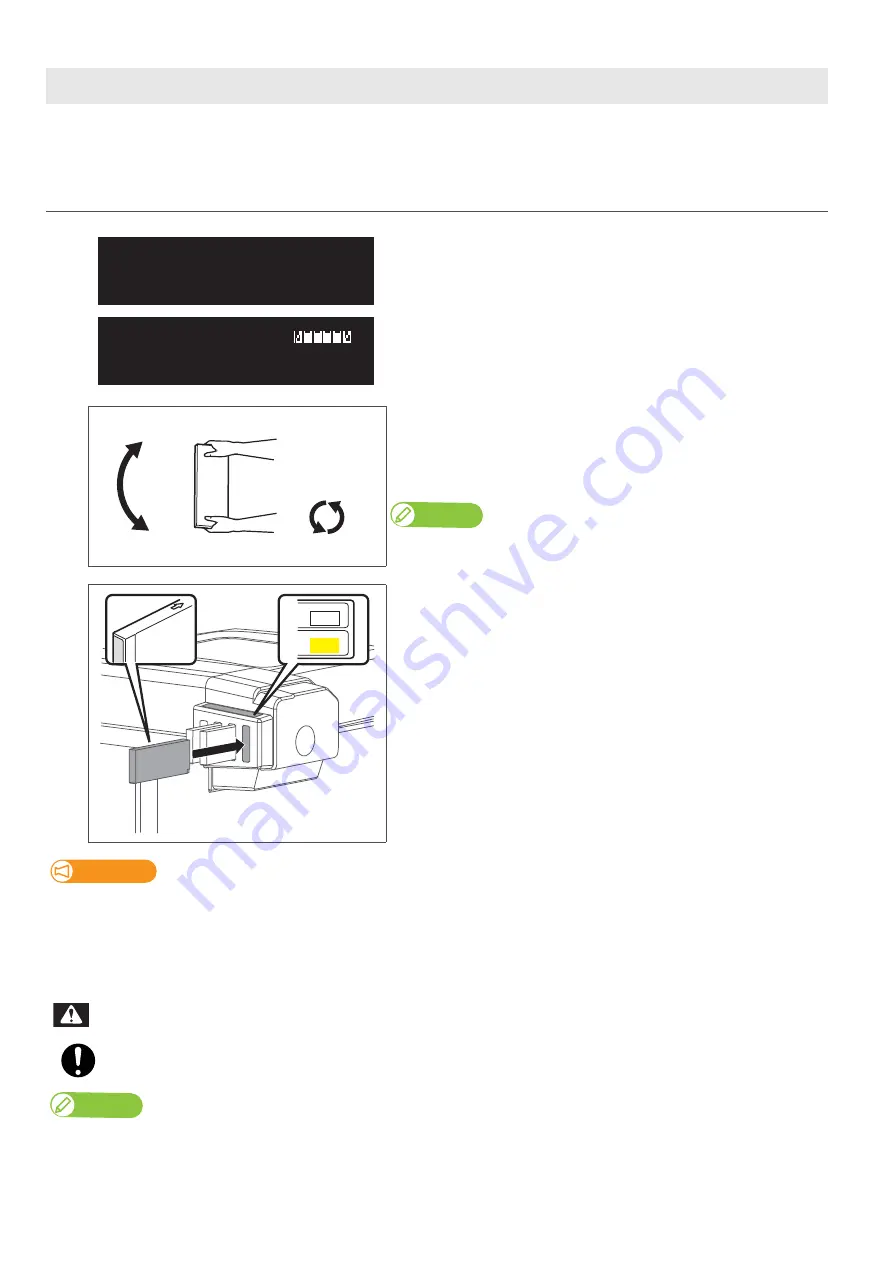
When the cartridge ink is running out, the status LED turns on red and beeps.
The printer pauses printing. After replacing with the new ink cartridge, it resume printing.
Replacing ink cartridge
Steps
[1]
Tap [Enter].
• The buzzer stops.
• In the icons shown on the left, the Slot 1 and 6 cartridges need replacing.
[2]
Make sure you agitate the ink cartridge after you unpack it.
• Turn the ink plug upward and wait for three seconds.
• Next, turn the ink plug downward and wait for three seconds.
• Repeat that 10 times.
Note
•
When replacing varnish ink, you do not have to agitate it.
[3]
Remove the empty ink cartridge and insert the new one.
• Make sure to match the ink cartridge color with the label of this product.
• The arrow on the cartridge should face up.
• Insert each cartridge to firmly seat it into each slot.
Important!
• Do not replace ink cartridge when the power of this product is OFF.
Ink level cannot be detected correctly.
• If there is no ink cartridge for replacement at hand, leave the empty ink cartridge inserted in the printer. Leaving the printer with
the ink cartridge removed may cause the print head to clog.
• If ink cartridge is moved from cold to warm place, leave it at least three hours.
Leave ink cartridges away from fire or high temperature objects.
It may cause fire.
Note
Sleep mode continues after stopping the buzzer.
[ 1 6 ] Ink End
Ink End
3 sec.
x 10
3 sec.
slot 6
slot 6
Wh
Y
WARNING
Содержание XPJ-661UF
Страница 56: ...56 Layer printing...
Страница 104: ...104 Menu during printing...
Страница 158: ...158 How to perform initial ink charging after ink discharge...
Страница 173: ...List of specifications 173...
Страница 174: ...XPJ661UFE A 00...


