


8 General Operation
58
Rev. 02/2018
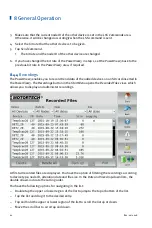
Setting up an individual screen saver
In the default configuration, the slide show contains pictures of
MOTORTECH products. If you want the screen saver to display your own
pictures, you can set this up as follows:
1.
Create a folder named
motortech-slides
in the root directory of a USB
flash drive or an SD card.
2.
In this folder, store pictures in JPG format with the size of 800 x 480
pixels.
3.
Name the pictures
1.jpg
,
2.jpg
...
x.jpg
; numbering must be continuous.
4.
Insert the storage medium into your PowerView3.
▸
When the slide show starts, your pictures are displayed.
–
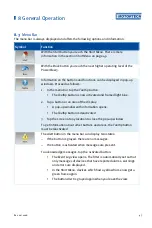
Pop-ups
Activate or deactivate pop-ups with information for the user. Important pop-ups, e. g. with
information on errors are always displayed. Pop-ups which e. g. provide information on
successful actions can be deactivated.
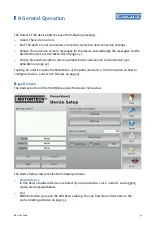
–
Revert Changes
Tap
Revert Changes
to restore the status of the last stored configuration. Date and time are
not affected.
–
Time
Tap
Set
to set the system time and the date.
–
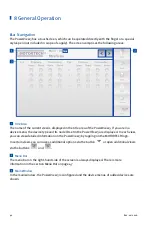
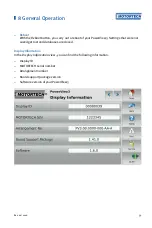
Configuration
You have the following options:
–
Print to PDF File
Save a PDF document with information on display configuration, connected devices,
memory usage, and a list of events to a USB flash drive or an SD card.
–
Save
Save the configuration data of your PowerView3 to a USB flash drive or an SD card in
XML files. One file is created for the configuration of the PowerView3 and one file for
each added TempScan temperature module. This enables you to easily restore the
configuration of your device or transfer it to other devices.
–
Load
Load a configuration that is stored on a USB flash drive or on an SD card. Open the
configuration via the contextual menu.
–
Calibrate Display
Calibration of the display is required if the display does not register touches at the desired
point. Tap as precisely as possible in the midpoint of the five successively displayed X's to
do this. The calibration is then automatically ended after conclusion.
Содержание PoewerView3
Страница 1: ...PowerView3 HMI Module Operating Manual P N 01 10 015 EN Rev 02 2018...
Страница 16: ...4 Product Description 16 Rev 02 2018...
Страница 17: ...4 Product Description Rev 02 2018 17...
Страница 18: ...4 Product Description 18 Rev 02 2018...
Страница 19: ...4 Product Description Rev 02 2018 19...
Страница 26: ...4 Product Description 26 Rev 02 2018 4 1 8 Overview Drawings Rear View...
Страница 27: ...4 Product Description Rev 02 2018 27 Plan View Side View...
Страница 137: ...Rev 02 2018 137...
Страница 138: ......


