Motortech PoewerView3 Скачать руководство пользователя страница 1


PowerView3 – HMI Module 

Operating Manual 


P/N 01.10.015-EN | Rev. 02/2018

Содержание PoewerView3

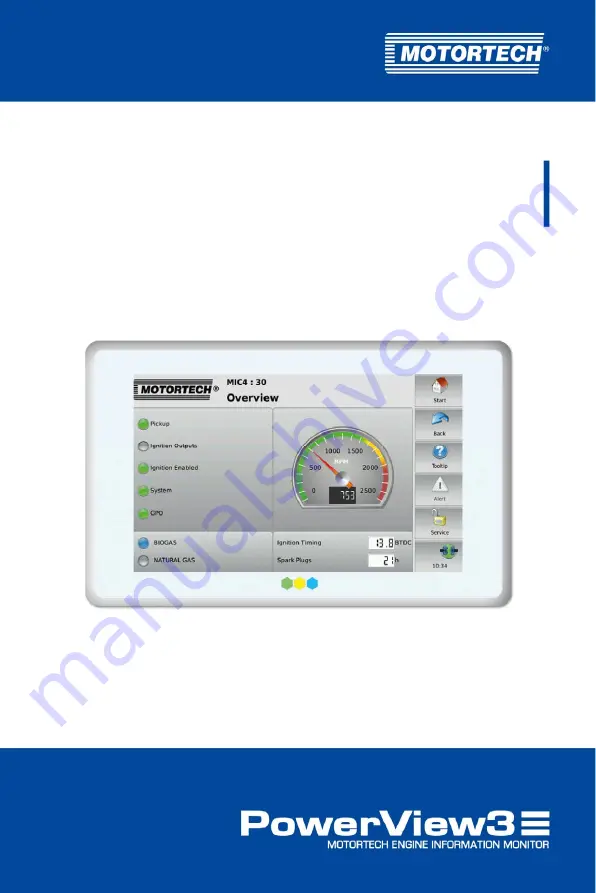
Страница 1: ...PowerView3 HMI Module Operating Manual P N 01 10 015 EN Rev 02 2018...

Страница 2: ...missible without express written approval by MOTORTECH Information contained in this publication may be changed without prior notice Trademarks MOTORTECH products and the MOTORTECH logo are registered...

Страница 3: ...Use 14 3 1 Functional Description 14 3 2 Applications 14 3 3 Use in Potentially Explosive Atmospheres 14 4 Product Description 15 4 1 Technical Data 15 4 1 1 Certifications 15 4 1 2 Mechanical Data 2...

Страница 4: ...Connection 60 8 4 4 Recordings 62 8 4 4 1 Displaying Recordings 63 8 4 4 2 Processing Data on the PC 64 8 5 Access Control 65 8 5 1 Enabling Disabling Access Control 66 8 5 2 Minimum Level 68 8 5 3 L...

Страница 5: ...116 9 3 3 3 Channels 117 9 3 3 4 Type 120 9 3 3 5 Activation 121 9 3 3 6 Thresholds 122 9 3 3 7 Internal Status 124 9 3 4 Group Specific Views 125 9 3 4 1 Overview 126 9 3 4 2 Temperatures 127 9 3 4 3...

Страница 6: ...level of technical knowledge with respect to the operation of gas engines and basic knowledge of electronic ignition systems are necessary Persons who are only authorized to operate the gas engine sh...

Страница 7: ...twork bus Bus for control devices networks Asynchronous serial connection system for linking control units CE Conformit Europ enne Conformity with EU directives Mark based on EU legislation for certai...

Страница 8: ...e for configuration of node ID and bit rate in a CANopen network MIC MOTORTECH Ignition Controller MICT MOTORTECH Integrated Configuration Tool Software for configuring MOTORTECH ignition controllers...

Страница 9: ...Serial Peripheral Interface Bus system for a synchronous serial data bus TFT Thin Film Transistor Control technology for liquid crystal flat screens TN Twisted Nematic Orientation type of liquid crys...

Страница 10: ...afe and reliable to operate Nevertheless the equipment can cause risks or damage can occur if the following instructions are not complied with The gas engine must only be operated by trained and autho...

Страница 11: ...e position at the gas engine 2 2 Electrostatic Discharge Hazards Electronic equipment is sensitive to static electricity To protect these components from damage caused by static electricity special pr...

Страница 12: ...ithout the appropriate grounding to prevent injuries and damage Risk of destruction It is possible to damage the ignition kit and engine through PowerView3 settings Consequently protect your device ag...

Страница 13: ...tterns for a longer period of time The screen saver does not turn off when touching the display The device does not react after a restart The PowerView3 must then be turned off and must not be used an...

Страница 14: ...en network Simultaneously the PowerView3 can integrate a maximum of one ignition controller one detonation controller and three temperature modules In addition you can monitor the connection status of...

Страница 15: ...CSA Std C22 2 No 213 M1987 R 2004 ANSI ISA 12 12 01 Ed 1 2007 UL Std No 916 Ed 3 1998 CE EMC Directive 2014 30 EU Immunity characteristics according to EN 55024 2010 Emission according to EN 55032 20...

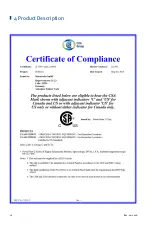
Страница 16: ...4 Product Description 16 Rev 02 2018...

Страница 17: ...4 Product Description Rev 02 2018 17...

Страница 18: ...4 Product Description 18 Rev 02 2018...

Страница 19: ...4 Product Description Rev 02 2018 19...

Страница 20: ...t Weight 670 g 1 48 lbs Shape of device See section Overview Drawings on page 26 Noise level Fanless design Mechanical environmental conditions Protection class IP20 entire device IP64 cover glass Cli...

Страница 21: ...unless area is known to be non hazardous For wiring details refer to the operating manual RISQUE D EXPLOSION Ne d branchez pas lorsque le circuit est sous tension sauf si la zone est connue pour tre...

Страница 22: ...n informs you with which activation codes for the visualization of device types the PowerView3 was delivered Ignition Control Ignition controllers MIC3 MIC3 MIC4 MIC4 MIC5 and MIC5 Detonation Control...

Страница 23: ...cy Depending on ambient temperature 30 ppm at 25 C 77 F Internal backup battery Type CR2032 3 V Li Ion Service life 10 years depending on application 4 1 6 Display The PowerView3 display has the follo...

Страница 24: ...SA Certificate 2173514 see section Certifications on page 15 for the PowerView3 The PowerView3 has the following interfaces Item no Type Properties MicroUSB 2 0 No function USB 2 0 12 Mbit s Host Seri...

Страница 25: ...Product Description Rev 02 2018 25 Item no Type Properties Power 9 V DC to 30 V DC nominal voltage 24 V DC Network No function Memory card slots Suitable for SD cards up to 2 GB SDHC cards up to 32 G...

Страница 26: ...4 Product Description 26 Rev 02 2018 4 1 8 Overview Drawings Rear View...

Страница 27: ...4 Product Description Rev 02 2018 27 Plan View Side View...

Страница 28: ...insert the supplied SD card or another suitable SD card into the memory card slot of the PowerView3 see Interfaces on page 24 5 Establish the power supply see section Power Supply on page 43 The Power...

Страница 29: ...e software back up the activation codes of the activated device types see section Devices on page 51 and the PowerView3 configuration see section Display on page 57 You receive software updates for th...

Страница 30: ...pdates until the desired installer file ins x x x BSP y y y tar bz2 is displayed Confirm the installation of this file After a short verification the installer file is installed The installation is co...

Страница 31: ...kage in the PowerView3 will be updated As a rule the suitable update packages are preselected To change the selection if needed activate or deactivate the checkbox under Select for the respective pack...

Страница 32: ...n requirements Scope of Supply The scope of supply of the PowerView3 includes PowerView3 Cable for power supply 15 m 49 2 Connector for power supply via an MIC ignition controller CAN cable 15 m 49 2...

Страница 33: ...as follows Installation by two people MOTORTECH recommends that the PowerView3 is installed by two people 1 Select a suitable place for the PowerView3 When selecting observe the following points The...

Страница 34: ...om the outside 5 Hold the PowerView3 firmly while a second person hooks in the four attachment clamps in the openings provided for this on the sides of the device 6 Carefully screw in the four fixing...

Страница 35: ...3 7 1 CAN Bus Wiring All devices are connected to the PowerView3 via a CAN bus The communication via the bus is effected using the CANopen protocol with a bit rate of 250 kbit s General Information on...

Страница 36: ...7 Wiring of the Device 36 Rev 02 2018 The diagram shows an example of the wiring for four devices First device Second to last device Second device Last device...

Страница 37: ...wire length Maximum length of a stub Maximum length of all stubs 1 Mbit s 25 m 82 1 5 m 5 7 5 m 25 800 kbit s 50 m 164 2 5 m 8 12 5 m 41 500 kbit s 100 m 328 5 5 m 18 27 5 m 90 250 kbit s 250 m 820 1...

Страница 38: ...werView3 has a built in 120 terminating resistor and must therefore be the last device in the CAN bus If the PowerView3 is not the last device in the CAN bus the cables of connection 2 and 5 must be s...

Страница 39: ...evice Rev 02 2018 39 The connector for the shielding must be connected with one of the four shielding connections at the back of the PowerView3 The other end of the conductor for the shielding must be...

Страница 40: ...View3 via the contacts of the corresponding military style connector Ignition controllers with service cover Ignition controllers without service cover Connector for CAN interface on PowerView3 CAN ca...

Страница 41: ...ld bus requires the following settings Activate CAN interface on the devices if applicable Assign unique CANopen node IDs to the devices Set bit rate of all devices to 250 kbit s CANopen protocol If y...

Страница 42: ...puts can be activated in the PowerView3 in the Device Setup view For this refer to the section Devices on page 51 The binary inputs of the PowerView3 are without function Pin Assignment Description Le...

Страница 43: ...power Power Supply via the PowerView3 Power Supply Connection Connect the PowerView3 with the supplied cable for power supply via the corresponding connection at the PowerView3 to the power supply The...

Страница 44: ...e PowerView3 4 Positive terminal Disconnect the conductor from the contact and insert it into contact of the connector provided with the PowerView3 5 From the PowerView3 power supply cable plug the L...

Страница 45: ...n chapter Devices on page 74 Notice In this manual the screenshots and buttons are displayed in day mode You can find out how to toggle between day and night mode in the section Start Menu on page 49...

Страница 46: ...vice menu the device type and its node ID set in the PowerView3 are displayed In each view you can view detailed information on the PowerView3 by tapping on the MOTORTECH logo In certain views you can...

Страница 47: ...utton or an area of the display A pop up window with information opens The Tooltip button is deactivated 3 Tap the screen at any location to close the pop up window To get information about other butt...

Страница 48: ...menu bar The database symbol provides information on the following states Trend data of added devices are recorded on the SD card inserted in the PowerView3 An error has occurred while recording the t...

Страница 49: ...device settings There is more information in the section Devices on page 51 Display With this button you open the Display Configuration view Among other things you can set the language and system tim...

Страница 50: ...nd administer recorded trend data from the inserted SD card There is more information in the section Recordings on page 62 Help This button opens the operating manual of the PowerView3 There is more i...

Страница 51: ...device see section Device Type Activation on page 52 Tapping on a device opens the Main Menu of the particular device For information on how to configure devices see section Devices on page 51 8 4 1...

Страница 52: ...ate the binary outputs of the PowerView3 The Test button opens a window in which you can switch the binary outputs This allows you to test the behavior of devices that are connected to the binary outp...

Страница 53: ...er three TempScan temperature modules and three devices of the type Generic To add a device proceed as follows 1 In the Device Setup view tap the Add button The dialog Add Device opens This symbol nex...

Страница 54: ...the Save button The dialog is closed and you are returned to the Device Setup view Here the added device with device class and node ID is displayed as Remote Device If you tap Start in the menu bar th...

Страница 55: ...temperature of added devices on an SD card inserted in the PowerView3 You can then display and administer the recordings with the PowerView3 see section Recordings on page 62 or the MOTORTECH Trend Vi...

Страница 56: ...moved data may be lost Each time you restart the PowerView3 and each time you insert an SD card a new recording file is created in the selected folder 8 4 1 6 Device Type Generic You can add up to thr...

Страница 57: ...lect the desired system language Temperature Unit Select whether temperatures in the PowerView3 are to be displayed in C or in F Recordings are also created in the units selected Screen Saver When the...

Страница 58: ...re the status of the last stored configuration Date and time are not affected Time Tap Set to set the system time and the date Configuration You have the following options Print to PDF File Save a PDF...

Страница 59: ...your PowerView3 Settings that were not saved get lost and databases are closed Display Information In the Display Information view you can find the following information Display ID MOTORTECH serial n...

Страница 60: ...kbit s Use this bit rate in the PowerView3 as well The Communication Setup view provides the following options PowerView3 Changing Node ID The factory setting for the node ID on your PowerView3 is 66...

Страница 61: ...ry set the corresponding bit rate in the PowerView3 before sending the LSS command Changing Node ID You can change the node ID of another device in the CAN bus as follows 1 Make sure that the current...

Страница 62: ...ata of the added devices on an SD card inserted in the PowerView3 The Recordings button in the Start Menu opens the Recorded Files view which allows you to display and administer recordings At first a...

Страница 63: ...an external storage device Plot Displays the currently selected file in the PowerView3 see Displaying Recordings on page 63 Files of running recordings are marked with an X in the Logging column Thes...

Страница 64: ...idually Adjust the enlargement factor Overall view Larger Smaller Move the trend lines by tapping and dragging them directly in the display 8 4 4 2 Processing Data on the PC With the MOTORTECH Trend V...

Страница 65: ...access control is enabled see section Enabling Disabling Access Control on page 66 four access levels with different rights are available Access level Rights Read Only displayed status in the menu ba...

Страница 66: ...ights Enable Disable access control Reset all PINs Firmware update Transmit LSS commands Access to locked functions If you would like to access a function with enabled access control which exceeds you...

Страница 67: ...INs to before disabling the access control A renewed enabling of the access control is only permitted with the Master PIN If you have forgotten the Master PIN you must contact MOTORTECH for a reset of...

Страница 68: ...nimum level as follows 1 In the Access Level entry select the access level which is to be set as minimum level from the drop down list Read Only cannot be set as minimum level If the selected minimum...

Страница 69: ...d on The PowerView3 is then placed on the access level Read Only with the displayed status Locked or the minimum level set There are three options for logging out manually from the access levels Opera...

Страница 70: ...Service or Master as follows 1 Log on for the access level Operator Service or Master whose PIN you want to change see section Logging in and Logging out on page 68 2 Tap the Change PIN button You ar...

Страница 71: ...aster Requesting Key Request the key from MOTORTECH as follows 1 Tap the Request Key button A dialog window with the new and actual PIN Reset Request Key opens Send the new PIN Reset Request Key New P...

Страница 72: ...ng and are described in the following Filter Button The button s appearance has the following meaning No filters are active All entries are displayed Filters are active Only certain entries are displa...

Страница 73: ...e list to scroll the list up or down Move the scroll bar to scroll up and down 8 7 Help You can access the operating manual of the PowerView3 or an added device as follows Help button in Start Menu op...

Страница 74: ...1 Main Menu The main menu of an added MIC ignition controller can be opened in the Start Menu via the button MIC3 MIC3 MIC4 MIC4 MIC5 or MIC5 The main menu has the following buttons Overview With the...

Страница 75: ...page 85 Trends With the button you gain access to the ignition angles and secondary voltages trend There is more information in the section Trends on page 93 Message Log In this view information alarm...

Страница 76: ...signals are detected Yellow The ignition controller is being synchronized to the pickup signals Green Signals are detected Ignition Outputs The status display shows the status of the ignition outputs...

Страница 77: ...are set in the MICT Further information can be found in the operating manual of your ignition controller Green The general purpose output is switched Gray The general purpose output is not switched S...

Страница 78: ...t to it the adjustment on the potentiometer in percent Analog Current Input Timing Displays the adjustment of the ignition timing via the analog current signal in crankshaft in direction advanced or r...

Страница 79: ...ng in crankshaft resulting from the cylinder specific adjustment Average Displays the average value of the cylinder specific ignition timing adjustment for all cylinders in crankshaft 9 1 4 Ignition T...

Страница 80: ...ed individually for every ignition output of the ignition controller The status display provides information about misfires for each cylinder Gray No misfires have been registered Yellow There were pr...

Страница 81: ...eceive information on which error has occurred in the wiring of the ignition coils Open The ignition circuit is not closed Short short circuit The status displays can show different colors Gray There...

Страница 82: ...assigned in the configuration of the ignition controller the Output column with the corresponding ignition output numbers A 1 A 2 is displayed instead This view displays the Spark Duration in s and t...

Страница 83: ...ion controller the Output column with the corresponding ignition output numbers A 1 A 2 is displayed instead Firing Angles The firing angles of the cylinders Cyl are displayed in crankshaft for each o...

Страница 84: ...9 Devices 84 Rev 02 2018 Firing Angles Drift The deviations from the global ignition timing in crankshaft are displayed in a bar chart...

Страница 85: ...e views are described as follows Risk of destruction Incorrect settings for energy firing angles and the reset position can lead to damage to the engine and the ignition system Therefore make sure tha...

Страница 86: ...est to check the order of the wiring and the connection between the MIC ignition controller outputs down to the spark plugs The status display indicates whether the ignition controller is ready for th...

Страница 87: ...er it should be ended after a defined number of cycles 5 Define whether All outputs or only a defined output should be fired during the self test 6 Start the self test via the Start button The self te...

Страница 88: ...8 Operating Hours Set the operating hours of the spark plugs or the engine to the desired value using the arrow keys You can reset the value of the operating hours for the spark plugs and the motor to...

Страница 89: ...ew you have the following options The Spark Duration for the schedules can be lowered or increased via the corresponding buttons by 1 s or 5 s The Spark Intensity for the schedules can be lowered or i...

Страница 90: ...following options for selecting outputs Tap the desired output directly to select it To remove the output from the selection tap the output again Tap a group symbol e g to reverse the selection of the...

Страница 91: ...sing the arrow keys correct the index reset position Reset in steps of 0 1 crankshaft or 0 5 crankshaft to advance or retard If the correction range is not sufficient the reset index position must be...

Страница 92: ...ing options for selecting outputs Tap the desired output directly to select it To remove the output from the selection tap the output again Tap a group symbol e g to reverse the selection of the respe...

Страница 93: ...vices Rev 02 2018 93 9 1 8 Trends The Trends button in the Main Menu of the added MIC ignition controller opens the Trends view To view the firing angles or secondary voltages trend tap the desired bu...

Страница 94: ...The Firing Angles button in the Trends view of the added MIC ignition controller opens the Firing Angles view You receive information on the trend of the firing angles The cylinders can be displayed...

Страница 95: ...age The High Voltages button in the Trends view of the added MIC ignition controller opens the Secondary Voltage view You get information on the secondary voltages trend The cylinders can be displayed...

Страница 96: ...views are described as follows States Status messages are listed in the States view The following information is provided Operating Hours operating hours counter reading at the time of message Time d...

Страница 97: ...wing information is provided Operating Hours operating hours counter reading at the time of message Time date and time of the message Category type of message information warning error alarm Message m...

Страница 98: ...controller is displayed Temperatures Overview of the temperatures of the ignition controller Controller Board Temperature of the controller board Output Board Temperature of the outboard board Switchi...

Страница 99: ...ayed in hours Device Total operating time of the ignition controller Spark Plugs Operating hours of the spark plugs used Engine Operating hours of the engine since the last start up Engine Total Total...

Страница 100: ...e of the MOTORTECH device Revision Hardware revision number of the device Serial Number The unique serial number is assigned once to each device Arrangement The arrangement number comprises the type a...

Страница 101: ...the most important operating data There is more information in the section Overview on page 102 Intensity With the button you receive information on the knocking intensity of each cylinder There is mo...

Страница 102: ...re summarized in the view Analog Output The current analog output signal strength is presented in percent with a pointer and also numerically in the display Knocking Intensity The maximum knocking int...

Страница 103: ...in the PowerView3 can be inverted see section Preferences on page 108 Reduction A yellow status display indicates that the reduction of the knock level via the analog output signal has exceeded the ma...

Страница 104: ...hown in percent for each cylinder monitored The colors of the bars have the following meanings Color Meaning Explanation Green Normal The detonation controller is not registering any excessive knockin...

Страница 105: ...2018 105 9 2 4 Trends The Trends button in the Main Menu of the added DetCon detonation controller opens the Trends view To view the knocking intensity trend or the analog output signal trend tap the...

Страница 106: ...can be removed and reconnected individually from the view via the buttons to the right next to the display window The areas have the following meaning Area Meaning From to the yellow line Reduction Th...

Страница 107: ...02 2018 107 Analog Output The Analog Output button in the Trends view of the added DetCon detonation controller opens the Analog Output view The diagram indicates the trend of the analog output signa...

Страница 108: ...he relevant detonation sensor is connected to Tap Set to change the sequence or to display the knocking intensity of only a selection of the sensors Trip Handling Activate the checkbox to invert the s...

Страница 109: ...e DetCon detonation controller binary output 2 Error is switched on the PowerView3 Operational safety The PowerView3 and the software are not designed for safety critical applications The binary input...

Страница 110: ...n specify whether the temperatures are displayed in C or in F see section Display on page 57 9 3 1 Main Menu The main menu of an added TempScan temperature module can be opened in the Start Menu via t...

Страница 111: ...buttons for opening group specific views are displayed in the Main Menu The buttons are labeled with the name of the group here Bank A Button Function With this button you can open an overview with t...

Страница 112: ...ion Currently measured Temperature A thermocouple failed channel not activated The colors of the temperature displays have the following meaning Green The temperature is within the permitted range Blu...

Страница 113: ...ames to the available groups There is more information in the section Groups on page 116 Channels This button opens the views for configuring the individual channels There is more information in the s...

Страница 114: ...tatus on page 124 Store Setup Tap this button to permanently save the following information in the TempScan temperature module Warning and shutdown thresholds Thermocouple types The information whethe...

Страница 115: ...th OK The abbreviation is displayed and then always used in the user interface of the PowerView3 if there is insufficient space for the full name Name Name the channel as follows 1 Tap the desired fie...

Страница 116: ...ed channel additional group specific views are available which can be accessed via the Main Menu of the temperature module see Group Specific Views on page 125 In this view you can assign group names...

Страница 117: ...ain Menu of the temperature module This button opens the view in which the average temperature deviations within the group are displayed Read the section Average Deviation on page 128 for more informa...

Страница 118: ...Activate the checkbox Channel Enabled to activate the displayed channel for displaying measured values in the PowerView3 Activate the checkbox Warning Output so that binary output 1 Warning is activa...

Страница 119: ...warning threshold value Warning Low defines the lower warning threshold value Adjust the threshold values as follows With and in steps of 1 C or 1 F With and in steps of 20 C or 20 F To save the set w...

Страница 120: ...You have the following options for selecting channels Tap the desired channel directly to select it To remove the channel from the selection tap the channel again Tap a group symbol e g to reverse the...

Страница 121: ...channels are displayed with their numbers or an abbreviation if available Channel Activation Activate the checkbox of the desired channels to activate them for the display of measured values in the P...

Страница 122: ...onfigured group name 9 3 3 6 Thresholds The Thresholds button in the Preferences view of the added TempScan temperature module opens the following views High Temp Shutdown Defines the upper shutdown t...

Страница 123: ...e 112 and Group Specific Views on page 125 Changes are made to selected channels You have the following options for selecting channels Tap the desired channel directly to select it To remove the chann...

Страница 124: ...sonnel when troubleshooting and are described in the following Status The following information is provided Error React Delay ms Time span after which the TempScan temperature module sends an error me...

Страница 125: ...rature with thermocouples you need a reference junction temperature This entry provides information on the current temperature measured by the reference junction Auto Correct on bits The hexadecimal n...

Страница 126: ...l number Tag user specified abbreviation Currently measured Temperature A thermocouple failed channel not activated The colors of the temperature displays have the following meaning Green The temperat...

Страница 127: ...ures is opened in the Main Menu of the added TempScan temperature module using the following button with the corresponding group name here Bank A This view displays the temperature trends of all chann...

Страница 128: ...the added TempScan temperature module using the following button with the corresponding group name here Bank A This button is only displayed if the checkbox Average in the Group Names view is activate...

Страница 129: ...ing on page 35 The display does not register touches at the desired position The display is dirty Clean the display see section Cleaning the Touchscreen on page 134 The display is not calibrated prope...

Страница 130: ...appears in the Add Device dialog next to devices The device type has not been activated Activate the device type with an activation code see section Device Type Activation on page 52 When tapping on...

Страница 131: ...er Send the device and the return form to one of the two addresses below or to the nearest MOTORTECH representative MOTORTECH GmbH Hogrevestr 21 23 29223 Celle Germany Phone 49 5141 93 99 0 Fax 49 514...

Страница 132: ...Improperly changing the battery can lead to destruction of the device or to injuries Disposal of batteries Dispose of empty batteries in an environmentally responsible manner and complying with local...

Страница 133: ...t care 6 Remove the battery 7 Insert the new lithium battery of type CR2032 The positive pole of the battery must be pointing upwards 8 Close and screw shut the housing You can now reinstall and resta...

Страница 134: ...f destruction Dirt affects the function of the touchscreen Water fingerprints and other dirt should be removed immediately from the touchscreen and frame to avoid spots Risk of destruction Organic sol...

Страница 135: ...Analog output signal 105 Binary outputs 108 Knocking intensity 104 105 Main menu 101 Overview 102 Trends 105 Device Cleaning 134 Configuration 51 Dimensions 20 Display 57 Display ID 57 Disposal 13 Ele...

Страница 136: ...werView3 60 O Operation 45 Other devices 56 P PIN Changing 70 Forgotten 70 Pop ups 57 Power supply 43 Protection class 20 R Recordings Recorded files 62 Recording 55 Regulations 15 Repair 131 Restart...

Страница 137: ...Rev 02 2018 137...

Страница 138: ......

Отзывы: